Download
1 / 12
120 likes | 126 Views
LESSON 01. Basebot Build. Let’s Get Started. Using VEX IQ Hardware

E N D
LESSON 01 Basebot Build
Let’s Get Started Using VEX IQ Hardware The VEX IQ platform kits provide easy, fun, and accessible tools to learn all four elements of STEM – Science, Technology, Engineering and Maths. No matter what your learning needs and desires may be. This curriculum unit lesson will familiarize you with the kit hardware and the VEX IQ Controller or Robot Brain. One of the best overall features of the VEX IQ hardware is its flexibility. If you can imagine it, you can build it with VEX IQ. The system allows for building of non-powered models, powered mechanisms and machines, as well as full-blown tele-operated and autonomous robots.
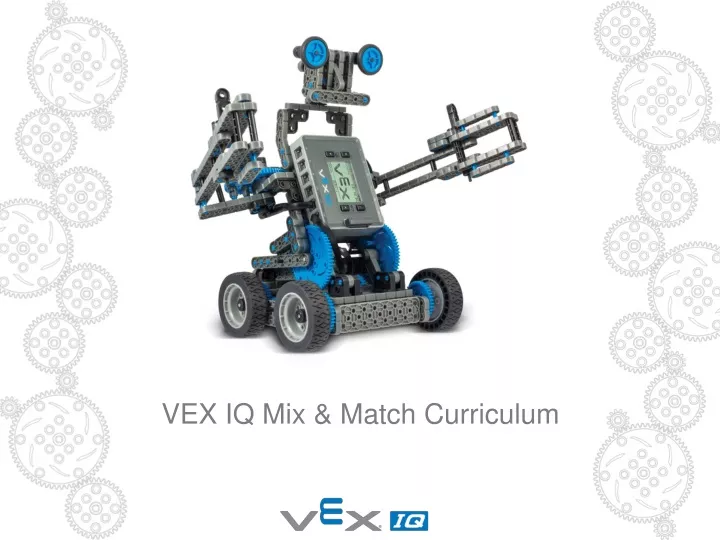
Your First Robot The purpose of this unit is to introduce students to a completely documented robot build, following the VEX IQ BASEBOT step-by-step instructions.
Matching Exercise Learning objective: Students will know the basic construction techniques and components used in the VEXIQ robotics system Task 1: Matching Exercise? Fill in the missing gaps on your worksheet by using picking words from the word bank at the top of the page that match the pictures.
Hardware Task 1: Matching Exercise – Answers Let’s work through the components and look at how they can be used…
Basebot Build Learning objective: Students will be able to follow instructions to build a functional VEX IQ robot. Task 2: The build Follow the assembly instructions to complete and test the robot base only. This gives you a fully functional drivetrain that can be operated and added to with your own creativity. Follow pages 4 to 9, constructions steps 1 to 19
Basebot Build Once completed, jump ahead to Page 32 and complete steps 102 and 103 only. QUESTION: This adds a bracing framework to the front of the robot. Why do you think this is useful? ANSWER: It gives the robot a more robust design and reduces flex in the chassis drivetrain. NB: This robot design will be the basis for several other lessons.
Wireless Tethering Learning objective: Students will pair their Controller with the Robot Brain. Task 3: Pairing the Controller with the Robot brain Items you will need: Robot Brain with Battery & Radio. VEX IQ Controller with Battery & Radio. Tether cable. QUESTION: Why do we need to tether the Robot and Controller? ANSWER: To allow for wireless communication between the controller and robot. Follow section 2 of this guide, pages 9 and 10 to pair up the controller and brain
Lesson - Plenary As a class, let us consider the following questions? A. Can you name some of the main hardware components? B. How do we Tether the Controller to the Robot Brain? C. Why do we Tether the Controller and Robot Brain?D. What are the lights on the Controller and Robot brain for?
Lesson - Summary Learning objective: Students will know the basic construction techniques and components used in the VEX IQ robotics system. Students will be able to follow instructions to build a functional VEX IQ Basebot. Students will pair their Controller with the Robot Brain. • Today you have: • Been able to recognise VEX IQ hardware parts and components visually. • Understood various hardware functions • Learnt how to pair your Controller with the Robot Brain