Download

1 / 59
610 likes | 1.86k Views
Intel Design and Discovery Robotics Module Padraig O Murchu Education and Research Manager Corporate Affairs Group Intel Ireland Welcome to Quadrabotz Objective of Robotics Session Have Fun Discover the hardware components that make up a robot Discover the functions of Quadrabotz

E N D
Intel Design and Discovery Robotics Module Padraig O Murchu Education and Research Manager Corporate Affairs Group Intel Ireland
Objective of Robotics Session • Have Fun • Discover the hardware components that make up a robot • Discover the functions of Quadrabotz • Program Quadrabotz to move forward • Program Quadrabotz to move backward • Program Quadrabotz to change gait • Program Quadrabotz to beep • Program Quadrabotz to detect light • Program Quadrabotz to detect objects and take evasive action
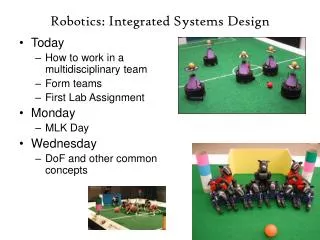
Hardware Components of Quadrabotz Chassis 3 motors-front middle back 4 Legs Left and right LED ( emit light ) Left and Right photodetector ( detect visible and infra red light ) Micro-controller Power source - battery packs on/off switch Piezo sounder Comms socket for PC/programming
h Sensors Infra Red LED LightSensor
Quadrabotz Programming Introduction to Software Programming The Quadrabotz can be programmed in Basic. The programs are written on a PC running Windows and downloaded into the Quadrabotz through an RS232 port. When the Quadrabotz is switched on and the programming cableis plugged inthen the Quadrabotz waits for communications from the PC. If the programming cable is unplugged then the Quadrabotz starts to execute its current program.
Quadrabotz If Quadrabotz is turned on, it will beep once a minute. ZZH
Plugging in the programming cable Connect comms cable to comms. port on computer (The COM port should have 9 pins) and to the earphone jack port (RS 232) on Quadrabotz. If necessary connect comms cable to USB adapter cable and load USB to serial minidiskette To check for connectivity; Click on Options Comms. A message box appears, as follows: If necessary change the comms port number and try again until you get a successful connection. Turn Quadrabotz on.
Quadrabotz Motors There are 3 motors, - front , middle and back A Delay command must be inserted after each motor command. (measured in jiffies: 1 jiffy = 50ms)
Examples of Motor constants xxx all motors stop LxR the front-left and back-right legs move forward LLx the front-left leg moves forward; the front section twists to the left LLL the front-left and back-left legs move forward; the front section twists to the left LRx the front-left leg moves forward; the front section twists to the right Note: The middle and back motors cannot move in opposite directions at the same time.
1. Set motor position 2. Create motor command
4. Create Delay command 3. Set Delay value
5. Set motor position 6. Create motor command
9. Run Program 8. Create Delay command 7. Set Delay value
Motor(LxR) Delay(15) Motor(xLx) Delay(10) Motor(RxL) Delay(15) Motor(xRx) Delay(10) Programming Quadrobotz to walk.
Quadrabotz walking on the floor. Click the Download button to download the program into the robot. Switch the robot off. Unplug the cable. Switch the robot on again. The program in the robot will start to run and will be executed repeatedly. Switch the robot off, plug the cable in, and switch the robot on again to await next program.
Gaits A gait is a way of walking – a sequence of motor commands. Quadrabotz is capable of over 2000 different gaits!
Gaits The Quadrabotz has six built-in gaits: Gait(gFwd) :execute one step forwards Gait(gLeft) :execute one step turning to the left Gait(gRight): execute one step turning to the right Gait(gRev) :execute one step backwards Gait(gRevL) :execute one step backwards to the left Gait(gRevR) :execute one step backwards to the right
Gaits Type-in, download and run this program: Gait(gFwd) The robot will walk forwards.
Gaits Try different combinations of gaits, for instance three paces forwards then two backwards and to the left: Type-in, download and run this program: Gait(gFwd) Gait(gFwd) Gait(gFwd) Gait(gRevL) Gait(gRevL)
Making Sounds Ensure that the robot is plugged in and switched on. Click the beep button to select the Beep Programming page. Click in the squared area of the dialog box Each square corresponds to a different type of beep Click on the test button to hear the type of beep The robot will play the beep. Select a beep and then press the Beep button Beep statement is now added to the program.
Sounds Type-in, download and run this program Beep(184) Beep(131) Beep(109) Beep(91)
Sounds Type-in, download and run this program Beep(184) Delay(14) Beep(131) Delay(14) Beep(109) Delay(14) Beep(91) Delay(14)
Testing the obstacle sensors Quadrabotz has 2 light sensors The robot’s chip measures the light level seen by the light sensor and assigns it a base value Quadrabotz has 2 light emitting diodes When these are turned on and If there is an obstacle nearby, then infra red light will be reflected off it back to the light sensors. The difference between the two readings is what is shown on the Measure dialog chart. The sensitivity of the light sensors depends on how much infra red light the obstacle reflects and on the background light level.
h Sensors Infra Red LED LightSensor
Testing the obstacle sensors Switch the robot off, make sure the cable is plugged in and switch the robot on again. Click the measure button to display the Measure dialog. Watch the Obstacle Left and Obstacle Right charts. Wave your hand in front of the robot’s sensors – the white lines on the chart move up and down.
Testing the light sensors Switch the robot off, make sure the cable is plugged in and switch the robot on again. Click the measure button to display the Measure dialog. The light sensors on each corner of quadrabotz are sensitive to white and red light Watch the Light Left and Light Right charts as you point the robot towards and away from a window or light source The white lines on the chart move up or down due to the differing light intensity.
Threshold Level The red line shows the threshold level above which an Event will be triggered. Click and drag the mouse over the Light charts to alter the threshold value.
Sensors in basic You can test the value measured by the obstacle detectors and light sensors in If,While and Repeat statements.
Sensors in basic The Quadrabotz has the following sensors LeftObs Left obstacle sensor RightObs Right obstacle sensor LeftLight Left light-level sensor RightLight Right light-level sensor FrontMotor Front motor sensor BackMidMotorsMid/Back motor sensor Timer timer
Sensors in Basic Type in and download the following program If LeftLight > 20 then Beep(189) end The robot measures the light level seen by the left light sensor It beeps if the level is greater than 20.
Sensors in basic If you click the if Left Bright button on the Ifprogramming page, the editor inserts: If LeftLight > 20 then else end
You could compare 2 sensor values as follows: Type-in, download and run this program If LeftLight > RightLight then Beep(240) else Beep(87) end Sensors in basic
Sensors in Basic Timer is a variable that is incremented 4 times a second. Type-in, download and run this program If Timer > 20 then Timer=0 Beep(240) end This program beeps every 5 seconds
Events An event (something happening in the outside world) allows a program to respond quickly to a sensor.
1. Select event dialogue Gait(gFwd)