Download
1 / 11
110 likes | 186 Views
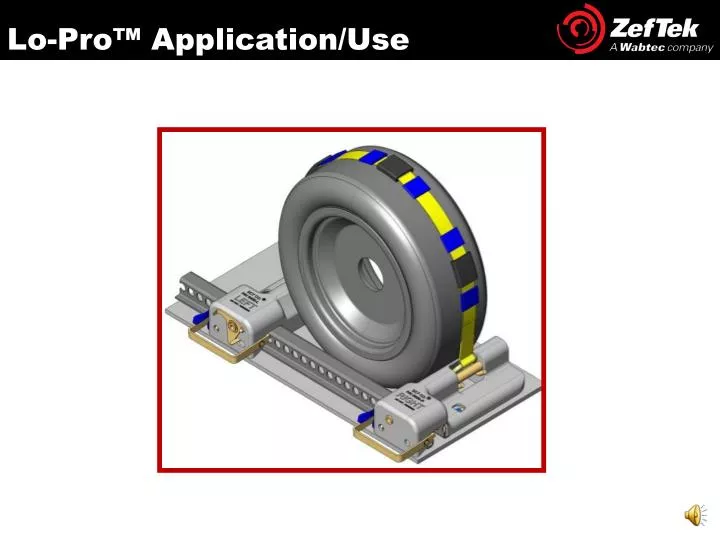
Lo-Pro™ Application/Use. Application: Chock Placement Positioning the Lo- Pro TM Devices.

E N D
Application: Chock Placement Positioning the Lo-ProTMDevices Placement:A Lo-ProTMchock set includes one (1) Left-hand (anchor chock) and one (1) Right-hand (active chock w/ Strap). Two (2) sets are required per vehicle. The chocks secure to the railcar tie-down track. The Lo-ProTMchocks are etched with “Left” or “Right” for ease of identification. Set 1 Set 2 Example of Lo-Pro Chocks applied to a vehicle
Application: STEP 1 Disengage the Left-hand Chock’s Locking Mechanism Step # 1: Starting with the Left-hand Lo-ProTM chock, disengage the Release Lever. Push the Blue Lock Handle aside, then pull the Release Lever upward. Pull the Release Lever Upward. Push aside the Blue Lock Handle. Blue Lock Handle Release Lever Example of the Release Leverin ‘locked’ position, secured by the Blue Lock Handle. A) Push the Blue Lock Handle aside B) Pull the Release Lever upward. LOCKED DISENGAGED/UNLOCKED
Application: STEP 2 Position the Left-hand Lo-ProTM Chock Step # 2:With the Release Lever disengaged, position the Left-hand Lo-ProTM on the railcar tie-down track as close to the vehicle wheel as possible*. The Lo-ProTM bolt heads will engage the track openings. Lo-ProTM underside view Position the Lo-ProTM as close to the vehicle wheel as possible*. *AAR Guidelines allow up to a 3/4“ space between the chock and the vehicle wheel. Always follow the vehicle manufacturer securement guidelines.
Application: STEP 3 Secure the Locking Mechanisms Step # 3: Push the Release Lever down to ‘Lock’ position. When fully secured, the Blue Lock Handle will rest above the Release Lever. When fully locked, the Blue Lock Handle sits ABOVE the Release Lever. Push the Release Lever down to lock in place. CORRECT !!! INCORRECT
Application: STEP 4 Repeat steps 1 through 3 with the Right-hand Lo-ProTMchock. Step # 4: Repeat steps 1, 2 and 3 to secure the Right-hand chock to the railcar tie-down track. STEP 1 STEP 2 STEP 3 Lock: Push the Release Lever down. Ensure the Blue Lock Handle rests ABOVE the Release Lever. Position: Set the Lo-ProTM chock in place. Disengage: Push aside the Blue Lock Handle, then Pull the Release Lever upward.
Application: STEP 5 Secure the J-hook. Step # 5: Pull the strap over the tire and affix the J-Hook onto the Left-Hand Chock Torque Tube. C J-Hook B A Torque Tube C A)Step on the Release Pawl Lever to unwind the strap. B) Pull the strap over the tire. C) Hook the J-Hook to the Torque Tube of the Left-Hand (anchor) Chock.
Application: STEP 6 Ensure the Strap is Properly Positioned. Step # 6: Center the strap over the middle of the tire, with the Cleat Tread Lugs engaged in the tire groove. Ensure the Strap is pulled through torque tube neatly and not twisted. C) The middle cleat is centered at the top of standard size tires; or Between 10 and 2 O’clock position for different size tires. B) Cleat Tread Retention Lugs are engaged into the tire groove. D) Ensure the strap is pulled through the Torque tube, not twisted or pinched. A) The strap is centered in the middle of the tire.
Application: STEP 7 Tighten the Right-Hand Chock Strap Step # 7: Pull the strap slack away from the J-hook. Then ratchet the Right-hand adjustable chock to tighten the strap until there is a slight compression of the tire. Then, further tighten 3 CLICKS. Do not over tighten!If you have clicked more than three times, release and retighten. J-Hook Starting from the J-hook, pull the strap slack toward the Left-hand anchor chock. Tighten the Right-hand chock an additional 3-Clicksby rotating the wrench clockwise.
Removal & Storage: Releasing the Lo-ProTM from the tie-down track. Removal: Release the chocks from the tie-down tracks. Wrap the cleat strap around the Right-hand chock. Store in the provided side screen chock pans. Wrap the strap around the Right-hand chock before storing. Push the Blue Locking Handle aside and lift the Release Lever upward to release chocks from the tie-down track. Un-clasp the J-hook, then wrap the strap around the right-hand Lo-Pro Chock. Store Lo-ProTM’s in the railcar Chock Box. *Wrap the cleat strap around the right-hand chock. Push the Release Pawl Lever down with your foot to release the strap. Step 3 Step 1 Step 2 Step 4
For further information Contact: FCGCustomerService@Wabtec.com