Download
1 / 48
481 likes | 608 Views
Advanced Routers Opening Ports. Objectives: • Understand how NAT works • Become familiar with different ways to open ports • Be able to configure a D-Link router to open ports for different applications. Agenda: • NAT • Opening Ports • Virtual Servers • Port Forwarding

E N D
Objectives: • Understand how NAT works • Become familiar with different ways to open ports • Be able to configure a D-Link router to open ports for different applications
Agenda: • NAT • Opening Ports • Virtual Servers • Port Forwarding • Applications • DMZ • UPnP • DHCP Reservation
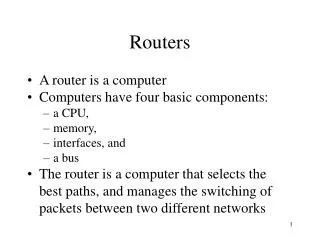
NAT • Network Address Translation • This technology is used in D-Link home and small office routers. • NAT Allows a device such as a router to act as an agent between the Internet (“public”) and a local (“private”) network. • Only one IP address is required to represent an entire group of computers/devices. Local Area Network Router Internet
NAT •A NAT firewall can only really see incoming and outgoing connections •It will not block any outgoing going connections, but it will block incoming connections •The real reason why incoming connections are blocked, is because the unit does not know which computer on the local network the connection is intended to go to
NAT • In order to solve this problem you need to tell the router where to send these connections • This is done by using “Virtual Server”, “Port Forwarding”, “Applications” and “DMZ” • If a port is used by an incoming connection, that port is occupied, and no other incoming connections on that port are accepted
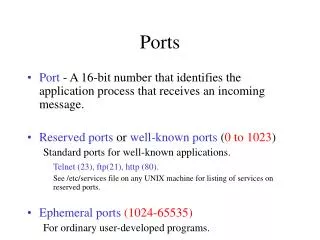
Common Protocols • The following is a list of commonly used protocols and their ports Protocol Port HTTP 80 HTTPS 443 FTP 21 SMTP 25 POP3 110 RDP (Remote Desktop) 3389
Virtual Server • Virtual Server is used to open a single port, and forwards its data to a specified device or computer •The virtual server section was made for a quick and easy way to open up a single port in the firewall without having lots of options to confuse the customer
Virtual Server • This becomes a problem if you are running applications that use multiple ports at a time, as you can run out of entries very quickly I need to open ports: 80, 88, 3074, 53, 500, 3251, 21, 3389, 25, 443, 5000, 110… • A good example of when you would use Virtual Server is if you are running a web server behind the router. • In order for the server to work, you would need to forward port 80 to that server’s IP address. This will give visitors access to the web page.
Virtual Server • Click Advanced > Virtual Server • Configure Rule: • Check to enable • Name: Name of rule • IP address: IP of device to open port for • Public Port: The Port you want to open • Private Port: The Port you want to open • Protocol type: TCP,UDP or Both
Port Forwarding • The Port Forwarding section of a D-Link router does the exact same job as the Virtual Server. • The Only difference is that Port Forwarding allows you to open a single or range of ports in one rule. • This is necessary/convenient when you need to open lots of ports. • A good example of an incoming port forwarding rule is when you are using an X-Box or Playstation 3. The router needs to have certain ports open for it when you play online. • Playstation 3 Requires ports 10070-10080 open (along with others) • Instead of making ten separate entries for 10070,10071,10072 etc... in Virtual Server, you can use the Port Forwarding section to open up that range all in one rule.
Port Forwarding • Click Advanced > Port Forwarding • Configure Rule: • Check to enable • Name: Name of rule • IP address: IP of device to open port for • TCP: The TCP Ports you want to open • UDP: The UDP Ports you want to open
Application • The “applications” option is a dynamic virtual server, in which you do not have to specify the IP address, instead you use a trigger port. • Unlike the Virtual Server, this section listens on outgoing connections from local computers instead of incoming connections • Because your WAN IP only has one set of ports, only one PC at a time can use a rule defined in Applications. • Once a computer/device has stopped using the rule, any other computer is free to use the rule. • Applications is typically used to allow a software application running on any computer on your network to connect to a web-based server or another user on the Internet.
Application •Click Advanced > Application Rule •Configure Rule: •Check to enable •Name: Name of rule •Trigger: Enter the outgoing port range used by your application •Traffic Type: The traffic type for the trigger ports (TCP/UDP) •Firewall: Enter the port range that you want to open up to Internet traffic •Traffic Type: The traffic type for the firewall ports (TCP/UDP)
DMZ Demilitarized Zone • This rule will open all ports on the router to ONE specified IP address • It will forward all unrecognized incoming connections to that IP address • This can essentially be thought of as turning off the hardware firewall for one computer or device on your network. • DMZ is used more for troubleshooting to find out if an application needs ports to be opened. • An good example of when you would use DMZ is with a PlayStation 3 • Since most games and the headset for PS3 require ports to be opened, instead of finding out every port for every game, you can find out the IP address of the PS3 and put it in DMZ • Since you can’t really “hack” a PS3 it is safe for them to be outside the firewall (in the Demilitarized Zone)
DMZ • Click the Advanced Tab > Firewall Settings • Check Enable DMZ • DMZ IP Address: Specify the single IP to be put in the DMZ
UPnP Universal Plug and Play • UPNP automatically opens/forwards ports on the router for an application • In order for UPNP to work the Operating System, Application, and/or Router must all support UPNP • All D-Link routers support UPNP • A popular UPNP enabled application is Windows Live Messenger. • UPNP is enabled by default on all D-Link Routers • Without UPnP, ports would have to be manually opened (Virtual Server/Port Forwarding/Application Rule)
DHCP Reservation • DHCP Reservation allows you to tell the router to always give a particular network device the same IP address every time. • When you open a port, you tell the router which IP to open it for, however, if that device (lets say your web server) restarts, it might obtain a different IP address. • In this case, your Port Forwarding rule will no longer work. • To make sure your port forwards will always point to the right PC or device, add it in the DHCP reservation list
DHCP Reservation • • Click Setup > Network Settings • • Configure DHCP Reservation: • •Check to Enable • •Computer Name: Enter name of device • •IP address: The IP to be given to device • •MAC Address: The MAC address of the device
MAC Filtering • MAC filtering allows you to Allow or Deny access to your network (Wired and Wireless) based on their MAC address. • Offers an extra layer of security on your network • Should not be used as only method of security • Relatively easy to crack Click Advanced > Network Filter Configure rule: • Choose MAC filtering Type: • Turn MAC filtering ON and ALLOW computers listed access to the network • Turn MAC Filtering ON and DENY computers listed access to the network • MAC Address: Enter MAC of computer or device
Access Control • The Access Control option allows you to control access in and out of the network • Access Control can be used to: • • Allow/Block certain websites • • Limit Web access via schedule • • Block connections on outgoing ports • Advanced > Access Control • Choose a name for the policy • Select a schedule
Access Control Select the Machine(s) based on IP address or MAC address Select the filtering method •Log Web Access Only: Doesn’t perform any blocking •Block All Access: Blocks all internet traffic •Block Some Access: Gives option to Apply the Web Filter or Apply Advanced Port Filter
Access Control Step 5 – Only displays if Advanced Port Filter was selected in Step 4 Step 6 – Only displays if Web Filter was selected in Step 4
Access Control • Websites to block are defined in the Website Filter section (Advanced > Website filter) • Sites are only blocked if Apply Web Filter was selected in Step 4 of the Access Control wizard
QoS • Quality of Service provides the ability to prioritize traffic for different users and applications. • It is used to ensure certain applications/users have enough bandwidth at all times.
QoS Name: Name of Rule (anything) Priority: (Between 1-255) 1 is the highest Local IP Range: The range of Local IP’s to be applied (within local Network) Local Port Range: The Port(s) that need prioritization (eg- 80 for HTTP) Remote IP Range: The Public IP range the rule will apply to Remote Port Range: The Public Port range the rule will apply to (1-65535 will apply for all Public Ports ) • This Rule will ensure 192.168.0.100 has priority when using Port 80.
System • Tools > System • The System section allows you to do some system related tasks such as: • • Save/Backup Router Configuration • • Load backed up configuration • • Restore the router to factory defaults • • Reboot the router
Firmware Upgrade • Firmware is the brains of a router. It contains all of the coding and is responsible for the router works. • When bugs/problems are found, new firmware versions are released. These released firmware need to be installed onto the router. • Download the latest firmware from the support site- http://www.dlink.com.sg • Save the file to disk
Firmware Upgrade • Extract the downloaded ZIP file to the desktop • Navigate to Tools > Firmware • Click the Browse button and search for the firmware file (.bin) • Click Upload • Note: It is not recommended to upgrade the firmware over wireless
Dynamic DNS • Most broadband Internet Service Providers assign dynamic (changing) IP addresses • The DDNS setting on the router updates the service every time the WAN IP changes • Using a DDNS service provider, you can enter your host name to connect to your public IP no matter what the IP address is • Customers can sign up for D-Link's Free DDNS service at www.dlinkddns.com
SharePort™ • What is SharePort™ • Installation • Troubleshooting
What is SharePort™? • SharePort™ technology allows you to connect a USB device to your router and allow users to access it from anywhere on the network • It will turn existing USB printers and storage devices into network devices for everyone to share • All current D-Link routers support SharePort™
Types of SharePort™ There are currently 4 types of SharePort™ available: • SharePort™ • SharePort™ Plus • SharePort™ Mobile • SharePort™ Web Access SharePort™ - Allows sharing of a USB device (One to One) - Only one person can use a device at one time SharePort™ Plus - Enhanced version of SharePort™ - Just the original version, but enables multiple clients to access USB Storage contents at the same time
Types of SharePort™ SharePort™ Mobile - Watch/View Video, music and Photos from anywhere with the D-Link SharePort™ Mobile App on your Smartphone. SharePort™ Web Access - Access USB Storage through a web browser.
Installation- PC Utility SharePort™/SharePort™ Plus EnableSharePort™ Within the Router interface, you must ensure that the SharePort™ feature is enabled. From the Router GUI: •Setup > USB Settings > My USB Type is: SharePort™
Download SharePort™ Utility • Go to http://www.dlink.com.sg • Select the router model number from the quick find search. Click Go • In the Applications Section, download the SharePort™ Utility • Note: Be sure to use the SharePort™ Utility that corresponds to the firmware version
Extract Installation Files Extract the installation files using your favourite method • Windows Compresses Folders (built into Windows) • WinZip • WinRar • Etc… Run Setup32.exe (32bit OS) or Setup64.exe (64bit OS)
Install SharePort™ Utility • Select the language • Choose the Install Location • Select a Start Menu Folder • Add exception to Windows Firewall • Auto Connect Default Setting
Installation- SharePort™ Mobile Within the Router interface, you must ensure that SharePort™ Web Access is enabled From the Router GUI: • Setup > Storage • Check Enable Web File Access • Check HTTP Storage Remote Access
Installation- SharePort™ Mobile • Download SharePort™ Mobile App from App Store (Apple/Android) • Insert a USB drive into the router • Ensure you are connected to the Wireless signal of your SharePort™ Mobile supported router. • Launch the SharePort™ Mobile Utility The Following screen will appear
Click on the Settings Icon Click Edit and enter router username and password
Select desired section to view contents •Files •Photo •Movie •Music •Folder •Favorite
Installation- SharePort™ Web Access Within the Router interface, you must ensure that SharePort™ Web Access is enabled From the Router GUI: •Setup > Storage •Check Enable Web File Access •Check HTTP Storage Remote Access •*** Take Note of the Remote Access Port. It is needed to access the SharePort™ Web GUI *** •Create Users if desired
Installation- SharePort™ Web Access Open a web browser and type: http://router_wan_ip:remote_access_port e.g. http://192.168.0.1:8181 Note: if accessing from the Internet, you need to enter the routers WAN IP : Port e.g. http://24.12.134.125:8181
Enter your username/password (if applicable) Click Login Select desired section to view and access content
Troubleshooting • No Devices Found • Verify communication with router • •Check cables • •Check Lights (USB Light on front of router) • •Ipconfig • •Ping router • Disable software firewalls • The USB devices connected to the device server may not be powered on • Verify firmware and utility version • Try closing the SharePort™ Utility and opening it again • Try 2nd Computer (If possible) • The device server may not support the USB device • •Devices that use isochronous transfer are not compatible
Troubleshooting Can’t Connect to a Device • The driver of the USB device may not be installed properly • • Connect the device directly to the PC • • Make sure the drivers are installed • Disable software firewalls • Try closing the SharePort™ Utility and opening it again • The device server may not support the USB device • • Devices that use isochronous transfer are not compatible