Download
1 / 5
50 likes | 83 Views
Setting up a patio is an outstanding method to get more out of your garden. A patio can be an location for relaxing and entertaining, however it also functions as a transitional area between house and garden. A patio is low maintenance, hard using, and relatively simple to lay. Laying a patio likewise provides a possibility to be innovative with style and building, thanks to the wide array of paving slabs now available.<br><br>Is laying a patio challenging?<br>The steps involved in laying a patio are relatively basic, although they are a little lengthy. However similar to most DIY ta

E N D
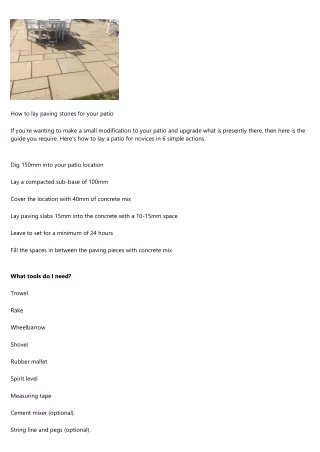
How to lay paving stones for your patio If you're wanting to make a small modification to your patio and upgrade what is presently there, then here is the guide you require. Here's how to lay a patio for novices in 6 simple actions. Dig 150mm into your patio location Lay a compacted sub-base of 100mm Cover the location with 40mm of concrete mix Lay paving slabs 15mm into the concrete with a 10-15mm space Leave to set for a minimum of 24 hours Fill the spaces in between the paving pieces with concrete mix What tools do I need? Trowel Rake Wheelbarrow Shovel Rubber mallet Spirit level Measuring tape Cement mixer (optional). String line and pegs (optional).
What products do I require? Paving slabs. Sub-base aggregate. Sand. Cement. FAST TIP: WHAT SAND SHOULD I USE FOR LAYING A PATIO? Wondering which kind of sand to put with cement for your concrete mix? To get the best results, use sharp sand. It's best for patio areas and gardens, and will avoid moles or rats from tunnelling below the paving slabs. ACTION BY STEP GUIDE TO LAYING A PATIO. Prepping the location. Prior to even thinking of laying paving slabs, you require to prepare your patio location. If you're updating paving slabs that are currently in location, dig these up before starting. Dig a depth of around 150mm across the whole area, ensuring the soil is uniformly compressed. Then pointer in the sub-base, raking it into a consistent depth of paving dublin 100mm. Make sure it's smooth, flat and firm. Producing concrete for laying your patio. Prepare a concrete mix of three parts sand and one part cement, including water to develop a doughy consistency. You can utilize a cement mixer, or a large tub or pail. To inspect the mix is thick enough, choose some up and mould into a ball. When you let go, it must retain its shape without exuding water or falling apart. You'll require to make adequate concrete to make an even 40mm layer in the patio bed. Laying patio slabs. Prior to you can start laying patio pieces, you require to moisten them so they do not dry your concrete too rapidly. Then, lower your very first paving piece into position. Lay it into the concrete mix and carefully tap it with a rubber mallet so it's fixed in place. Preferably it wishes to sit 15mm in the mortar. Repeat this procedure, leaving a 10-15mm space in between each paving piece, until your patio is covered. As soon as you've laid your patio, spray the entire location with water until it's completely saturated, and leave it to set for at least 24 hours. Finishing touches. The final part of laying a patio is applying the completing touches. Utilize a trowel to fill the spaces between your paving pieces with Marshalls Weatherpoint 365, ensuring there's no residue on the pieces' surface area. Then, you may desire to develop a decorative border by digging a rain gutter around the perimeter, and filling it with some sea washed aggregate or black polished pebbles. Laying paving pieces by yourself is easy, isn't it? You just dig a little, buy a bit of mortar and stick down your paving slabs. That's all there is to it, right? the paving company dublin
If only it were that easy. In truth, you require to painstakingly prepare your sub-base, blend your mortar with the best products and work with very exact paver positionings-- all to ensure your patio lasts a lifetime. But do not worry, that's where Simply Paving can be found in. In our handy how-to guide, we walk you through the procedure of patio installation so you can shave off a couple of ₤ ₤ s on a professional's aid. Let's get going. Prepare your paving site. Preparing a patio are for paving pieces. While you may be itching to begin on your dream patio, you do not want to neglect the most vital part: laying your foundation. We're discussing measuring, digging and tamping an ideal landscaping location, which will serve as a pristine canvas for your paving job. Find the full breakdown of how to prepare your paving site, below. What you need to prepare your website for laying pavers:. Measuring-tape. Wood pegs. Shovel. Spirit-level. Garden rake. Garden roller/tamper. MOT Type 1 sub base. How to prepare your site for laying pavers:. Start by measuring your designated paving area and mark it out plainly with wooden pegs. Then eliminate all plants, roots and topsoil in the marked-out area, digging to a depth of a minimum of 200mm. To ensure your paving drains successfully, you need to set your gradient at a 1 in 80 fall utilizing your spirit-level as referral. This fall enables surface water to run-off into drainage points. Rake the surface level and after that compact the entire area with the garden roller/tamper. Use the spirit-level to make sure the area is even. Lastly, fill the area with 150mm of MOT Type 1, then compact it down to 100mm-- you'll require the remaining 100mm of depth to lay your pavers.
Et voila, your website is all set to set up pavers. Laying your slabs. Checking levels on paving pieces. Groundwork arranged, it's time to turn your attention to the pavers. The method listed below is ideal for numerous kinds of paving slabs, so whether you're laying concrete paving slabs or natural stone, our guide has you covered. However, keep in mind that if you are laying porcelain paving pieces you will require a slightly different setup method. What you need to lay your paving slabs:. Sharp sand. Cement. Shovel. Wheelbarrow. Pointing trowel. Your paving slabs of choice. Rubber mallet. Spirit-level. Jointing compound. Hard-bristled brush. Tarpaulin (optional). How to lay your paving slabs:. Initially, you need to blend a fresh bed of mortar for each private paver. (That way, the mortar will not dry before you can lay your entire patio.) You can do this just by mixing four parts sharp sand to one part cement in a wheelbarrow, according to our mixing mortar guide. Utilizing the trowel, lay the mortar mix onto the sub-base (enough for one paver), and carefully slot your first flag into place. Take care not to stain the surface area of your paver with mortar mix as it is very challenging to eliminate. Protect the paver to the mortar bed by gently tapping it down with a rubber mallet. Before moving onto the next
paver, check that the surface area is even with a spirit-level. Procedure out the space between your pavers-- this might be anything from 5mm to 15mm, so you will need to seek advice from the item suggestions. Repeat actions 1 to 4, up until all pavers are safely in place. (If you need to cut any of your pavers to size, evaluate our how to cut paving pieces guide.). Now leave your pavers to dry for 24-48 hours (cover with the tarpaulin, if you're stressed over rain). When the time is up, fill the gaps in between your pavers with the jointing substance. This binds your pavers together. Brush away any excess compound with the hard-bristled brush and that's all there is to it.