Download
1 / 38
380 likes | 430 Views
Explore how to add detailed textures to shapes in VRML using image, pixel, and movie textures. Understand texture mapping techniques and how different nodes in VRML can be used to map textures to various shapes. Learn how textures are applied to different geometric primitives like boxes, cones, cylinders, spheres, and text.

E N D
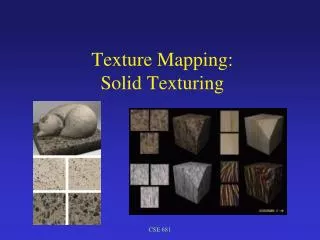
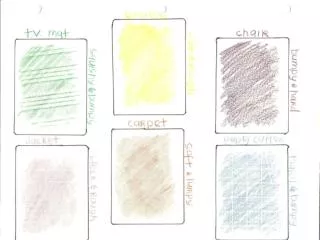
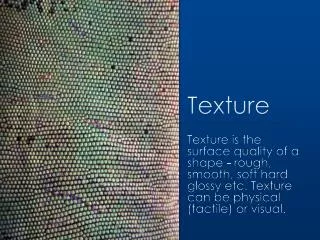
Understanding Texture Mapping • The real world is filled with an extraordinary amount of visual detail. • In computer graphics, this visual detail is known as texture • Creating extraordinary detailed texture for the shapes are impractical. • Instead VRML enables us to take a picture of anything in the world and map it on any shape in our VRML world. • This technique is known as texture mapping
Understanding Texture Mapping • In texture mapping technique, we can use any image as a texture image including real-world photographs and bitmapped graphics • The addition of these texture images increases the realism of the shapes without adding any additional shapes to the world • Texture image could consider as a 2D grid and it is measured in pixels • The image format could be JPEG and GIF for nonmovie texture images and the MPEG for movie textures
Understanding Texture Mapping • Some texture image file formats can optionally store a transparency level for each pixel • A pixel’s transparency level indicates whether the pixel should be transparent, opaque or somewhere in between. • Using pixel transparency, we can create texture images with transparent holes in them • The PNG file format supports pixel-transparency while the JPEG and MPEG does not support the concept of transparency
Understanding Texture Mapping • VRML provides 3 nodes for specifying a texture to be mapped to a shape: ImageTexture, PixelTexture and MovieTexture. • Any of these nodes can be used as the value of the texture field in a shape’s Appearance node • The ImageTexture node is the most common node used for texture mapping. • Using this node, we could provide URL of a texture image file in JPEG, PNG or GIF format. • The VRML browser retrieves the texture image from the file and applies it to a shape
Understanding Texture Mapping • The PixelTexture node provides an alternative way of specifying texture image. • However this enables us to embed a texture image in the VRML file without storing the image in a separate image file • The MovieTexture node is used to specify an MPEG movie-texture file for texture mapping. • Using this node, we provide the URL of the MPEG file and field values to control when the movie is played back and how quickly it plays
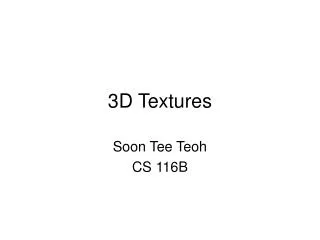
How Texture are Mapped • The Box node builds a box with four sides, a top and a bottom. • When texture is mapped, the texture image is applied to the box faces like this: • the texture image appears right-side up on the front, back, left and right sides of the box • on the top of the box, the texture image appears right-side up if we tilt the top of the box down to face us while keeping the left face pointing to the left and the right face-pointing to the right • on the bottom on the box, the texture image will appear right-side up if we tilt the bottom of the box up to face us while keeping the left face pointing to the left and right face pointing to the right
How Texture are Mapped • The Cone node builds a cone with sides and a bottom. • When texture is mapped, the texture image is applied to the cone like this: • on the sides of the cone, the texture is wrapped around in a counter-clockwise direction starting at the back of the cone • on the bottom on the cone, the texture image appears right-side up if we tilt the bottom of the cone up to face us without turning the once about its axis
How Texture are Mapped • The Cylinder node builds a cylinder with sides, a top and a bottom. • When texture is mapped, the texture image is applied to the cylinder like this: • on the sides of the cylinder, the texture is wrapped around in a counter-clockwise direction (as viewed from the top) starting at the back of the cylinder • on the top of the cylinder, the texture image appears right-side up if we tilt the top of the cylinder down to face us without turning the cylinder about its axis • on the bottom of the cylinder, the texture image appears right-side up if we tilt the bottom of the cylinder up to face us without turning the cylinder about its axis
How Texture are Mapped • The Sphere node builds a sphere. • When texture is mapped, the texture image is applied to the sphere as follows: • on the sides of the sphere, the texture is wrapped around in a counter-clockwise direction (as viewed from above) starting at the back of the sphere • the top and bottom of the texture image are pinched together at the sphere’s top and bottom poles
How Texture are Mapped • The Text node builds text shapes. • When texture is mapped, the texture image is applied to the text as follows: • the lower-left corner of the texture image is anchored at the origin of the text string • each character in the text string acts like a cookie cutter, stamping out side-by-side, character-shaped pieces of the texture image • at the left, right, bottom and top edges of the texture image, additional duplicate copies of the texture image are added to create an infinite sheet of repeating texture images spans the entire width and height of the text shaped
The Appearance Node • The Appearance node specifies the appearance attributes and may be used as the value of the appearance field in a Shape node as follows: Appearance { material NULL # exposedField SFNode texture NULL # exposedField SFNode textureTransform NULL # exposedField SFNode }
The Appearance Node • The value of the texture exposed field provides a node specifying a texture image to be applied to a shape. • Typical texture field values include the ImageTexture, PixelTexture and MovieTexture nodes
The ImageTexture Node • The ImageTexture node specifies texture mapping attributes and may be used as the value of the texture field in an Appearance node as follows: ImageTexture { url [ ] # exposedField MFString repeatS TRUE # field SFBool repeatT TRUE # field SFBool }
The ImageTexture Node • The value of URL exposed field specifies a prioritised list of URLs ordered from highest to lowest. • When a URL is opened, the file is read and used to texture map a shape. • The texture file format must be in JPEG, GIF or PNG
The PixelTexture Node • The PixelTexture node specifies texture-mapping attributes and may be used as the value of the texture field in an Appearance node as follows: PixelTexture { image 0 0 0 # exposedField MFImage repeatS TRUE # field SFBool repeatT TRUE # field SFBool }
The PixelTexture Node • The value of the image field specifies the image size and pixel values for a texture image used to texture map a shape • The first three integer values in the image field are in order: • the width of the image in pixels • the height of image in pixels • the number of 8-bit bytes for each pixel with the following interpretation: • 0 – disable texturing for the shape, • 1 – grayscale, • 2 – grayscale with alpha, • 3 – RGB, • 4 – RGB with alpha
The MovieTexture Node • The MovieTexture node specifies sound that may be played back when the node is used as the value for the source field of the Sound node as follows: MovieTexture { url [ ] # exposedField MFString loop FALSE # exposedField SFBool speed 1.0 # exposedField SFFloat startTime 0.0 # exposedField SFTime stopTime 0.0 # exposedField SFTime repeatS TRUE # field SFBool repeatT TRUE # field SFBool isActive # eventOut SFBool duration_changed # eventOut SFFloat }
The MovieTexture Node • The value of the url field is the same definition as in ImageTexture node • The value of the startTime exposed field specifies the time at which the movie texture starts playing. • The value of the stopTime exposed field specifies the time at which the movie texture stops playing. • The value of the speed exposed field specifies a multiplication factor for speeding or slowing the play back of the movie texture. • The value of the loop exposed field specifies whether the move playback or not.
Mapping Textures to Primitive Shapes #VRML V2.0 utf8 Shape { appearance Appearance { material Material { } texture ImageTexture { url "testimg.jpg" } } geometry Box { } }
Mapping Textures to Primitive Shapes #VRML V2.0 utf8 Shape { appearance Appearance { material Material { } texture ImageTexture { url "testimg.jpg" } } geometry Cone { } }
Mapping Textures to Primitive Shapes #VRML V2.0 utf8 Shape { appearance Appearance { material Material { } texture ImageTexture { url "testimg.jpg" } } geometry Cylinder { } }
Mapping Textures to Primitive Shapes #VRML V2.0 utf8 Shape { appearance Appearance { material Material { } texture ImageTexture { url "testimg.jpg" } } geometry Sphere { } }
Mapping Textures to Part of Primitive Shapes #VRML V2.0 utf8 Group { children [ # Can top Shape { appearance Appearance { material Material { } texture ImageTexture { url "cantop.jpg" } }
Mapping Textures to Part of Primitive Shapes geometry Cylinder { bottom FALSE side FALSE height 2.7 } } # Can bottom Shape { appearance Appearance { material Material { } texture ImageTexture { url "canbot.jpg" } }
Mapping Textures to Part of Primitive Shapes geometry Cylinder { top FALSE side FALSE height 2.7 } } # Can side Shape { appearance Appearance { material Material { } texture ImageTexture { url "canlabel.jpg" } }
Mapping Textures to Part of Primitive Shapes geometry Cylinder { top FALSE bottom FALSE height 2.7 } } ] }
Mapping Texture to Text Shape #VRML V2.0 utf8 Shape { appearance Appearance { material Material { } texture ImageTexture { url "brick.jpg" } } geometry Text { fontStyle FontStyle { style "BOLD" } string [ "Qwerty", "0123" ] } }
Creating Holes Using Pixel Transparency #VRML V2.0 utf8 Group { children [ # Ground Shape { appearance Appearance { material Material { } } geometry IndexedFaceSet { coord Coordinate { point [ -5.0 0.0 5.0, 5.0 0.0 5.0, 5.0 0.0 -5.0, -5.0 0.0 -5.0, ] }
Creating Holes Using Pixel Transparency coordIndex [ 0, 1, 2, 3 ] solid FALSE } }, # Tree face Shape { appearance Appearance { # No material, use emissive texturing texture ImageTexture { url "tree1.png" } }
Creating Holes Using Pixel Transparency geometry IndexedFaceSet { coord Coordinate { point [ -1.51 0.0 0.0, 1.51 0.0 0.0, 1.51 3.0 0.0, -1.51 3.0 0.0, ] } coordIndex [ 0, 1, 2, 3 ] solid FALSE } } ] }
Using Movie Texture #VRML V2.0 utf8 Group { children [ # Ground Shape { appearance Appearance { material Material { diffuseColor 0.0 0.7 0.0 } } geometry Box { size 10.0 0.01 10.0 } },
Using Movie Texture # Well wall Shape { appearance Appearance { material Material { } texture ImageTexture { url "wellwall.jpg" } }
Using Movie Texture geometry Extrusion { creaseAngle 1.57 beginCap FALSE endCap FALSE crossSection [ # upside-down U-shape 0.4 0.0, 0.4 -0.7, -0.4 -0.7, -0.4 0.0, ]
Using Movie Texture spine [ # Circle 2.00 0.0 0.00, 1.85 0.0 0.77, 1.41 0.0 1.41, 0.77 0.0 1.85, 0.00 0.0 2.00, -0.77 0.0 1.85, -1.41 0.0 1.41, -1.85 0.0 0.77, -2.00 0.0 0.00, -1.85 0.0 -0.77, -1.41 0.0 -1.41, -0.77 0.0 -1.85, 0.00 0.0 -2.00, 0.77 0.0 -1.85, 1.41 0.0 -1.41, 1.85 0.0 -0.77, 2.00 0.0 0.00, ] } },
Using Movie Texture # Well water Shape { appearance Appearance { # No material, use emissive texturing texture MovieTexture { url "wrlpool.mpg" loop TRUE } }
Using Movie Texture geometry IndexedFaceSet { solid FALSE coord Coordinate { point [ # Circle 2.00 0.6 0.00, 1.85 0.6 0.67, 1.41 0.6 1.41, 0.67 0.6 1.85, 0.00 0.6 2.00, -0.67 0.6 1.85, -1.41 0.6 1.41, -1.85 0.6 0.67, -2.00 0.6 0.00, -1.85 0.6 -0.67, -1.41 0.6 -1.41, -0.67 0.6 -1.85, 0.00 0.6 -2.00, 0.67 0.6 -1.85, 1.41 0.6 -1.41, 1.85 0.6 -0.67, 2.00 0.6 0.00, ] }
Using Movie Texture coordIndex [ 0, 1, 2, 3, 4, 5, 6, 7, 8, 9, 10, 11, 12, 13, 14, 15, 16 ] } } ] }