Download
1 / 7
70 likes | 101 Views
To help with the configuration of push notifications in iOS apps, we have come up with a comprehensive tutorial that covers some of the difficult steps such as configuring your own service and creating p12 files among other necessary tasks.

E N D
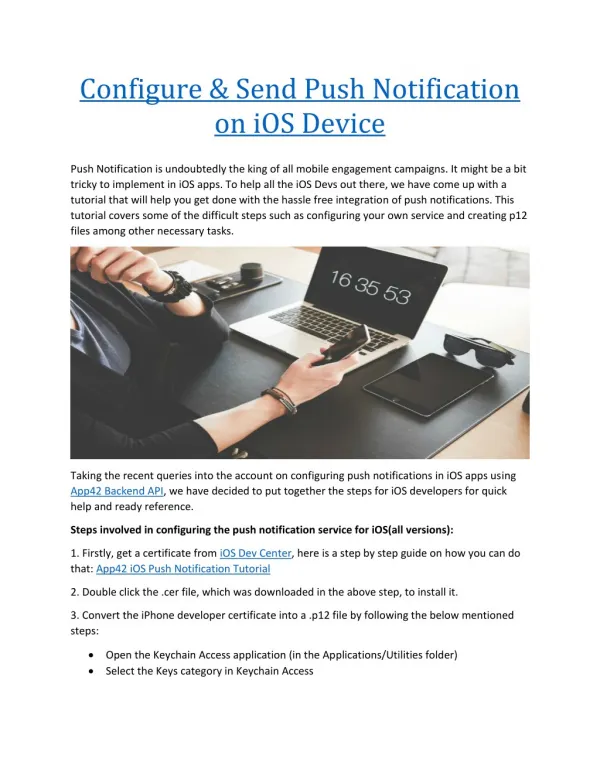
Configure & Send Push Notification on iOS Device Push Notification is undoubtedly the king of all mobile engagement campaigns. It might be a bit tricky to implement in iOS apps. To help all the iOS Devs out there, we have come up with a tutorial that will help you get done with the hassle free integration of push notifications. This tutorial covers some of the difficult steps such as configuring your own service and creating p12 files among other necessary tasks. Taking the recent queries into the account on configuring push notifications in iOS apps using App42 Backend API, we have decided to put together the steps for iOS developers for quick help and ready reference. Steps involved in configuring the push notification service for iOS(all versions): 1. Firstly, get a certificate from iOS Dev Center, here is a step by step guide on how you can do that: App42 iOS Push Notification Tutorial 2. Double click the .cer file, which was downloaded in the above step, to install it. 3. Convert the iPhone developer certificate into a .p12 file by following the below mentioned steps: Open the Keychain Access application (in the Applications/Utilities folder) Select the Keys category in Keychain Access
Select the private key associated with your iPhone Development Certificate. The private key is identified by the iPhone Developer as: public certificate that is paired with it. Select File > Export Items Save your key in the Personal Information Exchange (.p12) file format You will be prompted to create a password which will be used when you will attempt to import this key on another computer. 4. Make your .p12 file compatible with App42 server by following the below mentioned steps: Keep your .cer file and .p12 file in a single folder Open terminal and go to the folder that has both the files shephertz-technologiess-iMac:~ shephertztechnologies$ cd "your folder path" Now execute the following commands in the terminal: openssl x509 -in developer_identity.cer -inform DER -out developer_identity.pem - outform PEM openssl pkcs12 -nocerts -in yourPrivateKey.p12 -out yourPrivateKey.pem openssl pkcs12 -export -inkey yourPrivateKey.pem -in developer_identity.pem -out iphone_dev.p12 Where, - developer_identity.cer <= certificate you downloaded from Apple - yourPrivateKey.p12 <= your private key 5. Upload iphone_dev.p12 file to the AppHQ console
Login to AppHQ console and select your App Name in the drop down Select iOS settings in Settings Browse your iphone_developer.p12 file by clicking ‘choose file’ option to upload the file Enter password given during creation of the iphone_developer.p12 file Select the environment from the drop down menu Click on the submit button and it’s done here 6. Add Push Notification Entitlements Go to your project target’s Capabilities tab and add Push Notifications Entitlements.
7. Open your Xcode project and navigate to the AppDelegate.m class and change the application:didFinishLaunchingWithOptions: method to look like this: //Define constant for version check : #define SYSTEM_VERSION_GRATERTHAN_OR_EQUALTO(v) ([[[UIDevice currentDevice] systemVersion] compare:v options:NSNumericSearch] != NSOrderedAscending) -(BOOL)application:(UIApplication *)application didFinishLaunchingWithOptions:(NSDictionary *)launchOptions{ [self registerForRemoteNotifications]; return YES; } - (void)registerForRemoteNotifications { if(SYSTEM_VERSION_GRATERTHAN_OR_EQUALTO(@"10.0")){ UNUserNotificationCenter *center = [UNUserNotificationCenter currentNotificationCenter]; center.delegate = self; [center requestAuthorizationWithOptions:(UNAuthorizationOptionSound | UNAuthorizationOptionAlert | UNAuthorizationOptionBadge) completionHandler:^(BOOL granted, NSError * _Nullable error){ if(!error){ [[UIApplication sharedApplication] registerForRemoteNotifications]; } }]; } else { // Code for old versions if ([application respondsToSelector:@selector(registerUserNotificationSettings:)]) { // Register for Push Notitications, if running on iOS 8 UIUserNotificationType userNotificationTypes = (UIUserNotificationTypeAlert | UIUserNotificationTypeBadge | UIUserNotificationTypeSound); UIUserNotificationSettings *settings = [UIUserNotificationSettings settingsForTypes:userNotificationTypes categories:nil]; [application registerUserNotificationSettings:settings]; [application registerForRemoteNotifications]; } else { // Register for Push Notifications, if running iOS version < 8 [application registerForRemoteNotificationTypes:(UIRemoteNotificationTypeBadge |
UIRemoteNotificationTypeAlert | UIRemoteNotificationTypeSound)]; } } } The above code tells the OS that this App wants to receive push notifications. 8. Now you need to add the following delegate methods in your AppDelegate.m in order to receive push notification: -(void)application:(UIApplication *)application didRegisterForRemoteNotificationsWithDeviceToken:(NSData *)deviceToken{ NSString *token = @""; token = [[NSString alloc] initWithString:[[[[deviceToken description] stringByReplacingOccurrencesOfString:@"" withString:@""] stringByReplacingOccurrencesOfString:@" " withString: @""]]; NSLog(@"Device Token: %@", token); } -(void)application:(UIApplication *)application didFailToRegisterForRemoteNotificationsWithError:(NSError *)error{ NSLog(@"failed to get device token error:%@",error.localizedDescription); } When your App registers for remote (push) notifications, it tries to obtain a “device token”. This is a 32- byte number that uniquely identifies your device. A device token is the address to which a push notification will be delivered. 9. After getting the device token you need to register your device with the App42 Server to set up a connection to APNS to send the push notification to this device token. Change the delegate method application:didRegisterForRemoteNotificationsWithDeviceToken: in the AppDelegate.m class to look like this: -(void)application:(UIApplication *)application didRegisterForRemoteNotificationsWithDeviceToken:(NSData *)deviceToken{ NSString *token = @""; token = [[NSString alloc] initWithString:[[[[deviceToken description] stringByReplacingOccurrencesOfString:@"" withString:@""]
stringByReplacingOccurrencesOfString:@" " withString: @""]]; NSLog(@"Device Token: %@", token); [self registerUserForPushNotificationToApp42Cloud:token]; } -(void)registerUserForPushNotificationToApp42Cloud:(NSString*)deviceToken { PushNotificationService *pushService = [[App42API buildPushService] retain]; [pushService registerDeviceToken:deviceToken withUser:[App42API getLoggedInUser] completionBlock: ^(BOOL success, id responseObj, App42Exception *exception) { if (success) { PushNotification *pushNotification = (PushNotification*)responseObj; NSLog(@"UserName=%@",pushNotification.userName); NSLog(@"isResponseSuccess=%d",pushNotification.isResponseSuccess); NSLog(@"Response=%@",pushNotification.strResponse); } else { NSLog(@"Exception = %@",[exception reason]); NSLog(@"HTTP Error Code = %d",[exception httpErrorCode]); NSLog(@"App Error Code = %d",[exception appErrorCode]); NSLog(@"User Info = %@",[exception userInfo]); } }]; [pushService release]; } 10. Now to send a push notification, call the following method in a commonly used class in your project so that you can call this whenever you want to: -(void)sendPush:(NSString*)message { NSMutableDictionary *dictionary = [NSMutableDictionary dictionary]; [dictionary setObject:message forKey:@"alert"]; [dictionary setObject:@"default" forKey:@"sound"]; [dictionary setObject:[NSNumber numberWithInt:1] forKey:@"badge"]; PushNotificationService *pushObj=[App42API buildPushService]; [pushObj sendPushMessageToUser:@"User Name" withMessageDictionary:dictionary completionBlock: ^(BOOL success, id responseObj, App42Exception *exception) { if (success) { PushNotification *push = (PushNotification*)responseObj; } else {
NSLog(@"Reason = %@",exception.reason); } [pushObj release]; }]; } The pushDictionary in the above code should always follow the same structure as mentioned above to deliver the push notification successfully using App42 Server. You can remove or add the items to the pushDictionary if needed as per the Apple guidelines. 11. If you want to take any actions when you receive push notification then you need to add the following delegate method in the AppDelegate.m class: - (void)application:(UIApplication *)application didReceiveRemoteNotification:(NSDictionary *)userInfo { NSLog(@"%s..userInfo=%@",__FUNCTION__,userInfo); /** * Dump your code here according to your requirement after receiving push */ } //From iOS10, We can display notification when application is in foreground. //Called when a notification is delivered to a foreground app. -(void)userNotificationCenter:(UNUserNotificationCenter *)center willPresentNotification:(UNNotification *)notification withCompletionHandler: (void (^)(UNNotificationPresentationOptions options))completionHandler{ NSLog(@"User Info : %@",notification.request.content.userInfo); completionHandler(UNAuthorizationOptionSound | UNAuthorizationOptionAlert | UNAuthorizationOptionBadge); } //Called to let your app know which action was selected by the user for a given notification. -(void)userNotificationCenter:(UNUserNotificationCenter *)center didReceiveNotificationResponse: (UNNotificationResponse *)response withCompletionHandler:(void(^)())completionHandler{ NSLog(@"User Info : %@",response.notification.request.content.userInfo); completionHandler(); } With the above mentioned step, your App has been successfully set up to receive/send push notifications through our App42 Server using App42 Push Notification Service. It would be great to hear the views from the readers of this blog. In case you have any more questions, please feel free to reach out to us at support@shephertz.com.