Download
1 / 29
410 likes | 838 Views
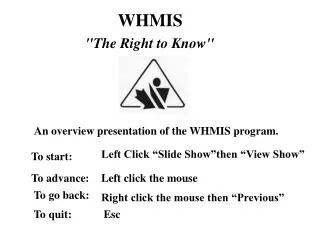
WHMIS. "The Right to Know". An overview presentation of the WHMIS program. Left Click “Slide Show”then “View Show”. To start:. To advance:. Left click the mouse. To go back:. Right click the mouse then “Previous”. To quit:. Esc. WHMIS – THE RIGHT TO KNOW. Introduction.

E N D
WHMIS "The Right to Know" An overview presentation of the WHMIS program. Left Click “Slide Show”then “View Show” To start: To advance: Left click the mouse To go back: Right click the mouse then “Previous” To quit: Esc
WHMIS – THE RIGHT TO KNOW Introduction Many hazardous materials are found in industry today. Exposures to these materials can result in harm or death. Workers using these materials have the "right to know" what these materials are, how they can be harmed by them and what they can do to protect their health and safety The WHMIS program was introduced to provide workers with this information
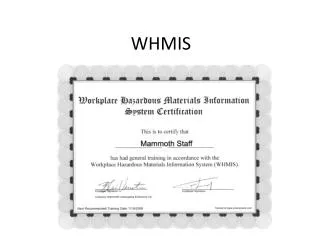
WHMIS – BASIC AWARNENESS This presentation has been designed to provide the participant with a BASIC OVERVIEW of the WHMIS program. It provides an "awareness" of the types of information that is legally required in the workplace. This presentation is NOT designed to replace the employer's responsibility for providing proper instruction on ALL hazardous materials found in the workplace. An optional "test" is available for those wishing to demonstrate their knowledge of these basic concepts. A certificate identifying the participant, score and date is also available to document knowledge of the basic WHMIS fundamentals
WHMIS WORKPLACE HAZARDOUS MATERIALS INFORMATION SYSTEM
WHMIS An INFORMATION SYSTEM Dealing with HAZARDOUS MATERIALS Used in the WORKPLACE
WHMIS -TOPICS MSDS History Employer Responsibilities Effects Routes of Entry Training 3 Groups Terms Labels Controls Classes
WHMIS -HISTORY Over the years many people have been killed or seriously injured as a result of exposure to hazardous materials. A couple of examples are: Mark Smith An NZ sheep farmer accidentally drank a selenium solution that damaged his internal organs Later while spraying pesticides, Mark used a respirator with the wrong cartridges and damaged his lungs Sean Kells As a 19-year old student, Sean was working at a factory pouring flammable materials from one container to another. A spark set off an explosion and Sean was burned to 90% of his body. He died the following day.
WHMIS -EFFECTS Hazardous materials are those that can they can have harmful effects on the human body. These effects can be: Acute Acute effects are those that are felt immediately after a large exposure to a hazardous material Chronic Chronic effects are those that are felt after a long-term exposure to low levels of a hazardous material Latency Period The latency period is the time between exposure and when the harmful effects are felt. The latency period could be months or years
WHMIS -ROUTES OF ENTRY Hazardous materials can enter the body in a number of ways. These "routes of entry" are: Inhalation Through the nose or mouth Examples are fumes or vapours breathed in Ingestion Through the mouth Examples are materials accidentally eaten or drunk Absorption Through the skin Examples are solvents used to wash hands Injection Direct penetration of the skin Examples are needles and slivers
WHMIS -3 GROUPS Employees handling hazardous materials have the "right to know" what they are handling and how it can harm them. 3 groups got together and implemented the WHMIS program so that employees could receive this information. These 3 groups were: Government Labour Industry
WHMIS -3 COMPONENTS There are 3 main components of the WHMIS program. 3 ways in which information is provided to users of hazardous materials 1. Labels 2. MSDS 3. Training
WHMIS -LABELS Under the WHMIS program containers of hazardous materials are to have a proper label. There are two types of labels: Supplier Label Workplace Label
WHMIS -SUPPLIER Supplier Label Supplier labels are to be on containers of WHMIS-controlled products brought into the workplace. They are to have: 1. The name of the product 5. Appropriate hazard symbols 2. Risk phrases 6. Reference to MSDS 3. Precautionary measures 7. The name of the supplier 4. First aid measures 8. A dashed border
WHMIS -WORKPLACE Workplace Label Workplace labels are required on containers into which WHMIS-controlled products have been poured. They are to have: 1. The name of the product 2. Handling instructions 3. Reference to MSDS
WHMIS – MSDS Material Safety Data Sheet A valid Material Safety Data Sheet is required for each WHMIS-controlled product in the workplace. The MSDS provides additional information on hazardous materials and is normally provided by the supplier of the product. An MSDS is required to have the following categories (not necessarily the exact words or order shown): 6. Fire or Explosion Hazards 1. Product Identification 7. Toxicological Properties 2. Hazardous Ingredients 3. Chemical & Physical Data 8. Reactivity Data 4. First aid measures 9. Preparation Information 5. Preventive Measures An MSDS is valid for: 3 years
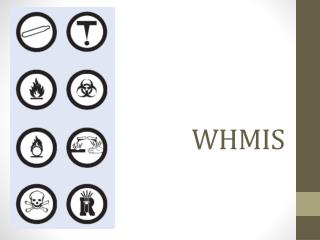
WHMIS – SYMBOLS A Class Compressed Gas Hazard Symbol Precautions Contents are under pressure and may explode. Do not drop Keep away from sources of ignition Examples Oxygen Propane
WHMIS – SYMBOLS Class B Hazard Flammable and Combustible Symbol Precautions Contents may burn Keep away from sources of ignition Examples Propane Gasoline
WHMIS – SYMBOLS Class C Hazard Oxidizer (provides oxygen for burning) Symbol Precautions Contents pose a fire or explosion risk Keep away from sources of ignition Example Oxygen
WHMIS – SYMBOLS Class D 1 Hazard Immediate and serious toxic effects Symbol Precautions Contents are potentially fatal Handle with extreme caution Examples Arsenic (used in pressure treating lumber)
WHMIS – SYMBOLS Class D 2 Hazard Other toxic effects Symbol Contents are not immediately dangerous to health but may cause illness after repeated exposure Use proper protective equipment Precautions Fiberglass insulation Example
WHMIS – SYMBOLS Class D 3 Hazard Biohazardous Material Symbol Contents may cause serious disease or illness Avoid contamination Use proper protective equipment Precautions Examples Anthrax (used for tanning)
WHMIS – SYMBOLS E Class Hazard Corrosive Symbol Contents may cause severe eye and skin damage Avoid contact Use proper protective equipment Precautions Examples Battery acid (acid) Cleaning agent (base)
WHMIS – SYMBOLS F Class Hazard Dangerously Reactive Symbol Precautions Contents are very unstable and may explode Keep away from sources of ignition Store in proper location Examples Nitroglycerine
WHMIS – TERMS The following are terms that may be found on an MSDS The Lethal Dose of a material that when fed to test animals causes 50% of them to die (the lower the number, the more toxic the material) LD50 : The Lethal Concentration of a material in the air when breathed by test animals causes 50% of them to die (the lower the number, the more toxic the material) LC50 : The measure of the acidity or alkalinity of a material Range is 0 to 14 Less than 7 are acids Greater than 7 are bases The closer to 0 or 14 the more corrosive the material pH:
WHMIS – TERMS The following are terms that may be found on an MSDS If less than 1, indicates that a liquid will float on water If greater than 1, indicates that a liquid sinks in water Specific Gravity: Vapour Density: If less than 1, indicates that a vapour will rise in air If greater than 1, indicates that a vapour sinks in air The Threshold Limit Value Sets maximum concentrations of contaminants in air For 8-hour day or 40-hour work week TLV:
WHMIS – TERMS The following are terms that may be found on an MSDS The lowest temperature at which flammable vapours will burst into flame with a source of ignition Flash Point: The lowest temperature at which flammable vapours will spontaneously burst into flame Auto Ignition Temperature: The lowest temperature at which a liquid will turn into a vapour Boiling Point: Freezing Point: The highest temperature at which a liquid will turn into a solid
WHMIS – TRAINING Workers who use hazardous materials or who may be exposed to them are to receive training so that they understand: The information contained on WHMIS labels The information contained on an MSDS Proper procedures for storing, handling and using hazardous materials Emergency procedures in the event of spills or escapes of hazardous materials Generic concepts as well as specific information on the particular hazardous materials used in the workplace
WHMIS – EMPLOYER RESPONSIBILITIES Under the Occupational Health & Safety Act, the employer has certain responsibilities. Some of these are: Prepare an Inventory of all hazardous materials in the workplace (in conjunction with the Joint Health & Safety Committee) Ensure that all hazardous materials are properly labeled Ensure that there is a valid MSDS for all hazardous materials Not allow hazardous materials to be used unless: -they are properly labeled -there is a valid MSDS -worker training has taken place
WHMIS – CONTROLS Controls are required to reduce the amount of exposure of hazardous materials to employees. There are 3 main types of controls: At the Source: Elimination of the material if it is not required Substitution with a less hazardous material (if available) Most effective form of control Along the Path: Often involves the use of ventilation to reduce exposure May result in others being exposed Less effective than at the source At the Worker: Involves the use of Personal Protective Equipment (gloves, goggles, respirators, etc.) May interfere with worker comfort Least effective form of control