Download

1 / 21
210 likes | 421 Views
Coding the Arduino. “Embedded Systems”. Software Lives in a “Virtual World” Restart makes all OK Easy to Modify; programmable Expensive: i7 ~$800. Hardware Deals with the Real World --- Arduous to Modify; NOT programmable Expensive: PCB >$100. Software Lives in a “Virtual World”

E N D
Coding the Arduino “Embedded Systems”
Software Lives in a “Virtual World” Restart makes all OK Easy to Modify; programmable Expensive: i7 ~$800 Hardware Deals with the Real World --- Arduous to Modify; NOT programmable Expensive: PCB >$100
Software Lives in a “Virtual World” Restart makes all OK Easy to Modify; programmable Expensive: i7 ~$800 Firmware “Embedded Systems” Does Both Restart makes Some things OK Easy to Modify; programmable Inexpensive:$1-$30 Hardware Deals with the Real World --- Arduous to Modify; NOT programmable Expensive: PCB >$100
Software • Computers do exactly what you tell them, no more, no less • Arduino uses the C programming language • You can go a long ways with just a few instructions • See the Arduino Guide (2011 web site)
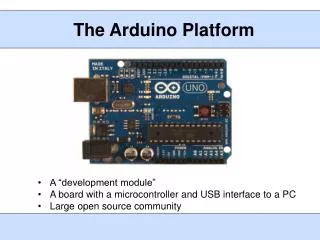
On the Arduino Programming cable I/O pins Reset 9V or 12V battery Power pins Brain
TIP120 1K Schematic Icons: Hardware
Dealing With the Outside World SENSOR COMPUTER ACTUATOR Lamp Relay Motor Solenoid … Switch Light beam Potentiometer Encoder Temperature …
I/O Commands DigitalWrite(n,HIGH); set pin n to +5 V DigitalWrite(n,LOW); set pin n to 0 V DigitalRead(n); read state of pin n
Program Structure /* declare variable names here to be used below */ void setup() { // commands to initialize go here } void loop() { // commands to run your machine go here } Comments Commands
Anatomy of a Program /*--------------------------- Turn on LED for ½ sec ----------------------------*/ void setup() // one-time actions { pinMode(2,OUTPUT); // define pin 2 as an output digitalWrite(2,HIGH); // pin 2 high (LED on) delay(500); // wait 500 ms digitalWrite(2,LOW); // pin 2 low (LED off) } void loop() // loop forever { }
b0 b7 Digital Numbers 00000011 (binary) = 3 (decimal) 11111111 (binary) = 255 (decimal) A bit is one binary digit: 0/1A byte is 8 bits Type #bits Number range bit 1 0-1 byte 8 0-255 word 16 0-65,535 int 16 -32,768-32,767
Arduino Data Variables Declare at top of program bytei; 0 to255word k; 0 to 65,536int length; -32,768 to 32,767int width; type name Variable Names: Can’t have white-space, use camelCase: myVariableName Make them short but meaningful: motorSpd, redLED Use byte variables unless expecting large numbers; Don’t mix types:bytei=266 will ‘roll over’ to 0
Constant Symbols #define LED 2 // define the LED pin void setup() { pinMode(LED,OUTPUT); } void loop() { digitalWrite(LED,HIGH); delay(500); digitalWrite(LED,LOW); delay(500); }
Changeable Variables #define LED 2 // define the LED pin intmyDelay = 500; void setup() { pinMode(LED,OUTPUT); } void loop() { digitalWrite(LED,HIGH); delay(myDelay); digitalWrite(LED,LOW); delay(myDelay); myDelay = myDelay - 50; }
Setting Pin Direction void setup() { pinMode(2,OUTPUT); pinMode(3,INPUT); } void loop() {}
What Does This Program Do? #define LED 2 // the LED pin byte i,j; void setup() { pinMode(LED,OUTPUT); for (i=0;i<4;i++) { flasher(); delay(5000); } } void loop() {} void flasher() { for (j=0;j<3;j++) { digitalWrite(LED,HIGH); delay(500); digitalWrite(LED,LOW); delay(500); } }
Printing to the Terminal void setup() { Serial.begin(9600); Serial.println("Hello World"); } void loop() {}
Debugging an Input void setup() { Serial.begin(9600); } void loop() { // Read from digital pin 2 & // spit the value out to serial Serial.println(digitalRead(2)); // Every 100ms or so delay(100); }
Want More? • “Arduino Microcontroller Guide” • Language Reference section of Arduino site