Download
1 / 8
80 likes | 146 Views
Science Mythbuster Video "Design Cycle". By: Joseph Chua. Source: http://www.co-bw.com/DMS%20Images/DesignCycle.png.

E N D
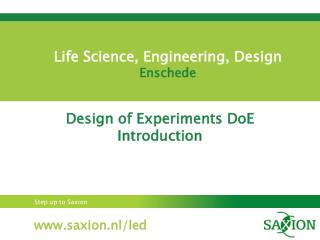
Science Mythbuster Video "Design Cycle" By: Joseph Chua
Source: http://www.co-bw.com/DMS%20Images/DesignCycle.png This is the Design Cycle. The Design Cycle is a wheel that I learned in my Computer class. This wheel taught me essential parts or steps that I never learned before. Just like how it taught me the proper way to start and end my projects through only some easy steps. Using these steps, I tested this theory out during my Myth busters video.
Investigate The first thing I did was to investigate or research about a theory to start me up with an idea on how to do my project, since without doing this step I will not be able to how a stepping stone on where my project will be based upon. Then I came to think that my project has to be still not commonly investigated upon. This was hard since this project has to be a student friendly project which is unique to be able to achieve my teachers expectations. In the process, I had to even ask my parents for assistance because they might know some old secrects or techniques that might have been forgotten already. After sometime I was able to investigate on the best possible project I could do, and finally I was done with my first step.
Design The design of the project was hard since we had to do it in school. Plus, there were many complications because we still needed a wooden plank in order to showcase our project since we are not allowed to vandalize a wall. We even came to the thought of where we would capture the videos that we will do for the project and what kind funky intro we want to put on our project using the computer. After a few days, we were able to estimate and deside on what we will have to settle on when we are gonna do that video.
Plan Somewhat coordinated with the design is how we plan to film and present our video. So we talked about it and decided to use my camera since my camera can film and to film it during science class and lunch. Since during Sci. We get to film in peace and during lunch I could get my friends to help cast my video. We even planned on what to film on what time and even planned on the sequence of events for our video with the help of the design step. Once we finished planning there came the creating.
Create Creation was hard, depending on the fact that we are stressed for time to finish our video before its deadline. Even when it came to shooting the video we had to come up with a very presentable way on how to execute what we wanted to say and do. Sometimes during lunch times we also had the problem of it being noisy and some people also pass by our camera making the filmer seem ameteur. When it finally came to the editing in the computer there were a lot of complications with the effects and the mixing of the sound so that we can be heard. There was even a shot that became corrupt that is why we needed to use parts from our failed filming scenes but at the end our classmates comended us for making a veryinteresting yet informative video.
Evaluate • But before I submitted the Myth busters video, I watch it before I ever submitted it. Then when I found out that some part were somewhat out of place I tried to fix it so that it can fit the video well. Even after doing this I showed it to my groupmates to make sure that the video not only can be understood by me but also the people who watch it. Then when I finished I exported it and gave it to my teacher. To sum things up, the design cycle is a very effective tool when it comes to using it for your projects. It is because of its nature to help you achieve the standars of what the teacher is looking for. So what are you waiting for, use the design cycle and make your parents “awe” at how smart you just became. - Check our video at : http://www.youtube.com/watch?v=i8GzcNftWmk