Download
1 / 51
510 likes | 769 Views
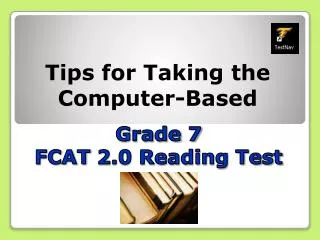
Tips for Taking the C omputer-Based. Grade 7 FCAT 2.0 Reading Test. It’s almost time to take the FCAT 2.0! Here are some important explanations and reminders to help you do your very best. S tudents in G rade 7 will take FCAT 2.0 Reading on the computer.

E N D
Tips for Taking the Computer-Based Grade 7 FCAT 2.0 Reading Test
It’s almost time to take the FCAT 2.0! Here are some important explanations and reminders to help you do your very best.
Students in Grade 7 will take FCAT 2.0 Reading on the computer. • There are two sessions of FCAT 2.0 Reading; you will complete the sessions over two days. • You will have 70 minutes to complete each session of FCAT 2.0 Reading. FCAT 2.0
Let’s talk about the term test invalidation. It’s important for you to understand what it means so it won’t happen to you! Test Invalidation
If your test is invalidated, it means that your test will not be scored, and you will not be able to retake the same test. Test Invalidation
To make sure your test is scored . . . Remove all electronic devices. If you have an electronic device at your desk, in your pocket, or ANYWHERE you can reach it during testing or on a break,your test will not be scored.
Some examples of electronic devices are: • Cell phones or smart phones • Tablets • Handheld video games • MP3 players • Calculators Electronic Devices
If any students have electronic devices, your teacher will collect them or instruct students to put them away (in a locker or backpack away from your desk). • If you aren’t sure if something is an electronic device, please ask your teacher before the test.
Do your own work. If you are caught looking at another student’s answers, talking about the test during breaks, or using any kind of unauthorized aid (cheat sheet, etc.) during the test, your test will not be scored. To make sure your test is scored . . .
Don’t be disruptive. If you are disruptive during a test, you may be dismissed from the room and your test may not be scored. It is very important for you to remain quiet, respect other students, and pay attention to the instructions. To make sure your test is scored . . .
Don’t leave school. If you leave the school’s campus for lunch or an appointment before you finish taking a test session, you will not be allowed to complete the session. To make sure yourtest is scored . . .
Don’t discuss the test. After the test, you may not discuss the test items with anyone. This includes any type of electronic communication, such as texting, emailing, or posting online, for example, on websites like Facebook, Twitter, or Instagram. If you are found sharing information about test items, even without the intent to cheat, your test will be invalidated. To make sure yourtest is scored . . .
TestNav is the computer program you will use to take FCAT 2.0 Reading.
Before you begin testing, your test administrator will give you aworksheetthat you may use to take notes. • When you complete a test session, the test administrator will collect your worksheet. • While testing, ensure your worksheet is not easily visible to other students. Worksheets 14
Before you begin testing, your test administrator will give you a Student Authorization Ticket. You will use the Login ID number and Test Code at the bottom of the ticket to log in to the test. Authorization Ticket 15
When your test administrator tells you to do so, you will enter the Login ID and Test Code printed on your ticket in the boxes on the login screen. Logging In to the Test 16
After you log in, you will see a Welcome Screen. After you click Next, you will go to the Testing Rules Acknowledgment Screen. Welcome Screen 17
During the test, you must not: Talk to other students or make any disturbance Look at another student’s computer screen or worksheet Allow another student to look at your computer screen or worksheet Ask for help answering any test questions Have notes or scratch paper, other than your worksheet Have any electronic or recording devices in your possession at any time, including breaks, even if you do not use them Fail to follow any other instructions given Testing Rules 18
Before the test, your test administrator will read the testing rules aloud, and ask you to read the Testing Rules Acknowledgment on your screen. You will be asked to click the box next to the statement to show that you understand the rules. Testing Rules Acknowledgment 19
Your test administrator will give you a four-digit test group code on each day of testing. When told to do so, you will enter your test group code in the boxes. After you enter the code and click Next, you will begin the test. Test Group Code 20
You may use any of the tools at the top of the screen to help you with your test. Computer-Based Tools
Computer-Based Tools The Pointer Tool You will use this tool to select your answer to each question. You can also click the pointer tool to turn off other tools. 22
Computer-Based Tools The Eliminate Choice Tool You can use this tool to cross out answer choices that you have eliminated as possible correct answers. 23
Computer-Based Tools When the eliminate choice tool is turned on, your cursor will look like a red X. 24
Computer-Based Tools The Highlighter Tool You can use this tool to highlight portions of a question or a graphic. 25
Computer-Based Tools When the highlighter tool is turned on, your cursor will look like a highlighter. 26
Computer-Based Tools The Eraser Tool You can use the eraser tool to remove highlighting and to erase an X from an eliminated choice. To erase highlighting, with the eraser tool selected, click anywhere in the highlighted area. 27
Computer-Based Tools When the eraser tool is turned on, your cursor will look like a pencil eraser. 28
Computer-Based Tools The Notepad Tool You can use the notepad tool to make notes on a particular question for later reference. Each passage or item will have its own notepad so notes made on a passage or item will only be visible when you are on that passage or item. 29
Computer-Based Tools You can move the notepad by clicking the top window and dragging it to another part of the screen. 30
Computer-Based Tools The Help Tool You can click this tool for information on how the tools work. 31
This is what the information in the Help Window will look like. Help Window 32
Use the buttons at the bottom of the screen to move through the test. Navigating through the Test
The Back button takes you to the previous item. The Reset button clears your answer. The Go To button takes you to the Item Review Screen. The Next button takes you to the next item. The Review button marks an item for review. Navigating through the Test 34
To answer an item, you will click the bubble to select your answer. You can clear your answer by clicking another answer choice or the reset button at the bottom of the screen. Completing Items
When you have completed Session 1, click the Go To button. Check the Item Review Screen to ensure you have answered all the items, and go back to questions you have marked for review. Finishing Session 1
The Review? Column shows you which items you have marked for review. If you marked an item for review, you will see a red check mark and a link that says Review that will take you to the item. The Answered? Column tells you if the question is answered or not answered. The Question Name Column is a list of the questions. When you click on a question, it takes you to that test item. Item Review Screen
After you have answered all test questions in Session 1, you will click Next Section. Only press the Next Section button when you are done with Session 1 questions. Finishing Session 1 38
After clicking Next Section, confirm you are done with Session 1 and ready to move on. Finishing Session 1 39
To exit TestNav at the end of Session 1, click the Save and Exit button. You cannot go back to Session 1 once you exit the test. Ending Session 1 40
When you come to the Save and Exit screen, you will see four sections. • Section 1 contains the Testing Rules Acknowledgment and Test Group Code for Session 1. • Section 2 contains test questions for Session 1. • Section 3 contains the Seal Code and Test Group Code for Session 2. • Section 4 contains test questions for Session 2. Save and Exit Session 1
In the pop-up window, click “Yes, exit the test.” Save and Exit Session 1 42
On day two of the test, your test administrator will give you a four-digit seal code. When told to do so, you will enter the seal code in the box on the bottom of the screen. Session 2 43
When you have completed Session 2, click the Go To button and check the Item Review Screen to ensure you have answered all the items in Session 2, and go back to questions you have marked for review. Submitting the Test
Only press the Submit button on your test when you are sure you are completely done. You cannot go back into your test once it is submitted. Submit Button
After pressing the Submit button, you will be asked to confirm your submission. Only press the Yes, submit my test button when you are sure you are completely done. You cannot go back into your test once it is submitted. Submit Button
Practice Test Session You will learn more about the test and be able to practice using the tools and answering items when you take an ePAT practice test. 47
You may not ask for help in answering any test questions. • Your teacher or test administrator is not allowed to discuss the test or help you read, understand, or answer test questions. • Try to answer every question. Remember . . .
Once you submit your test, you cannot go back into the test. Be sure to check your answers and try to answer every question before submitting your test. Remember . . .
During breaks and after testing, it’s important that you don’t talk about the test questionswith friends, classmates, teachers, or other students. Remember . . .