Download
1 / 201
2.03k likes | 2.33k Views
The primary focus of this book is progressive calisthenics, a minimalist and non-dogmatic approach to strength training. Simple, minimalistic training using calisthenics work to build coordination and neuromuscular strength. Like weight training, calisthenics can also be made progressively harder.<br><br> In old school calisthenics, the goal is to build joint integrity, overall health, coordination, and raw "brute" strength, using tested techniques. These techniques are treated as skills to be worked diligently for as long as they yielded coordination and postural improvements, and strength gains. In this way, such training can benefit martial arts training.

E N D
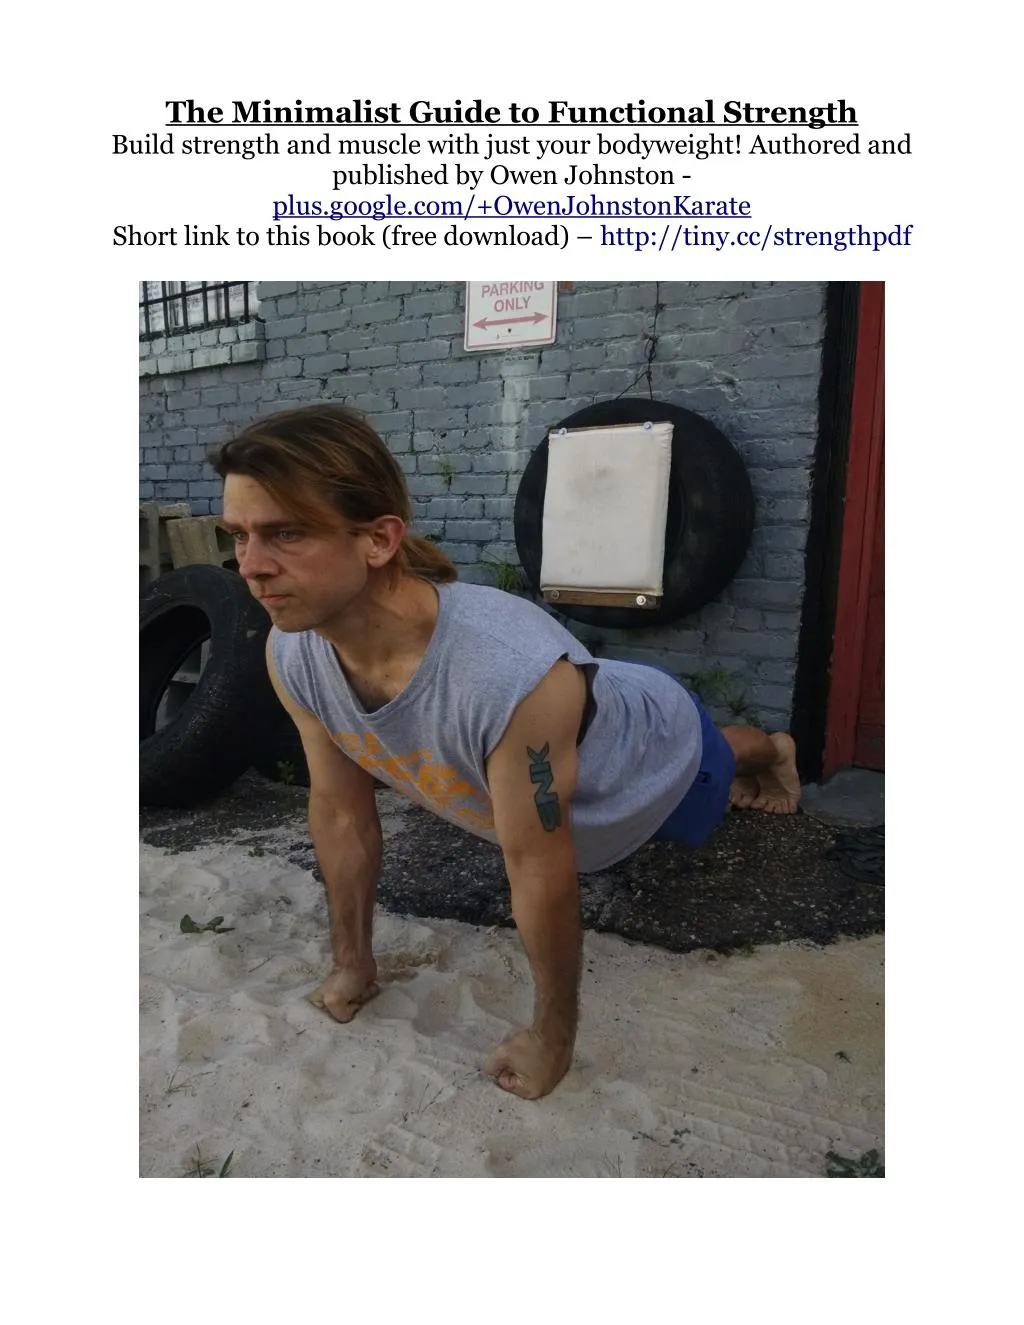
The Minimalist Guide to Functional Strength Build strength and muscle with just your bodyweight! Authored and published by Owen Johnston - plus.google.com/+OwenJohnstonKarate Short link to this book (free download) – http://tiny.cc/strengthpdf
Owen Johnston - plus.google.com/+OwenJohnstonKarate Copyright Information The Minimalist Guide to Functional Strength Fitness Instruction, 4th Edition Authored and published by Owen Johnston Edited by T.O.D. Johnston © Owen Johnston, 2016. Licensed under the Attribution NonCommercial NoDerivatives 3.0 License - http://creativecommons.org/licenses/by-nc-nd/3.0/ You are encouraged to share the book, print it out, and upload it to other sites. I want to change the world one life at a time, and help people ditch the gym! You can build muscle and strength with bodyweight. Work out for free anywhere! Don't buy the scams and misinformation sold by the fitness industry. Short link to this book – tiny.cc/strengthpdf Short link to my book folder – tiny.cc/pdfbooks “Every day, we change the world, but to change the world in a way that means anything, that takes more time than most people have. It never happens all at once. It’s slow. It’s methodical. It’s exhausting. We don’t all have the stomach for it.” - Mr. Robot You can order a professionally printed edition of the book through Simple Print Service. Visit the page below, upload a PDF, and follow the simple ordering process. I do not make a single cent from orders made through this service. www.simpleprintservice.com 2
Owen Johnston - plus.google.com/+OwenJohnstonKarate Disclaimer This book is intended for people of good health and physical condition. The training methods and advice in this book may not be for everyone. Always consult your physician before starting a new exercise program. I am not a physician, and as such, nothing in this book should in any way be taken as medical advice or a substitute for medical advice. Also, this book should not be used to replace advice from your personal physician. Physical activity always carries with it a risk of injury. When you practice the training methods in this book, always practice proper safety precaution, use proper technique, and apply common sense. The author can not assume any responsibility for any injury, illness, loss or damage that may result from following the training methods in this book. Lastly, this book is not a replacement for formal instruction. Be sure to seek out a competent, qualified instructor who may carefully observe your progress and provide feedback. This book is intended primarily to be a supplement to, not a replacement for, formal training. 3
Owen Johnston - plus.google.com/+OwenJohnstonKarate About the guide and the author The primary focus of this book is progressive calisthenics, a minimalist and non- dogmatic approach to strength training. Simple, minimalistic training using calisthenics work to build coordination and neuromuscular strength. Like weight training, calisthenics can also be made progressively harder. In old school calisthenics, the goal is to build joint integrity, overall health, coordination, and raw "brute" strength, using tested techniques. These techniques are treated as skills to be worked diligently for as long as they yielded coordination and postural improvements, and strength gains. In this way, such training can benefit martial arts training. Author's Website - plus.google.com/+OwenJohnstonKarate YouTube Playlist Collection I have curated a collection of strength training playlists on YouTube. There are quite a few tutorials and progressions. This collection serves as a supplement to this guide. Collection - plus.google.com/collection/wExZWB Short URL – tiny.cc/onlinecollection About Me I am a certified calisthenics instructor. I offer discounts for groups and for class packages. More about my classes - www.dragondoor.com/owen_johnston/ Short link – tiny.cc/owenjohnston 4
Owen Johnston - plus.google.com/+OwenJohnstonKarate Table of Contents Fitness 101 Transform your life! Thoughts on Training Specificity in Training and Setting Goals Progressive Calisthenics – introductory article Calisthenics Exercises using Benches An Essay on Flexibility Building up to full pullups Dead hang gymnastics pullovers One Arm Pullup Training Jowett Pushups Gymnastics Backbend Tips Mobility work – tension flexibility exercises Karate approach to calisthenics Karate approach to calisthenics, part 2 Abdominal training basics Methods of progression in calisthenics Progressive Calisthenics Lifestyle Ultimate Leg Training Odd Object Training for Strength Old Time Strongmen - Training and Resources Sandbag training for functional, real world strength Caveman Conditioning: Uncivilized, Minimalist Training Methods Street Workouts – minimalist training, anywhere Hojo Undo - Supplementary training exercises for karate Poor Man's Strength Training Calisthenics Program Design for Beginners Calisthenics Program Design for Advanced Athletes Calisthenics Programs - workouts from remedial through advanced Calisthenics Progressions “Quick start guides” (short primers) - 7 - 8 - 9 - 10 - 11 - 14 - 16 - 19 - 22 - 24 - 27 - 28 - 29 - 31 - 35 - 39 - 40 - 42 - 43 - 44 - 47 - 49 - 50 - 52 - 59 - 62 - 63 - 67 - 69 - 150 - 187 5
Owen Johnston - plus.google.com/+OwenJohnstonKarate Fitness 101 – A Basic Tutorial There are many benefits to exercise, including burning calories, elevating your mood, and heart disease prevention. Using cardio training to improve your fitness also improves your circulatory system, strengthens your heart and lungs, improves bone density, which all help immensely not just with other types of exercise, but life in general! Benefits to lifestyle include improved mood, stress / depression relief, better posture, being able to fall asleep quicker, as well as sleeping more deeply. Not only that, strength training helps not only build your muscle mass and strength, but also your endurance, and performance of daily activities such as lifting, carrying, and walking. Your flexibility is also enhanced, which helps to prevent back pain, and pulling muscles. Not only that, even your ligaments and tendons adapt to training, and become stronger, and less prone to injury. The additional muscle and bone density gained in training also help in reducing injury to joints. The metabolism definitely gets a boost with effective training, which results in improved body composition. The end result will be more muscle and less body fat. More muscle doesn't necessarily mean a big, bulky look - but regular, effective exercise will (as a rule) result in improved muscle tone. Since this is not meant to be a comprehensive article, keep in mind that there is a lot more to understanding fitness than I can condense into just a few pages. Nutrition and lifestyle changes are two important topics to consider when starting a new fitness program. Also, it's a good idea to talk to a certified fitness trainer who can help you figure out the best options and routines. Lastly, if you're new to fitness, you'll want to get at least a basic idea about nutrition, body mechanics, and fitness concepts. If you're just starting out, I recommend calisthenics, also known as body weight training. Calisthenics train the whole body – muscles and joints. This means no equipment required, so you can practice the exercises anywhere. Practicing calisthenics builds functional strength and muscle tone very naturally. It also boosts the metabolism. Even if you're already in shape, easier calisthenics exercises can help train your whole body, strengthen any weak areas, and rehabilitate joints. I personally teach my own unique approach to calisthenics, which is given a general description in the article “Progressive Calisthenics – introductory article”. I would highly recommend progressive calisthenics to anyone trying to get into shape. It's an approach, not a set routine! Once you understand the basic concepts, you can become your own coach. Before starting a program, though, be sure to find a workout partner you trust, or talk to a certified fitness trainer. Gradually introduce more protein into your diet from natural sources if needed. (Nuts, grains, cheese, milk, etc.) Change up your routines up once in a while if it helps you stay motivated. Also, what you do outside of the gym or exercise in general is just as important, such as making any 7
Owen Johnston - plus.google.com/+OwenJohnstonKarate necessary lifestyle changes, as well as getting the right nutrition and rest. Always try to eat fresh and drink things like water, tea, fruit smoothies etc instead of sodas. If you want to bulk up, work up to heavy weight and/or hard calisthenics exercises with low reps. If you want to tone up, you will want to start burning off any unhealthy weight, while also building muscle in challenging strength sessions. The key is to burn more calories than you take in. Remember to have a small, nutritious meal after a hard workout, such as a protein shake and a piece of fruit. Also, always give your body enough recovery time after a workout. Moderately heavy to heavy amounts of lifting should be done every other day to allow time to recover. ("Heavy" depending upon what level of training you are at.) Need to lose weight? Get out and get movin'! Get any kind of cardio you can fit into your daily routine. Do laundry, some yard work, walk the dog, whatever! Get on the bike, jog, take an aerobics class...The list goes on! Find a friend to go outside and get active with - have fun with it! Remember to set realistic goals - such as allowing a few months to achieve the right look. Feel free to research other exercises as needed to help train for your own personal performance goals, and talk to your fitness instructor for ideas on how to tweak your routine. Always warm up and stretch properly before you begin your workout. Warmups should usually include joint rotations, which oil up the joints, and some kind of aerobic activity, such as skipping rope, walking, or jogging. Aerobic activity warms up your body temperature and increases blood flowing. This helps to improve your muscular performance and 'elasticity', which helps to prevent injury (such as pulling a muscle). If you do not stretch correctly, injuries can occur, so always start slowly if you are new to flexibility training. Start with a few minutes of static stretching, which is used to stretch out the muscles while the body is at rest, then move onto dynamic stretching. Remember to do light aerobic activity such as walking or jogging and some more static stretching, at the end of your workout to cool down the body. 8
Owen Johnston - plus.google.com/+OwenJohnstonKarate Transform your life! With time, patience, proper training, proper nutrition, and proper attention to lifestyle factors, almost anyone can transform their body and their life. It takes a lot of time and dedication – it could take at least a full year to achieve a trim, proportioned, fit look. Yes, of course you will see some results within two weeks if you’re training at least twice a week and watching your nutrition. But to get a whole new body – trimming down while building up the muscles – is a long term, difficult process. It takes time to replace old habits with new ones. You also have to pay a lot of attention to nutrition, losing weight slowly (instead of too quickly), learning how to train (skill), building up the stamina and strength for truly intense training, while not over training. Over training fatigues mind and body, slowing your progress, and over training also leads to injury. Certainly, you do want to train hard, but allow for recovery. Push past your comfort zone, but not to injury. The fortunate thing, though, is that hard work builds not just strength, but willpower and confidence as well. It takes guts and tenacity to train hard! Most people give up too easily, before they see results. Don’t give up! Climb that mountain! 9
Owen Johnston - plus.google.com/+OwenJohnstonKarate Thoughts on training – "slow and steady" When it comes to training, whether in martial arts or for any area of fitness, let’s remember the old phrase – “Slow but steady wins the race.” Never be in such a rush that you don’t plan your workout, or that you do not train your body and mind through the preparatory stages. It’s certainly great to feel out new exercises as a test of strength ability, but do not venture into “over training”, which could lead to injury. Of course, this is not to say we shouldn’t work hard when we train! Progression is the name of the game. We have to keep steadily improving each workout. If we’re using weight, try to add sets, reps, variety, or weight each week. If practicing body weight training, change something up a little bit each day that you work out. And remember slow but steady – gradual progress! This is especially true as we get older. Aging is not a death sentence for your training – in fact, we can continue improving at many things throughout a lifetime and maintain great health! But we must also be realistic and remember that we have to accommodate a potentially slower recovery rate. And when it comes to progress, especially when it comes to us older athletes (I was born in the 70s, myself) - “Longer is one thing. Never is something entirely different. And longer always beats never.” – Brooks Kubik If you want a pile of info on some sensible workouts, pick up his book, Chalk and Sweat. Head to the page below and click on “Dinosaur Products” for links to his books, including Chalk and Sweat. I don’t make a single cent by recommending the book. I have read his Dinosaur Training and Dinosaur Body Weight Training books and they have been working for me so far. As such, I am happy to recommend his stuff! www.brookskubik.com 10
Owen Johnston - plus.google.com/+OwenJohnstonKarate Specificity in training and setting goals In the beginning, it is indeed important to build “absolute strength” in the muscles needed for your chosen activity. This provides a foundation for the other end of the strength spectrum, “speed strength” or power. On the other hand, if you started on the speed strength end of the spectrum (basketball, for instance), you can still get some benefits to power by working on absolute strength. Also, we have to figure out S.M.A.R.T. goals. Specific, measurable, attainable (or actionable), relevant (or realistic), and timely. If our goals are vague and not concrete (or measurable), there will not be any clear, objective way to work towards them. Specificity deals with not just numbers (hitting a set / rep goal, or how much weight), but also, the reasoning behind the goals. Basically, our long term goal(s) should help us define our S.M.A.R.T. goals – like comparing strategy to tactics. 11
Owen Johnston - plus.google.com/+OwenJohnstonKarate Progressive Calisthenics – introductory article Progressive calisthenics is a strength oriented approach to bodyweight training. It also focuses on minimalism – little to no equipment, but high rewards. Your body is its own very versatile form of training equipment! Balance, agility, and coordination also gain a lot of benefit. Popular examples of calisthenics exercises include pushups and pullups. Exercises may be trained progressively by adjusting leverage, range of motion, hand and/or foot positioning, and other such variables. With these in mind, body mechanics, and movement, one may use progressive calisthenics to achieve very high levels of functional, full body strength and coordination. This is primarily because calisthenics use natural movements that act on multiple joints, and force many stabilizer muscles to be used. Lastly, calisthenics help to improve posture, as well as build supple strength and tension in the tendons, ligaments, and joints. Naturally, it is also possible to make exercises easier. This is especially important if you are working around an old injury, and want to build up your strength again in particular joints. Making an exercise easier also useful when you want to work on your form. The key thing to remember is that progressive calisthenics – like with weight training – is that multiple methods of progression may be used. A common type is a double progression. The first progression is building up your sets and reps in an exercise that you can work with comfortably. The second progression is moving up to a harder variation of that exercise, but only once you have built up enough strength in your muscles and joints. When you start on a harder variation, you will generally not be able to perform as many to repetitions, and as such you will return to the first type of progression. Everyone is different – you have your own unique body type, goals, needs, metabolism, and so forth. As such, feel free to use the progressive approach to calisthenics to help you develop your own personalized routines. Remember the key concepts to the approach – using a double or multiple progression method to build strength and skill in various types of movement, while also collecting knowledge of body mechanics, kinesiology, and "intensity variables" or "tougheners" to adjust leverage, range of motion, and positioning to make the movements progressively harder or easier. There is a seemingly infinite number of ways to adjust your techniques, and continue gaining strength from them for years and years to come. 12
Owen Johnston - plus.google.com/+OwenJohnstonKarate As you practice your exercises, keep in mind that body weight training techniques can be treated like martial arts techniques. At first, when you learn a new movement, it is important to take it slowly while getting an understanding of the body mechanics behind the exercise. Then, practice it repetitively to gain skill, strength, coordination, improved posture, and balance in the required positions. From there, you can learn new variations of the body weight exercise – just as in martial arts, when learning variations of different strikes or blocks. Also, improved balance, coordination, and strength in postures help martial arts training. All in all, progressive calisthenics for strength are very useful for everyone into not just martial arts, but athletic sports in general. I want to emphasize that, to achieve total fitness, calisthenics alone are not enough. Keep in mind that you will want to make needed lifestyle changes in diet, nutrition, rest, recovery, and so forth to help improving overall health in body, mind, and spirit. Scientific research has helped to develop many useful therapeutic modalities. However, we should not entirely discount or deny age old wisdom and practices. This includes yoga, meditation, prayer, solitary hiking – anything that helps you to cope with day to day stress and strengthen your spirit. 13
Owen Johnston - plus.google.com/+OwenJohnstonKarate Calisthenics Exercises using Benches I have videos on this subject and the Dragon Flag progression. The videos are part of my training playlist on YouTube. Point your browser to the below short URL to view the playlist - http:// tiny.cc/trainingplaylist Squats Split squats with front or back foot on the bench One leg squats with working leg standing on the bench and the other on the floor Self assisted two leg squats or pistol squats Jumbo shrimp squats Partial ROM (range of motion) squats - back facing bench - sit down to bench and stand up (using one leg or two) Posterior chain Partner or solo prone hyperextensions on the bench Cross-bench Superman Angled bridge Bridge curls (one foot or two) Abdominals Knee tucks, flat or sitting Leg raise variations, including scissors Bent leg hold - between two benches or using a pair of pushup handles or parallettes on one bench L-sit progression - same as above Pushing movements Incline and decline pushups - on palms, knuckles, wrists, or fingers. If you’re working wrist or finger pushups, you can have both hands touching the ground in the same way (such as on the back of the hand or on the fingertips), or in mixed positions, to make it easier (one hand on the palm, the other on the back of the hand or fingertips). Also, one can use one hand, both hands, or a transitional movement (archer pushups, uneven pushups. etc). Jowett pushups - can be done with feet on bench and hands on chairs or benches. This exercise allows for a much deeper range of motion. Elevated pike handstand pushups Bench dip variations Bodyweight triceps extensions - one or two hands; standing or kneeling Tiger bend pushups - incline, decline, or elevated pike position 14
Owen Johnston - plus.google.com/+OwenJohnstonKarate Holds Planks - incline or decline; bent arm or straight arm; one leg or both legs; gecko plank (one arm up and opposite leg up) Elbow lever - decline or raised. These are both easier than practicing a full elbow lever, in which you are supporting your entire body weight on your hands. Dragon Flags Dragon flag is a technical, difficult, and cool looking movement credited to Bruce Lee. Rocky Balboa also used the Dragon flag as part of training for his fight with Ivan Drago in Rocky IV. Dragon flag works most (if not all) of the torso, as well as the hips and glutes. In my opinion, the Dragon flag is the most difficult bodyweight training exercise for the abdominals that I can think of. Take your midsection training routines to the next level with Dragon flags! I have included a Dragon Flag progression in the Calisthenics Progressions article later in this guide. 15
Owen Johnston - plus.google.com/+OwenJohnstonKarate An Essay on Flexibility As a martial artist with many years of experience, I have had the good fortune of learning and testing out many kinds of stretching. I have found that it is important to have a variety of “active flexibility” stretches where one uses muscular control to help affect the range of motion of the stretching technique. Yoga and Pilates postures have been very effective for me and my martial arts students in helping “open up” not only the hamstrings and shoulders, but correct postural problems in our backs and help strengthen the back muscles while doing so. This is very desirable for practicing martial arts, and for many types of resistance training. I can imagine that performing many types of Olympic lifts would be greatly assisted by improving one’s posture, back strength, and spinal health. Static stretching, from my experience, is not conducive to resistance training, which is supported by research. I have found that performing dynamic stretching – joint rotations and so forth – form an integral part of any warmup routine. This is very important for warming up the joints and muscles that are specific to the workout, and it also lubricates the joints with synovial fluid, allowing for improved function of the joints. This is necessary for skill work such as in martial arts, gymnastics and so forth, as well as resistance training of almost any kind. As an example, before we train any Aikido techniques, we carefully practice wrist rotations and wrist stretches. These help prevent injury to the wrists when practicing the various wrist lock techniques, and the stretches also help us to further ingrain the motions of the techniques. In this way, such stretches have “joint specificity”. There are many examples of such joint specific stretches that assist in martial arts techniques. As far as resistance training goes, we have indeed found that it does contribute to increased joint flexibility. I previously mentioned Yoga and Pilates. These disciplines do tend to help build strength throughout the full range of motion of the exercises, as well as balance and posture. Similarly, other disciplines of body weight movements have been very helpful in not only building strength in “natural” movements, but balance, coordination, and agility. Such movements include various pushing, pulling, and squatting exercises, and many more. As an example, I generally start most new, untrained karate students with a short list of Judo style stretches and kneeling pushups, or wall pushups if necessary. Such pushups are fairly remedial exercises that allow students to learn the basic form, and help stretch out the muscles and joints while using the muscles to stay in control of the motion. Developing muscular control is a very important concept in both flexibility and martial arts. There are remedial variations of almost any exercise one can imagine, especially in calisthenics. The position, leverage, and range of motion may be adjusted in any calisthenics technique such that it can be made more difficult (progressing the technique) or less difficult (regressing the technique). Of course, during pushing movements, the antagonistic muscles hold some tension, and the stabilizer muscles also get some training via holding correct posture and balance. 16
Owen Johnston - plus.google.com/+OwenJohnstonKarate Once a set of pushing movements is completed, pulling movements are practiced to help stretch out the muscles and joints on the other side. An example remedial exercise for pulling is standing pulls, where one places one’s hands on either side of a pole, beam, or any other sturdy object or piece of furniture that one can safely put one’s hands around. As the student progresses in muscular control, his or her technique improves and will be able to perform more “high quality” repetitions. Also, as the student continues practicing these techniques, his or her range of motion will generally deepen, allowing him or her to make the exercise more difficult, as well as improve his or her own active flexibility. An example is performing wide stance body weight squats half way down at first. This functions as not only a resistance exercise, but also a stretch for the quadriceps where most of the muscles of the legs are involved in the exercise. Another great exercise is body weight calf raises. These help stretch out the calf muscles as well as the Achilles tendon. Any menu of squats and calf raises is greatly supplemented by ankle rotations and “runner’s stretches” (similar to lunges). As flexibility and muscular control improve in calf raises, one can practice them with one foot and / or off a step. Of course, it takes time and dedication with squats and calf raises to build up balance, and flexibility in the ankles. The key point is not to rush things and gradually develop the flexibility needed to keep the heels planted in the bottom portion of squats. Calf raises and ankle rotations help immensely with this. Naturally, connective tissues will get stretched and strengthened by practicing such techniques. Simply holding tension (via muscular control) will work the ligaments and tendons. Also, going through the proper ranges of motion in these techniques stretches them and helps one’s body learn correct movements and postures. As such, not only can one build muscular control, posture, balance, general proprioception and kinesthesia, flexibility, and skill, but joint integrity and strength in ligaments and tendons. This helps maintain joint health and prevent injury. Maintaining strength balances in the body allows one, also, to maintain natural ranges of motion. Asking any gymnastics coach about building shoulder health and flexibility will certainly yield much useful advice on the topic. It can be argued, especially from a gymnastics perspective, that excellent upper body flexibility is required to learn more advanced body weight techniques. Also, to quote an article by a gymnast, “Keeping the shoulders (glenohumeral / scapular articulations) operating optimally is the key to bodyweight strength success.” Referenced article - “The Fundamentals of Bodyweight Strength Training” by Steven Low, posted at the site below - http://www.eatmoveimprove.com 17
Owen Johnston - plus.google.com/+OwenJohnstonKarate Light, gentle stretching as a part of cool downs has helped me and my martial arts students reduce post workout pain. This usually involves partner assisted stretching and massage to help “detox” the affected joints and muscles of waste products and so forth. So, as you can see by my approach to body weight training, calisthenics can be very holistic in nature, help with flexibility, and provide light, moderate, and even very high levels of intensity for strength training. My overall approach to strength and flexibility is based around my years of experience in martial arts, progressive calisthenics, and gymnastics, as well as experience and research into other disciplines (ballet, parkour, Yoga, Pilates, etc.), and training with other instructors. 18
Owen Johnston - plus.google.com/+OwenJohnstonKarate Building up to full pullups Start with the first exercise in the horizontal pullup progression, called straight pullups. Refer to the calisthenics progression article for the full list of exercises in this progression. Start with an overhand grip and imagine you're rowing a boat as you practice. The imagery isn't as important as the mechanical principle you're trying to drill. The idea is that you're gripping and "rowing the boat" into your armpits with each finger and the thumbs. Activate the shoulders as you do this and try to get the entire chain of muscles involved in the movement. Have someone put the fingers of one of his or her hands between your shoulder blades to spot you. Try to squeeze his or her fingers with your shoulder blades as you start a repetition of the exercise. Try to pull the bar into your sternum as you pull your elbows into your armpits. Also focus on gripping hard with the little fingers as you pull into the bar. Imagine that you're trying to "corkscrew" your hands through the bar and turn your palms up (supination of the wrists). This will help you recruit more muscles. Keep the hips locked out and the midsection braced throughout the movement, especially the negative portion. Take a deep breath in through the nose before pulling into the bar (positive), hold the "flexed" position for 1 second (focus on bracing), and exhale from the navel as you reverse the "corkscrew" motion and return from the bar (negative). Remember to maintain bracing and muscular coordination at every part of the movement. These basic tips will help you with the rest of the progression. The next exercise involves you stepping your feet under the bar some and trying to get "hollowed out" at a 45 degree angle to the floor, or close enough. This makes the exercise harder. The closer you get to fully horizontal and under the bar, the harder. Angled pullups are done with your body at about a 45 degree angle to the ground. Aim for at least a few reps in as hollow a position as you can. Horizontal pullups are done with your body below the bar and hollowed out. Make the exercise harder by getting parallel to the ground (you can use a block, folded up cheese or similar to put your feet on) and/or by using a lower bar (perhaps lower a bar at gymnastics). To make the exercise easier, use a higher bar (perhaps raise a bar at gymnastics) and/or bend at the knees (this gives you a better position for pushing down through the legs to assist the movement). Once you become proficient with horizontal pullups, perform them with an underhand grip and the hands next to each other. Perform them normally (elbows into armpits and so forth) until you become proficient with this variation. This will help build up the biceps. The next "toughener" is locking your elbows onto your ribcage, as if you are about to perform biceps curls. You will essentially be performing "biceps curls horizontal pulls". It will 19
Owen Johnston - plus.google.com/+OwenJohnstonKarate take some experimenting to figure out the best angle of the body of the floor for you to start with. Feel free to bend at the knees at first so you can push a bit more with the feet, to help get used to this variation. Once you feel good about these, move on to the pullup progression. Remember the same lessons you learned about breathing, bracing, grip, and pulling into your armpits. Have a partner assist you with pullups, or perform leg assisted pullups. Either variation will help you strengthen and learn how to engage the lats. The key point to remember is to still pull your elbows down into your armpits. Imagine you're trying to pull the bar into your chest. With leg assisted pullups, use a bar low enough that you can at least partially squat down while holding onto the bar. You will want your elbows and shoulders to be fully extended. Stand straight up as you pull your elbows straight down into your armpits. As you get stronger, pull more with your arms. Remember to not push away from the bar at any point so that the exercise does not revert to a variation of horizontal pullups. The motion should be strictly up and down. Once you feel comfortable with this, move on to bent leg "jackknife" pullups. From a leg assisted pullup position, keep your hands on the bar and move your feet forward. The thighs should be parallel to the ground and the heels should be planted. Ideally, your shins will be perpendicular (90 degree angle) to your thighs. Your legs can still assist with the motion, but put more of the focus on pulling straight down through your arms. Also feel free to ask a partner to give you a spot between the shoulders. If you are having trouble with this exercise, even with a spot, try at least one of these: 1) ask for a heavier spot; 2) go back to horizontal pullups and perform the reps very slowly, with a focus on holding the "flexed" position at the top for a few seconds (train this with different hand positions) Once you feel proficient with this exercise, fully extend the knees. If the bar is low enough, or you have something safe and sturdy to place your heels on, you can get your body into a full "jackknife" position (hips are bent at a 90 degree angle). Using a higher bar will make the exercise easier, as long as your feet are still in contact with the floor at the top (fully flexed) portion of the movement. Not elevating your feet will also make the exercise easier, since they are in a better position to assist, as you push through your heels. Elevating the legs higher than horizontal makes the exercise harder, as the legs are not in a good position to assist. You will have to focus even more on pulling down through your lats. Using a lower bar can also make the exercise harder, as long as you are able to fully extend the elbows and shoulders at the bottom position of the movement. Start with your feet on the floor. At first, keep your feet in contact with the floor throughout the entirety of this exercise. Try to fully master this exercise before adding the next "toughener". 20
Owen Johnston - plus.google.com/+OwenJohnstonKarate Again, make sure you do not push away from the bar when using your legs to assist. If you are having trouble with this, and have a training partner or coach that you are very comfortable with, you could ask him or her to spot you. What he or she will do is place a hand on each side of your ribcage and help you stay vertical. He or she should cue you to pull straight down and bring your elbows into your armpits. He or she could instead place one or both hands on your back and give you the same cues as he or she pushes straight up. The next "toughener" is to only push down through your heels during the bottom portion of the upwards phase and allow the feet to hang down (if possible) or tuck the feet under you as you ascend. This will make the exercise closer to a full pullup without self assistance. A training partner or coach can give you a light or heavy spot behind your shoulders or torso, or give you a spot under your ankles as you ascend. Build up to doing 2 sets of 10 repetitions this way. In one of my videos, I demonstrate some of the pullup exercises listed in this article. The video is included in my training playlist on YouTube. Point your browser to this short link to view it - http:// tiny.cc/trainingplaylist 21
Owen Johnston - plus.google.com/+OwenJohnstonKarate Dead hang gymnastics pullovers Dead hang pullovers require proficiency and strength in pike lifts and pullups. (A pike lift is when you hold onto an overhead bar and perform a leg raise with knees locked and toes pointed - touch toes, feet, or shins to the bar, and reverse, all in a slow cadence.) A potential training progression to a dead hang pullover from a high bar: Australian pullups on a low bar - build up to 2 sets of 20 at a slow cadence with proper form; a partner can give you a light spot under your shoulders; good partner cues are "squeeze my fingers with your shoulder blades", "try to pull the bar down into the floor", and "stay hollow" (the last one reminds him or her to keep the toes pointed and midsection tensed). Partner assisted pullups on a high bar - build up to 2 sets of 10 at a slow cadence with proper form; partner can give a light spot through your legs at first, and once you can do 10 this way, have your partner give you a light spot by placing his or her palm in the center of your upper back (just below the shoulder blades), and pushing just enough to get you through the concentric sticking point Self assisted pullups - you can use a few different self assisted methods. One way is to use varying degrees of leg assistance. The easiest variation is to get directly under a bar that is at a height that will allow you to keep a hold of it while still standing on the contact surface (mat or floor, for example) and at least slightly bending at the knee. Basically, you are starting at a dead hang while at least partially squatting down. Assist the upwards pulling motion by standing up straight, but do so with a slow cadence. As your chin clears the bar, tuck your feet behind you and hold the topmost position for a 1 second count, then place your feet back onto the contact surface and slowly lower back down into the bottom position. To make this harder, simply place your feet a little further out so that your legs will not be able to help as much. This takes some experimentation. Build up to performing jackknife pullups, where your legs are fully straightened out and at about a 90 degree angle to the torso. Place a mat or block under the feet if needed, or ask for partner assistance. As you pull upwards, you can still press down slightly through the heels. You will want to be "hollowed out" with the legs when you get to the top position. Pullups without assistance - build up to 2 sets of 10 at a slow cadence with proper form; keep the body in hollow and the midsection tight; drill scapular retraction and hollow body drills separately if needed to ingrain proper technique and full body tension. L-hang pullups - build up to 2 sets of 10 at a slow cadence with proper form. Self assisted pullover - there are a few ways to self assist. They all deal with generating momentum for the pullover. While a lot of gymnasts will be familiar with some of these, I can still provide some more details if anyone would like more. Dead hang pullover - get a hold of a high bar, start performing a pullup, and as you are 22
Owen Johnston - plus.google.com/+OwenJohnstonKarate pulling your torso up to the bar, start lifting your legs up to the bar. It will look like a mixture of a pullup and a pike lift. Your goal is to pull your waist to the bar. From there, roll your hips over the bar, then roll your wrists up to the top of the bar and lock out into jump front support position. Dead hang pullovers are easier if you can grip the bar without having to jump to reach it. 23
Owen Johnston - plus.google.com/+OwenJohnstonKarate One arm pullup training One arm pullups are an impressive feat of strength, and take a lot of dedicated training to work up to. You don't need any specialized equipment, either – just your own bodyweight, knowledge of progressive principles and exercises, and a horizontal bar. Let's explore how to work towards one arm pullups. Firstly, I'll recommend two books and a certification that are invaluable for calisthenics enthusiasts, martial artists, and coaches. Secondly, starting on the next page is a description of a useful strength training method as well as my own progression towards them. Lastly is a potential progression. The first Convict Conditioning book – which sparked the resurgence of interest in progressive calisthenics - has an amazing progression for pullups, which helps lay out a plan for training towards one arm pullups. For a lot more information about progression in calisthenics, check out the other articles in this guide. My progress towards the one arm pullup, a useful training method, and a sample progression -Met the Convict Conditioning progression standard for uneven pullups (step 7 in the pullup progression). - Improved form and reps for bar and towel pullups, which are essentially a form of self- assisted pullups. Bar and towel pullups are similar to assisted one arm pullups (step 9 in the progression), but you do not let go of the towel in the top half of the movement. - Had trouble breaking into 1/2 one arm pullups, though, so I started working on the weighted pullup progression in Steven Low's book “Overcoming Gravity”. - Moved to using what Coach Paul Wade calls the Hartigen Method for uneven pullups. This method is a 5/4/3/2/1 "ladder" protocol wherein you choose the hardest exercise you can perform for 5 quality reps. The final work set includes a 10 second flex hang at the top and a 10 second negative. I was eventually able to perform uneven pullups with good form with Joe's system. -I applied a 5x5 scheme to Commando pullups, then revisited uneven pullups using the Hartigen method. I eventually progressed to applying this method to Archer pullups. Over time I tightened up form and built up to the full 10 seconds of dynamic tension and the 10 second eccentric at the end. -I began working an Australian pullup progression twice a week, up to Archer Australian pullups and one arm Australian pullups, plus horizontal hangs & negatives without assistance. 24
Owen Johnston - plus.google.com/+OwenJohnstonKarate -I also began gradually training my way back through the vertical pullup progression. I worked this progression once or twice a week with a goal of 5x5 for slow reps, and I still “greased the groove” for pullups. -I spent several weeks working with weighted pullups and chinups to help me break past my plateau. After that I started working uneven pullups again, but placing the off hand lower on the working arm, to make it more difficult. I gradually worked up to placing the off hand near the elbow. -I have been working with archer pullups, self-assisted one arm pullups, and self- assisted one arm pullup negatives. The goals are to perform self assisted one arm pullups as described in step 9 of the pullup progression in Convict Conditioning, then to build up to the progression standard. The next steps are to work up to jackknife one arm pullups, and one arm negatives. Over time I will gradually decrease leg assistance until I can perform one arm pullups. Essentially, the Convict Conditioning pullup progression is still very solid, but for most trainees, will require extra steps between Steps 7 and 8 in the progression, as well as between Steps 8 and 9. On the next page I list a potential progression, with tougheners for some of the exercises. I am not dogmatic about this approach. You're encouraged to add other steps as needed, and you don't have to use all of the steps below, or work with only one at a time. Explore and experiment! It may even be a good idea to split horizontal pullups into their own progression, leading to one arm Australian pullups or even harder variations (such as torquers). Such a progression could include archer Australian pullups, close grip Australian pullups, and more. 25
Owen Johnston - plus.google.com/+OwenJohnstonKarate Potential one arm pullup progression 1. Vertical / straight pullups 2. Angled pullups 3. Table pullups 4. Australian pullups 5. Jackknife pullups (feet elevated; lower base makes it easier) 6. Pullups 7. Close grip pullups (over time, bringing the hands closer together) 8. Commando pullups (over time, putting more emphasis on one arm) 9. Uneven pullups (over time, putting assisting hand lower on working arm) 10. Around the worlds 11. Archer pullups 12. Jackknife one arm pullups *Feet elevated. To make the exercise easier: bend the knees during the exercise, and/or use a lower base. Tougheners: keep the legs straight during the exercise, and or use a higher base for your feet to push down on (up to having the legs to form a right angle to your torso). 13. Partner assisted one arm pullups *To make the exercise easier: your partner can push harder. Toughener: Instruct your partner to only push through the concentric sticking point or when your movement starts to slow down. Make sure you have good communication with your partner to insure safety. However, if you feel you need too much assistance with this exercise, go back to jackknife OAPUs. 14. Self-assisted one arm pullups *Hold on to a vertical base with your free hand (such as the vertical pole of a pullup unit). Keeping the assisting hand closer to you makes it easier to push downwards, as does keeping it higher. Tougheners: Lowering the assisting arm and/or keeping it further from you; only push through the concentric sticking point with the assisting arm; use a towel or rope for self- assistance, since either would be an unstable “base” to push downwards on; keeping an L-hold position with the legs during the exercise. 15. One arm pullups *Kicking up with the legs makes this easier, but using little to no momentum (keeping the knees locked and legs immobile) will make it harder. 26
Owen Johnston - plus.google.com/+OwenJohnstonKarate Jowett Pushups One of the best calisthenics exercises for the chest is Jowett pushups, named after the strongman George F. Jowett. You will need three sturdy chairs or parallettes and one chair for this exercise. Park benches may also be used. When using chairs, arrange two of them so that they are turned inward and facing each other. These two chairs should be placed about your shoulder width apart. The third chair will be placed at a distance of about your height from the other two. Stand with your back facing the third chair, then bend forward at the waist. Carefully place one hand on each of the chairs facing each other, and lock out to the top of a pushup position. Carefully place your feet, one at a time, on the chair behind you. Slowly bend at the elbows while keeping your abdominals braced. Aim to stretch your chest just below the level of your hands before pushing back up. This provides a deeper range of motion and makes the exercise more analogous to bench pressing, especially if you are wearing a weight vest or sandbags. The idea is that the deeper range of motion puts you at more of a mechanical disadvantage, forcing your muscles to work harder to complete the exercise, therefore inducing more strength gains. It also helps to strengthen your muscles in positions where they are the weakest, forces you to load your muscles in a stretch, and helps you recruit more muscles. Getting that stretch at the bottom also helps build muscle. I demonstrate Jowett pushups and other exercises in my video “A few park bench exercises”. The video is included in my training playlist on YouTube. Point your browser to the below short URL to view it - http:// tiny.cc/trainingplaylist 27
Owen Johnston - plus.google.com/+OwenJohnstonKarate Gymnastics backbend tips Build up to performing a deep bridge before teaching yourself how to perform a backbend. Once you have a strong bridge, start performing the exercise “wall walking down”, which is basically a wall supported backbend. Remember to keep your back arched and to stay balanced as you follow your hands. Of course, you will ultimately want to teach your body to not rely on support from the wall, but it is still helpful at first as you are learning the mechanics and building flexibility. As you improve at both, gradually depend on the wall less and less. Once you feel as if you barely need the wall, ask a training partner to spot you for a backbend. He or she will put one hand under your shoulders and another hand under the small of your back to encourage you to keep your back arched. Follow your hands throughout the skill. If necessary, revisit the bridge and improve your form. Try to deepen your bridge by “walking” your hands a few inches closer to your feet. Perform your reps very slowly with a focus on squeezing out a deep bridge every time in the top position. To practice recovering from a backbend, try “wall walking up”. Get into a full bridge with your chest as close to the wall as you can get it. Place a hand on the wall and push down on it to start lifting yourself off the ground. Follow with the other hand. Gradually walk your way up the wall until you can push off it and rock forward into a standing position. If you find it too difficult to start this way, here is a way to make it easier. Start with wall walking down, and find the lowest point from which you can walk back up under control. Try to walk down the wall a few more inches each time you practice the exercise, until you are able to place your hands on the floor and walk back up. 28
Owen Johnston - plus.google.com/+OwenJohnstonKarate Mobility work – tension-flexibility training A lot of these are "tension flexibility" exercises that train strength, balance, and flexibility. Of course, like any bodyweight only movement, those particular exercises can be modified to emphasize one quality more than the others while emphasizing the others less. Exercises marked with an asterisk aren't strictly "tension flexibility" exercises, but can be used or modified for that. Lastly, this is not meant to be a comprehensive list. The exercises on this list can be ignored or modified as needed, or substituted with others. Strength-led stretches not only help to open up and “oil” the joints, but also train the muscles and connective tissues. Passive, especially forced, stretching – while useful in certain contexts, such as gymnastics, dance, and martial arts – can potentially lead to injury. It also doesn't train the muscles and connective tissues to move the joints throughout their range of motion. On the other hand, strength-led / “tension-flexibility” stretches train mobility – the ability of the muscles to control the joints throughout their range of motion. Flexibility by itself is defined as "the absolute range of movement in a joint or series of joints that is attainable in a momentary effort with the help of a partner or a piece of equipment." (Mobility Training for the Martial Arts, by Tony Gummerson.) All in all, mobility work improves joint health. 1. Cossack stretches – called spider stretch, by many gymnasts 2. Progression for pistol squat* (basically one leg squat) A. Partner assisted one leg squats throughout a full or partial range of motion - go back to doing deep, slow split squats if you're not able to do partials yet B. Self assistance - i.) Use a sturdy object to sit on in the bottom position of partial squats. Less range of motion is easier; more R.O.M. is harder - and remember to keep tension throughout the movement. ii.) Stand on a sturdy object with the working leg and let the non-working leg hang. Be prepared to "catch yourself" on the non-working leg if you're still working on the balance requirement. Push through the object you're standing on with your working leg and aim to straighten the knee, but a partial movement is fine at first with this exercise as well. Steadily tighten up on form as you improve your strength with these. Once you feel comfortable with these, try to bring the non-working leg to where it is parallel to the ground, during the eccentric movement of the squat. iii) Self assisted pistol squats on the ground - using a sturdy object under your foot or pressing off of it with the hand that is on the same side as the non-working leg. Higher objects are easier, lower objects are harder. Unstable objects also make it harder (basketball, etc.). Remember to take it slow and hold very tight tension on the non-working leg. As you improve, the hamstrings of the non-working leg and the quadriceps of the working leg get a better and better stretch. 29
Owen Johnston - plus.google.com/+OwenJohnstonKarate C. Wushu squat D. Transition to wushu squat from Cossack stretch 3. Bridge hold progression. a. Pulling feet in while in short bridge b. Tabletop, straight bridge, head bridge, angled bridge c. Wall bridging, one arm and/or one leg bridge, stand to stand bridge, etc. 4. Cat stretch 5. Twist work 6. Midsection holds (L-sit etc.) 7. Full ROM hanging leg raises 8. Standing partner stretches against a wall.* These are technically passive forced stretching, so be careful not to go too far – I kept these on the list since the person being stretched can hold tension in the top position of the stretch. The key to not going too far, though, is to only stretch as far as feeling mild to moderate discomfort. One can also try a modified version, where one leans against flat against the wall and lifts a leg as high as possible in a slow and controlled manner, with the goal of locking the knee out. 9. Calf stretches off elevation 10. Lever work on bars 30
Owen Johnston - plus.google.com/+OwenJohnstonKarate A Karate Approach to Calisthenics To view my video on this subject, visit my training playlist on YouTube. Short URL – http://tiny.cc/trainingplaylist Like many of my generation, I grew up watching movies like The Karate Kid, Kickboxer, Enter the Dragon, Drunken Master, and Rocky. The larger-than-life characters from these films wowed us with their fighting skills and never-give-up attitudes. A common theme they all share is that the main character is an underdog who must train hard to become a better fighter and overcome his seemingly invincible opponents. The training methods employed often include some tough calisthenics skills. I’m sure we all remember seeing Rocky do uneven pull-ups in the second film, and dragon flags in the fourth. The perseverance of our heroes, the amazing skills they learned, and the rigorous training methods they endured inspired many of us to take up martial arts and training ourselves. Bruce Lee popularized the dragon flag as well as other difficult bodyweight feats, like his two finger push-ups. He espoused improving your athletic performance in order to improve your martial performance, as well as to help fully express the human body. Certainly, the martial-calisthenics connection is as old as man, yet Bruce was a great catalyst in the popularization of martial arts in America, inspiring many to train hard like he did. He said, “Life is never stagnation. It is constant movement…as well as constant change. Things live by moving and gain strength as they go.” I didn’t fully understand the implications of these words until I got into Progressive Calisthenics. There are certainly comparisons to be made between learning progressive calisthenics and martial arts. Coach Wade made some of these comparisons in “The Tao of PCC”. He brought up some important similarities to martial arts. “…nobody can remember a hundred techniques in a fight. What matters are the principles you absorb.” “You learn the form, you absorb the form, you discard the form.” Our training shouldn’t keep us stuck in a rigid form, but instead be directed to the fullest expression of ourselves with utmost efficiency and simplicity. In Jackie Chan’s older films, many of his characters often went through a transformation from a struggling student to a graceful, efficient and powerful athlete. The training was generally harsh, but once he absorbed the principles of his master’s art, he was ready to face the next challenge! Like the progressive calisthenics approach, traditional power training and body conditioning methods in Okinawan karate focus on bulletproofing the joints, improving flexibility, and building holistic, functional strength. There are a number of progressive bodyweight movements taught in Okinawan karate, including knuckle push-ups, fingertip push-ups and ultimately, wrist push-up variations. The exercises have very direct benefits for “bunkai” or application of kata. 31
Owen Johnston - plus.google.com/+OwenJohnstonKarate Of course, these exercises shouldn’t replace previous progressions, but supplement them. Also, don’t overdo it with directly training the joints. Be sure to allow plenty of time for your connective tissues to adapt. To regress any of these variations, you can practice them using an incline (wall, chair etc) or you can simply create less demanding leverage by kneeling instead of performing them from your toes. You could also adapt the Convict Conditioning push-up progression to these variations. (Coach Wade has already covered this for fingertip push- ups in Convict Conditioning 2.) Warm up your hands and forearms properly before working knuckle, fingertip or wrist push-ups. Afterwards, shake your hands out, and stretch your fingers and wrists. Like most push-up variations, knuckle push-ups strengthen most of the muscles used in straight punches. Knuckle push-ups also strengthen the wrists and knuckles, and help toughen up the skin. A course of fingertip push-ups, grip work, pull-ups, and proper use of a heavy bag will help you punch as hard as Rocky Balboa! Fingertip push-ups strengthen the finger extensor muscles. Naturally, they provide direct benefits to strikes using extended fingers. Fingertip push-ups can be progressed by doing push-ups on fewer fingers. Wrist push-ups strengthen the wrists for various strikes, and have very specific benefits for “ox jaw” and “crane” techniques. This push-up variation is done on the backs of the hands. You can also ease in by having one palm on the training surface instead of having both on the backs of the hands. Practice this way on both sides to maintain symmetry in training. 32
Owen Johnston - plus.google.com/+OwenJohnstonKarate A stretch commonly done in gymnastics will be useful in preparing for a wrist push-up progression. Sit in a kneeling position, look straight down at your knees, lean forward slightly and place the back of your hands on the ground, directly in front of your knees. Naturally, leaning forward will put some of your weight onto the backs of your hands, with the fingers turned inward. Cautiously lean into your hands until you feel mild discomfort. Hold this stretch for 10-30 seconds, then come up and shake your hands out. Repeat 1-3 times. There are “hidden steps” between this stretch and a wrist hold in the top position of a kneeling push-up. First, gradually build strength and flexibility in the wrists with the stretch until you can put moderate pressure onto the backs of your hands with little to no discomfort. The next part of the progression is to move your hands a few inches forward from the starting position and unfold your hips slightly as you start putting pressure on the backs of your hands. Imagine that you are trying to move a little closer to perfect form for push-ups (hips locked out, weight carried through arms and hands). Find the most difficult position that you can hold for 10-15 seconds when you put mild to moderate pressure on your hands. Gradually work towards the full kneeling push-up wrist hold. A sample progression: 1. Wall wrist push-ups 2. Incline wrist push-ups with one palm on contact surface and the back of the other hand on contact surface 3. Incline wrist push-ups 4. Kneeling wrist push-ups with same regression as in step 2 5. Kneeling wrist push-ups 6. Hold top of push-up position on backs of hands; use same regression as in steps 2 if needed at first 7. Full push-up with one palm on contact surface and back of other hand on contact surface 8. Full wrist push-ups 33
Owen Johnston - plus.google.com/+OwenJohnstonKarate Programming and volume for wrist pushups are straightforward. Since the joints don’t adapt as quickly as the muscles, and the wrists can tend to be injury prone, be conservative about volume. Practicing wrist push-ups once a week for low sets of low reps is a good rule. A few options for programming wrist training: 1) Adding it to an existing joint specialization session; see Convict Conditioning 2 for a template 2) Doing some wrist stretches, holds and/or pushups as part of your warm-ups for practice (whether karate or a sport that needs strong hands/wrists) 3) Doing some light stretches and other exercises as part of rehabilitating your wrists (of course, this will depend on what exercises your physician recommends) 4) Training wrist holds after a session of pushups 5) There are many other possibilities depending on your own needs, goals, experience, etc. Martial arts and calisthenics can work hand-in-hand to develop all of the qualities needed for the development of strength and technique. I hope that you, dear reader, find my examples of this to be clear and useful. The Okinawan martial arts and the methods that Coach Wade wrote about are ancient, but are still around because they work, and can work well together! 34
Owen Johnston - plus.google.com/+OwenJohnstonKarate A Karate Approach to Calisthenics, part 2 To view my video on this subject, visit my training playlist on YouTube. Short URL – http://tiny.cc/trainingplaylist Getting to a high level in martial arts requires balance, power, flexibility, and strength. In striking oriented arts such as karate, one’s joints and connective tissues must also be directly trained. Lastly, the body must be trained holistically in order to develop the needed coordination and power in techniques. In the previous article, I discussed karate style training for the upper body. Now, I would like to go into detail about specific calisthenics exercises that strengthen the lower body and midsection. These exercises also help with balance, tension-flexibility, and coordination. This helps to prepare the student for more advanced training methods, including power training, which I will detail later. Lastly, the exercises I detail will start with general strengthening exercises such as squats, and gradually become more and more specific to karate techniques and stances. This helps develop focus in one’s strikes as well as “rooting” and smooth transitions in stances and footwork. Of course, it also helps develop coordinated, full body strength against resistance, which sets the stage for training a makiwara board or heavy bag, and for power training. Lower body exercises - quads, glutes, calves Squats train not only the legs, but also the back to some degree when performed with proper alignment. The importance of posture cannot be overstated for exercise, as well as for combat. When training squats, look forward, keep your elbows in tight to the torso, and visualize protecting your centerline from your opponent. Breathe deeply on the way down, brace your abdomen, and slowly exhale on the way up. When breathing out, make sure to keep your abdomen braced and engage it as fully as possible in exhalation. Imagine that you are collecting energy on the way down and filling up your abdomen with it. Lastly, try pulling both hands back into a karate “hikite” position (fists chambered at hips) as you lower and inhale. As you stand and exhale, open your hands and slowly extend your arms in front of you while rotating your fingers so that they point straight up. This is like performing a slow and controlled palm strike with both arms. 35
Owen Johnston - plus.google.com/+OwenJohnstonKarate Coach Wade’s amazing progressions for squats and bridges in Convict Conditioning, as well as the calf raise progression Convict Conditioning 2, can give your lower body all the strength it needs. Work up to the progression standard for squats (step 5), while performing them “karate style” as detailed above. Also work up to the progression standard for short bridges (step 1 of the bridge progression) and for standing calf raises (also step 1). These will prepare you for the exercises to come. Of course, if you want a massive calves and a back made of steel, aim for the master steps of calf raises and bridges! For now, let’s move on to specialized karate-style calisthenics training for the lower body. Glute and hamstring training Many martial arts practitioners seem to forget the importance of paying attention to this area of the body. The glutes act as the antagonist to the hip flexor muscle group, called the Iliopsoas. It’s important to train both to maintain muscular balance and prevent injury. Both muscle groups are incredibly important in stances and kicking. This goes back to the idea of training for holistic strength. Below is a short progression of exercises to help develop the glutes and hamstrings. All of these can be performed without a partner or any special equipment. Glute / hamstring progression Short bridges One leg short bridges Foot elevated short bridges Foot elevated one leg short bridges Hip thrusts Foot elevated hip thrusts Build up to 3 sets of 50 reps 3 sets of 40 reps 3 sets of 30 reps 3 sets of 20 reps 2 sets of 20 reps 2 sets of 15 reps Stance training Now we’re ready to apply your strength to stances! These methods will drastically improve your rooting, balance, and coordination. Also, the deeper you go with each of these stances, the harder they become, and the more of a deep, isometric stretch you get. This helps develop tension-flexibility, which is an integral part of the striking oriented arts, especially kicks! Even if you are strong at squats, don’t be afraid to work on wall sit along with squats to start getting ready for the isometric work to come. After a tough lower body session, just put your back to a wall and slide down while bending your knees until your hamstrings are at a 90 degree angle to your feet. Aim to hold this for 20-60 seconds, then take a short rest, and perform the exercise once more. Build up to at least 2 minutes total time in wall sit. 36
Owen Johnston - plus.google.com/+OwenJohnstonKarate This exercise is also useful as a remedial exercise if you’re coming off an injury and your physician has cleared you for training. Just remember to ease into it slowly and practice safely. Don’t let your knees go past your toes during wall sit, or go below a 90 degree bend at the knees. Take deep breaths, brace your abdomen during the exercise, keep your heels planted, and your back straight. If any pain develops, immediately stop the exercise. Stance training progression Wall sit Horse stance Lunge / front stance Tree pose Cossack squat / back stance Build up to 2 minute hold 10 minute hold 2 minute hold 30 second hold per leg 2 sets of 10 per leg Power in techniques Once you have built up the requisite foundation of strength in stances and movement, it is time to work on power. To throw powerful strikes and kicks, one must be able to utilize strength quickly and in a coordinated way. The bodyweight exercises given previously helped to not only build strength, but coordination. What we need now is to work on acceleration! Below is a progression of techniques that may be used to build power in kicks. It can be modified to include roundhouse kicks instead of front kicks. Keep the sets high, but the repetitions low to moderate. An exception can be made for bunny hops, if you would like to build endurance. When practicing, remember to “block”. Blocking involves quickly pushing off the floor in order to transfer your momentum upwards. Keep your knees pointed forward when you’re in the air, and keep them bent when landing, so that they don’t absorb too much of the shock. Power Progression for front kick Straight jump Tuck jump Bunny hop Front kick from squat Front kick from lunge Jumping front kick Lunge to jumping front kick 37
Owen Johnston - plus.google.com/+OwenJohnstonKarate Abdominal training and tension-flexibility Karate also requires a strong core and the ability to contract your muscles throughout a range of motion. Midsection holds and leg raises are incredibly helpful in developing contractile tension in the muscles needed for kicking. I cover progressions for both in my Calisthenics Progressions article later in this guide. The side kick progression trains the sides of the abdomen (obliques) and develops tension-flexibility in the legs. Before beginning the progression, build up your legs with squats and your abdominals with midsection holds and/or leg raises. This will give you the holistic strength needed. Progression for side kick Side plank Side elbow plank Side plank hip raises Side leg raises Standing side leg raises Standing side leg hold Side kick Build up to 2 minute hold on each side 2 minute hold on each side 2 sets of 20 on each side 2 sets of 20 on each side 2 sets of 10 on each side 10-30 second holds on each leg 50 per side Exercises performed in the video - Foot elevated short bridges Foot elevated one leg short bridges Hip thrusts Horse stance Tree pose Lunge Vertical bunny hop Front kick from lunge Side leg raises Standing side leg hold 38
Owen Johnston - plus.google.com/+OwenJohnstonKarate Abdominal training basics I've found that the hardest thing to teach total beginners to calisthenics and those coming from a sedentary lifestyle is generating and holding tension throughout the entire midsection. The importance of this cannot be overstated in calisthenics, gymnastics, and martial arts. The implications for martial arts should be obvious - if you can't maintain tension in your midsection, how can you safely take a body blow or throw a powerful blow of your own? In progressive calisthenics, full body tension is an essential aspect of most skills, and as such, in progression. I help beginners pattern abdominal and full body tension through two very short and easy to learn drills. One drill is rolling from a pushup position to a "hollow" leaning plank, and the other is moving from "six inches" to "supine hollow body hold". Both are pictured at bottom. If the student finds the plank too hard to hold for long, I have them regress the beginning posture to an incline that they can hold with, at most, mild to moderate discomfort in the muscles for 10 to 15 seconds at a time. Basically, it has to be just hard enough to hold to be a challenge, without exhausting him or her too quickly; the goal is to work on the posture, coordination, and technique. Strength gains in total beginners are largely from neuromuscular gains. This means becoming more efficient at movement and using your muscles in a more coordinated way as you learn new skills, not just making your muscles themselves stronger. Some other invaluable "hollow hold" variations once you are comfortable with the previous two - hollow hold dead hang (using an overhead bar, pullup bar, or even a sturdy tree branch), front jump support (as done in gymnastics), inverted front hang, inverted back hang, Australian hollow hold (so named because you "go down under" the bar, and it more or less looks like an inverted hollow leaning plank) I've developed the above approach over time, and is a mixture of my experience in martial arts, gymnastics, and progressive calisthenics. 39
Owen Johnston - plus.google.com/+OwenJohnstonKarate Methods of progression in calisthenics Linear progressions - single, double, triple, or multiple progression. Most beginner trainees will notice some improvements (higher reps, improved form, what have you) every workout. A double progression consists of only two “intensity variables”: first, build up to a target number of reps in an exercise, then move to a harder exercise or variation of the previous one, and repeat. This is often called “milking strength”, “banking strength”, “paying your dues”, or “building training momentum”. The idea is that you will get as much benefit from an exercise as you can by staying with it long enough to build up to performing the target number of reps. A triple or multiple progression consists of having three or more variables. For instance, after hitting the target number of reps, you could tighten up form (which makes an exercise harder) or change a hand / foot position such that the exercise becomes harder. Aim for a target number of reps again, and once you can achieve your goal you will move to the next exercise. It’s best to focus on only a few variables at once, though, to make progress easier to track. Stepped and waved progressions; periodization. Most trainees who have at least an intermediate level of strength are likely to discover that the law of diminishing returns is kicking in, and overall progress is no longer linear. Progress will not come every workout for all of their exercises - maybe every other workout or maybe a little progress every week. This is a “stepped progression” instead of a linear progression. Tighten up form a little here, add a rep there - the main thing is to stay with an exercise but introduce slight changes as needed to keep the training momentum going, even when progress slows. There will be times, of course, that athletes getting into the higher end of the intermediate level of strength and the lower end of the advanced level of strength will start having trouble adding reps week after week to a moderately intense exercise. This will be the time to start looking into wave progression or other methods of planning training cycles. What follows is based on my personal experience with methods of progress. When an athlete hits a plateau on a difficult exercise, explore a few options to see what will help them tighten up form, or make the exercise slightly easier so that they can focus on form, reps, or another variable of the exercise more easily. At the advanced stage of strength, add specialization exercises to strengthen any areas that need attention, to assist progress in an exercise or overall training program / progression. 40
Owen Johnston - plus.google.com/+OwenJohnstonKarate A few bullet points to keep in mind. -There are general guidelines for practicing each type of movement and static hold. These form guiding principles rather than a dogmatic approach to strength, as it is good to be open to new ideas and willing to tailor programs to each trainee. -Due to individual differences in trainees, we should try to get as much experience and knowledge as we can about the movement chains (pullups, pushups etc.) and static chains (levers, bridges etc.), intensity variables, and long term progression. This will help gauge an athlete’s progress, tweak lesson plans “on the fly” during a workout, and so forth. -No matter what strength level an athlete is at, working towards high reps is still one of the most important ways to develop proficiency and strength in a style of movement. Repetition builds muscle memory, strength, and endurance. Basically, every exercise should be treated like a skill. -Safety is an integral part of all physical activity, and especially when performing exercises or skills where you leave the ground. As such, safety is a part of the design of progressive calisthenics movements and program design. Holding full body tension in all exercises, keeping an eye on form, and performing all repetitions with a slow to moderate cadence in the beginning stages of training not only help train strength, but also help to build joint health as well as prevent injury. Athletes should be reminded to not over-train or train to injury. Not only does venturing into over training do very little good for strength, it can be an obstacle to building strength, since it often just eats into precious recovery time and can lead to injury, making recovery take even longer. -Minimalism is an essential aspect of progressive calisthenics. This is why I did not bring up any specific equipment or apparatus. All you really need in order to train for high levels of strength is enough room to spread out your arms, something to hang from, and knowledge of the principles of progression. Of course, using creativity, one can also use everyday objects as makeshift equipment. Athletes should keep in mind, though, that safety is especially important to keep in mind when selecting and using such equipment. -Strength training provides many benefits to the human body and mind – including joint health, improved metabolism, beating stress, improved power and speed, help regulating emotions and sleep cycles, etc. - that strength should be the primary goal of exercise and considered the foundation of all athletic activity. Naturally, this is not the only priority, especially for athletes (whether competitive or not). -Brief, intense workouts build strength. The longer a training session is, the more it will venture into muscular endurance training. In gymnastics, having a high level of muscular endurance is necessary, but so is building a high level of muscular strength, for reasons mentioned above. -The technical guidelines for the progressions fall outside the scope of this article, but other articles in this guide detail some of these guidelines. 41
Owen Johnston - plus.google.com/+OwenJohnstonKarate Progressive Calisthenics Lifestyle Below are my thoughts about the variables and lifestyle factors that need to be taken into account for progressive calisthenics. Strength isn't just made in your workouts; you also have to include proper recovery and proper nutrition. 1. Leverage – increase or decrease 2. Range of motion – increase or decrease 3. Positioning – hand or foot (such as basketball pushups or putting hands closer together in pushups or pullups) 4. Unilateral or bilateral (one hand or both, one foot or both) 5. Correct form!!! It is an art. Be creative, but also have the discipline to go with it. Keep the correct body alignment for the exercise at all times. 6. Other tougheners – seek and find! Inter-set rest, volume, frequency, partner resistance, locked knees while doing calf raises, towel work for pullups, infinite possibilities in hand balancing arts, as well as the use of equipment in public parks. 7. Set S.M.A.R.T. goals – PLAN AHEAD! This also means you should log your workouts. 8. Lifestyle factors – nutrition, sleep, emotional health, recovery days, live clean 9. Specializations – only after competency in progressions for the basics. Specializations include neck, forearms, wrists, knuckles, feet and calves, gymnastics holds, odd objects for more full body strength, etc. 10. “Journey, not a destination.” LOVE TRAINING! Consistency, motivation, and creativity in training will fall into place when you relish every rep. Milk each exercise for all of the lessons it can teach you. Savor the gains and let nature take its course. Summary, and the name of the game – PROGRESSION! Burn that sole word into your mind and keep it there. We all have hard days – but take time to “improve the moment”! No matter what, keep moving forward as best you can, no matter what life throws at you. When you go to train, leave your problems at the door and get the work done. Don’t worry, your problems will still be there to keep you company when you get back. But you can get stronger RIGHT NOW. Mentally and emotionally, as well as physically. 42
Owen Johnston - plus.google.com/+OwenJohnstonKarate Ultimate Leg Training Make sure you have a safe, clear practice area that is at least several feet in length, although at least 40 feet is preferable. Warm up and stretch for at least 10 minutes before any leg training session. Also, do not attempt unless you are already in good physical condition and want to improve your leg strength, stamina, and tone. The exercises listed are functional exercises that do not require equipment. These exercises build explosive power and stamina in the legs, as well as help drill qualities needed for good footwork in martial arts. Of course, most or all of these exercises should also benefit most athletes. Give your legs at least least one day between workouts to recover. Also remember to not sacrifice proper form to complete the exercises more quickly or easily. Squats Start with performing normal squats continuously for one 2 minute round. The goal is to be able to perform squats continuously for three 3 minute rounds, with one minute rest after each round. An alternative to using rounds is to build up to doing 3 sets of 100 squats for each day you work out. Do not sacrifice proper form to complete squats more quickly / easily - you want to feel the burn! For added difficulty, do at least one set of 10 one legged squats, per leg. Horse stance training The first goal is to hold the stance with proper form for 10 minutes. Once this is achieved, practice sitting in a very wide and deep horse stance (you should be able to balance cups of water on your knees in this stance). Perform at least one set of 10 calf raises in this stance. For added difficulty, add a pair of hand weights to the stance. Duck walks Completely bend at the knees while keeping the back straight, and the hands up. Step one foot in front of the other without coming up at all. Move swiftly without dragging the feet, or losing balance. The first goal I recommend for this exercise is to be able to duck walk for 3 or 4 minutes at once. A sidewalk may be used for this exercise, but high quality, comfortable running shoes are highly recommended. High Difficulty Once you are proficient at duck walks, try the following - which should not be done more than 3 times a week. Perform duck walks until failure - again, preferably at least 3 to 4 minutes. Rest for at least 1 or 2 minutes. Perform duck walks until failure again. The first goal is a 20 minute session (with rests included). A very high goal is to duck walk half a mile. For additional difficulty, add a weight vest. 43
Owen Johnston - plus.google.com/+OwenJohnstonKarate Odd Object Training Odd object training – generally - involves exercise using heavy 'found objects' or implements that you can modify for strength training. Many odd objects such as Atlas stones have been traditionally used as part of strongman training. This type of exercise is nothing new, but it has been coming back into favor recently. An odd object is a non-rigid implement with a center of mass that is not fixed. In conventional strength training, the pattern of movement is fixed, whereas the load given by odd objects will cause adjustments during the movement. Some label this style of training 'real world training', and odd objects certainly have benefits, including versatility, portability, and simplicity. The only limit is your own creativity, as well! Odd object training used to be done because there were no other options – people either had no access to special equipment, or it simply had not been invented yet. Many old school strongmen also became very well known for using rather heavy odd or awkward objects. Such objects include kegs, anvils, Atlas stones, medicine balls, and sandbags. In this modern era, with all of the scientifically designed equipment and training routines that we can get access to, we can still benefit from odd object training. An increasingly popular philosophy of training – Dinosaur Training – promotes returning to the exercises and training of strongmen. I have personally found that working with odd objects and the exercises I have discovered for them have helped with coordination, wrist and forearm strength, and more. I ended up getting into this kind of training as a result of reading about the old school strongmen in the Convict Conditioning books written by Paul 'Coach' Wade, as well as reading about the ancient training methods of Okinawan karate in the book 'The Art of Hojo Undo: Power Training for Traditional Karate' by Michael Clarke. The book Overcoming Gravity – written by Steven Low - focuses on basic gymnastics progressions for building strength. Many old school strongmen were capable of great feats of not only strength, but skill and balance. Let's remember that it takes strength to hold many of the positions in gymnastics. As such, I recommend these books very highly. Like with odd object training, the types of training these books describe help a lot with neuromuscular strength and efficiency, musculoskeletal strength, coordination, and more. On the next page, I recommend some odd objects and other implements that I prefer to use, as well as alternative methodologies. I realize that this is far from a comprehensive treatment on the subject. As such, I do list my primary references at the end of the document and highly recommend that you visit them for plenty more exercises and ideas on constructing your own routines. 44
Owen Johnston - plus.google.com/+OwenJohnstonKarate Equipment List Old car tires Have a partner hold the tire so that you can practice body blows on it. Make sure to wear MMA or boxing gloves (or similar hand protection). You can also practice front kicks and roundhouse kicks. You can also modify a martial arts striking dummy or makiwara board by adding a car tire to it. 'The Art of Hojo Undo' illustrates a few ideas. Alternative idea – if you can acquire a used truck / tractor tire and a sledgehammer, there are many drills you can use. Cinder blocks Curls, presses, plank variations, wide squats, calf raises, lunges, shrugs, single arm rows, swings, farmer's walk, step-ups, and more! For squats, you can also practice assisted one leg squats – step 9 in the squat progression of Convict Conditioning. Instead of using a basketball or similar object, you will use the cinder block for support as you squat down and 'find' the block with your hand. For calf raises, you can practice them standing on the cinder block. You will stand with on the balls of the feet on the edge of the block and lower your heels slowly, with control. Make sure you have a sturdy chair or other piece of furniture, a training partner, or a wall nearby to maintain a safe level of balance. Where to find used tires and cinder blocks? Many times, auto repair shops will have plenty of old tires lying around they are happy to get rid of. If you're looking for cinder blocks, try the Freecycle Network - http://www.freecycle.org/ - or ask friends or local businesses. Abandoned buildings will often have old materials lying around, but investigating such buildings can involve legal and safety issues, so exercise discretion. Rice Bucket There are wrist strengthening exercises that you can work using a bucket full of rice. Such exercises are common in baseball and physical therapy. Rope Climbing and Towels for Hang Grip Work These make great additions to any grip or pullup training. Rope climbing is common in military style workouts. Like many odd object training methods, rope climbing and towel hangs build strength in the hands, wrists, forearms, tendons, and ligaments. Overcoming Gravity, a book I recommended earlier, recommends the use of a towel in its one arm pullup training progression. Also, the second Convict Conditioning book has a progression for hang grip work that includes the use of towels. The two progressions supplement one another very well. 45
Owen Johnston - plus.google.com/+OwenJohnstonKarate Sandbag training I have written a full article on sandbag training, which is also included in this guide. Some other ideas for strength training without special equipment Car pushing, chopping wood, using monkey bars or rafters for pullups and various gymnastics exercises, using chairs or picnic tables for 'chair dips' and decline pushups. The “Strongman (strength athlete)” entry on Wikipedia lists various “odd objects” and more in the “Events” section - http://en.wikipedia.org/wiki/Strongman_(strength_athlete) Hojo Undo / martial arts tools View my article on the subject later in the guide. My Primary References for this Article http:// en.wikipedia.org/wiki/Dinosaur_Training www.dieselcrew.com/how-to-odd-object-training www.artofmanliness.com/2010/03/18/odd-object-training-basics/ Also be sure to check out this page to look at training equipment that you can order - http://atomicathletic.com/store/ 46
Owen Johnston - plus.google.com/+OwenJohnstonKarate Old Time Strongmen – Training and Resources The old time strongmen from the 1800s and early 1900s were known for many legendary feats of strength. Many of these feats have not been replicated since! They used many kinds of training that are not commonly known, much less used, in "modern" gyms. Odd object training (such as anvils, sledgehammers, sandbags), progressive calisthenics, and various types of strongman training are coming back into fashion, however. The old time strongmen tended to not let any part of the body slip behind in strength, either - they trained the neck, forearms, calves, every muscle of the body. The benefits of this kind of training include coordination and agility, "all over strength" - power from head to toe, achieving a well balanced physique and a healthy body, building up insane grip strength and bulletproof joints, and well - learning how to do some awesome strength feats! Some of the types of training that strongmen took up included kettlebell work, sprinting and overall endurance training, the art of hand balancing and other gymnastics style training, lifting barrels, kegs, and sandbags; there were even mental training methods used. Compound lifts such as deadlifts, presses, snatches and other such "big movements", many of which are still used today, were also trained. The old time strongmen were indeed into many different types of training that would benefit them in some way. Of course, they also understood the importance of recovery and proper nutrition. They also understood that you don't necessarily have to go through super long, protracted workouts every single day to become insanely strong, or machines, or a gym. The most important things are to understand proper exercise techniques to work each part of the body, how to work at enough intensity to force the body to adapt, with enough frequency to produce lasting gains. Of course, dedication to the training and a long term outlook are also among the most important factors. Never rush your training - milk each exercise for all the strength gains you can possibly get out of it before moving up in intensity or load. As you progress in your training, whatever type of training you are into, remember to plan ahead. The more advanced you become, the more important it is to adjust frequency (how often you train, or how often you perform particular workouts), volume, exercise selection, intensity, and other factors. Here is a list of the many types of strength feats strongmen were known for, and fortunately the knowledge of training methods for these is still around. The below webpage links out to articles that describe these feats. YouTube videos, as well as books and DVDs are available through this page. Feats of strength - http://legendarystrength.com/feats-of-strength/ 47
Owen Johnston - plus.google.com/+OwenJohnstonKarate Resource List I own an official print edition of Hand-Balancing for Muscular Development by Bill Hinbern, and I highly recommend it. Head over to his website and visit the Products section, where you will find the book for sale as well as many other valuable courses - http://superstrengthtraining.com/ Some other very useful links - http://www.sandowplus.co.uk/ http://www.oldtimestrongman.com/ http://legendarystrength.com/?s=strongman http://www.functionalhandstrength.com/ Be sure to also check out the Odd Object Training YouTube playlist I compiled. It is included in my Google+ strength training collection. Collection - http://plus.google.com/collection/wExZWB Short URL - http://tiny.cc/onlinecollection Dinosaur Training - Lost Secrets of Strength and Development: http://www.brookskubik.com/ "MASTER THE TRAINING SECRETS OF THE STRONGEST MEN WHO EVER LIVED - AND BUILD MORE STRENGTH, POWER AND MUSCLE THAN EVER BEFORE!" 48
Owen Johnston - plus.google.com/+OwenJohnstonKarate Sandbag training for real world, functional strength Sandbag training is incredible for building functional, real world strength. It is also relatively inexpensive. Sandbags usually cost a few dollars each at a hardware store. Sandbags can normally be purchased at a hardware store for a few dollars each, and commonly weigh 40 to 45 pounds. Military surplus duffel bags also tend to be inexpensive, especially compared to the overpriced bags sold by equipment manufacturers. They are also quite common, both at army surplus stores and online. Also, there are some retailers that sell military style duffel bags online. I highly recommend purchasing duffels from Rothco, an Amazon seller, as their bags are heavy duty, and the price range is reasonable. You can perform almost any type of lift with sandbags. Also, because the sand shifts around, it forces you to stabilize the bags, giving you a harder workout. Sandbag training is very useful for firefighters and combat athletes, such as cage fighters and wrestlers. So, why waste your cash on a gym membership, or on "traditional" weights and machines, which can cost a fortune? Also, machines guide you through the motions and do not build truly functional strength that requires muscular synergy and coordination. The body was built to work holistically - train it that way! Sandbag training builds the kind of "uncivilized" brute strength needed to move real world objects - not just in the bigger muscles, but even the stabilizers and hands. Many trainees in gyms focus on only the beach muscles - biceps, triceps, pecs - but sandbag training builds all over strength and muscular balance, so needed for muscular health. Pour two sandbags into a duffel and try a few lifts - fireman's carry, clean and press, curls, squats, swings. Pour one sandbag each in a pair of sturdy backpacks and hold them anyway you like while walking. Build up to walking a quarter mile with them. It works the legs, back, and especially the arms. Eventually try bear hugging a duffel bag with two sandbags in it while walking. Build up to 3, 4, or even 5 sandbags in your duffel. If you are experienced in progressive calisthenics or gymnastics, try wearing a sandbag while performing chin ups, dips, and other exercises. This is one of many methods that can help you progress towards much harder movements such as one arm chinups. I have designed a series of sandbag + bodyweight training workouts, which are given in the Calisthenics Programs article later in this guide. Last, but not least, read "Dinosaur Training" by Brooks Kubik, as well as articles on awkward object lifting (which I will link below), for many more ideas. http://www.dieselcrew.com/how-to-odd-object-training http://zacheven-esh.com/real-world-strength/ http://www.brookskubik.com I have a Sandbag Training YouTube playlist, which is included in my Google+ strength training collection - plus.google.com/collection/wExZWB Short URL – http://tiny.cc/onlinecollection 49
Owen Johnston - plus.google.com/+OwenJohnstonKarate Caveman Conditioning: Uncivilized, Minimalist Training Methods Caveman conditioning revolves around rather uncivilized and minimalist, but very rewarding, strength training methods out in nature, whether it be the woods, the mountains, wherever. Why bother with a gym or expensive equipment when you can get your strength training for little to no money? Even if the closest thing to nature you have available to you is a public park, you can still get a free but difficult workout by trying some of the ideas from “caveman conditioning”! No matter where you go, you just need some creativity and knowledge of proper exercise technique. Please note – this article is not related in any way to the “Caveman Conditioning” of Bodyforce. This is my own take on “primitive” training methods, and no copyright infringement is intended in any way. Check out Bodyforce’s awesome Caveman Conditioning page by visiting the blog below and clicking on “Caveman Conditioning” - http://stuartdorrill.wordpress.com/ Precautions Dress for safety and for the weather. Always have permission to use the land. (Unless you, a close friend, or a family member owns it – in which case, knock yourself out. If you get yourself in trouble though, “I told you so.”) Take all proper precautions before you go into the woods, including hydration, sunblock, any needed equipment, hiking shoes, thick socks, and bug repellent spray. Caveman Conditioning – Strength Training Methods Drag away dead trees by hand. Chop down a tree for firewood. Shovel some dirt. You’d be surprised how great these are for training both strength AND endurance, until you’ve done one of them steadily for an hour. Especially in hot weather. You can use a relatively low but very sturdy tree branch for pullups, leg raises, various gymnastics exercises, and so forth. You could also perform a burpee, jump up to the branch explosively, do a pullup, drop, and repeat, for a full set. Run through and navigate the natural obstacle course that the woods provide – this includes jumping ditches. Climb trees for grip work and overall agility. Hang a rope from a tree and learn some rope climbing exercises to train your grip and overall body strength even more. Ropes are also useful in pullup variations and mud run style obstacles. Look into army training and drills for ideas. Look online for the Army Field Manual 21-20 and read it thoroughly. Clear any straw and or leaves in a particularly shady and grassy area that could be used for various calisthenics – just remember to wear long shirts and pants for this. Also make sure that if you’re going to use the area and regularly, spray it for ticks using Permethrin or another recommended pesticide. Anyway, some excellent calisthenics in such an area include using a tree for support when practicing gymnastics backbends or various handstand exercises. You could also wrap a length of heavy rope around a tree to use for striking practice. Just make 50