Download
1 / 29
1.62k likes | 5.73k Views
Basics of Orthopedic Implants. Reviewed by: Name : AGNES Purwidyantri Student ID No: D 0228005. Bone Properties. Density – 2.3g/cm 3 Tensile Strength – 3-20MPa Compressive Strength – 15,000 psi Shear Strength – 4,000 psi Young’s Modulus – 10-40 MPa. Orthopedics Terms.

E N D
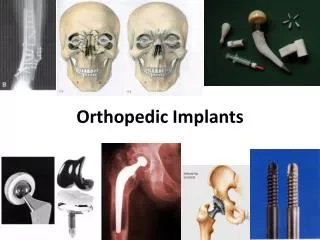
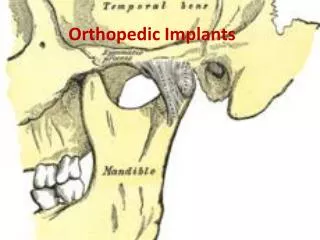
Basics of Orthopedic Implants Reviewed by: Name : AGNES Purwidyantri Student ID No: D 0228005
Bone Properties • Density – 2.3g/cm3 • Tensile Strength – 3-20MPa • Compressive Strength – 15,000 psi • Shear Strength – 4,000 psi • Young’s Modulus – 10-40 MPa Orthopedics Terms Osteoconductive – The property of a material that allows for the possible integration of new bone with the host bone. Osteoinductive – Characteristic in materials that promote new bone growth. Bioresorbable – The ability of a material to be entirely adsorbed by the body. Trochanter The second segment of the leg, after the coxa and before the femur
Screw Types OBLIQUE SCREWS • In subtrochanteric and high femoral fractures oblique screws may be required to be inserted up the femoral neck • Screws are 4.5mmX150mm
Screw Types CANNULATED SCREW • Screw Sizes • 6.5mm X 102mm • 4.5 X 12.5mm
Screw Types CANNULATED SCREW A bulbous ended nail with cannulated 12.5 mm screws is shown here successfully stabilizing a subtrochanteric non-union of the femur following a failed Gamma nail
Screw Types TRANSVERSE SCREWS In most subtrochanteric and upper femoral fractures it is much easier to insert transverse screws in the upper femur, than use oblique screws up the neck of the femur.
Screw Types Transverse Screws
Reference: Medical Multimedia Group (http://www.sechrest.com/mmg/) Example case The steps involved in replacing a diseased hip with an uncemented artificial hip begin with making an incision on the side of the thigh to allow access to the hip joint. Removing the Femoral Head Once the hip joint is entered, the femoral head is actually dislocated from the acetabulum and the femoral head is removed by cutting through the femoral neck with a power saw.
Reaming the Acetabulum • Attention is then turned towards the socket, where using a power drill and a special reamer, the cartilage is removed from the acetabulum and the bone is formed in a hemisperical shape to exactly fit the metal shell of the acetabular component.
Inserting the Acetabular Component • Once the right size and shape is determined for the acetabulum, the acetabular component is inserted into place. In the uncemented variety of artificial hip replacement, the metal shell is simply held in place by the tightness of the fit or by using screws to hold the metal shell in place. In the cemented variety, a special epoxy type cement is used to anchor the acetabular component to the bone.
Preparing the Femoral Canal • To begin replacing the femur, special rasps are used to shape the hollow femur to the exact shape of the metal stem of the femoral component.
Inserting the Femoral Stem • Once the size and shape are satisfactory, the stem is inserted into the femoral canal. Again, in the uncemented variety of femoral component the stem is held in place by the tightness of the fit into the bone (similar to the friction that holds a nail driven into a hole drilled into wooden board - with a slightly smaller diameter than the nail). In the cemented variety, the femoral canal is rasped to a size slightly larger than the femoral stem, and the epoxy type cement is used to bond the metal stem to the bone.
Attaching the Femoral Head • The metal ball that makes up the femoral head is attached.
The steps involved in replacing a diseased knee with an artificial knee begin with making an incision on the front of the knee to allow access to the knee joint. • Shaping the Distal Femoral Bone • Once the knee joint is entered, a special cutting jig is placed on the end of the femur. This jig is used to make sure that the bone is cut in the proper alignment to the leg's original angles - even if the arthritis has made you bowlegged or knock-kneed. The jig is used to cut several pieces of bone from the distal femur so that the artificial knee can replace the worn surfaces with a metal surface.
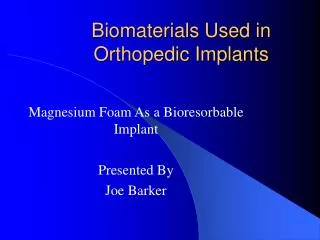
ORTHOPEDICS MATERIALS 1. Metal Metals For Implants • Must be corrosion resistant • Mechanical properties must be appropriate for the desired application • Areas subjected to cyclic loading must have good fatigue properties -- implant materials cannot heal themselves Orthopedic Devices with Metal • Plates and screws, Pins and Wires, rods (temporary) • Total joints (permanent) • Clips and staples
Metals Used in Implants • Three main categories of metals for orthopedic implants • stainless steels • cobalt-chromium alloys • titanium alloys • Material looked at in this project: • Magnesium Foam Stainless Steel • Generally about 12% chromium (316L, Fe-Cr-Ni-Mo) • High elastic modulus, rigid • Low resistance to stress corrosion cracking, pitting and crevice corrosion, better for temporary use • Corrosion accelerates fatigue crack growth rate in saline (and in vivo) • Intergranular corrosion at chromium poor grain boundaries -- leads to cracking and failure • Wear fragments - found in adjacent giant cells
Cobalt – Based Alloys • Co-Cr-Mo • Used for many years in dental implants; more recently used in artificial joints • good corrosion resistance • Co-Cr-Ni-Mo • Typically used for stems of highly loaded implants, such as hip and knee arthroplasty • Very high fatigue strengths, high elastic modulus • High degree of corrosion resistance in salt water when under stress • Poor frictional properties with itself or any other material • Molybdenum is added to produce finer grains
Titanium and Titanium Alloys • High strength to weight ratio • Density of 4.5 g/cm3 compared to 7.9 g/cm3 for 316 SS • Modulus of elasticity for alloys is about 110 GPa • Not as strong as stainless steel or cobalt based alloys, but has a higher “specific strength” or strength per density • Low modulus of elasticity - does not match bone causing stress shielding
Titanium Alloys • Co-Ni-Cr-Mo-Ti, Ti6A4V • Poor shear strength which makes it undesirable for bone screws or plates • Tends to seize when in sliding contact with itself or other metals • Poor surface wear properties - may be improved with surface treatments such as nitriding and oxidizing
Best Performance • Titanium has the best biocompatibility of the three. • Metal of choice where tissue or direct bone contact required (endosseous dental implants or porous un-cemented orthopedic implants) • Corrosion resistance due to formation of a solid oxide layer on surface (TiO2) -- leads to passivation of the material
Metallic Foam • Types of metallic foams • Solid metal foam is a generalized term for a material starting from a liquid-metal foam that was restricted morphology with closed, round cells. • Cellular metals:A metallic body in which a gaseous void is introduced. • Porous metal: Special type of cellular metal with certain types of voids, usually round in shape and isolated from each other. • Metal Sponges: A morphology of cellular metals with interconnected voids. Why Foam? (Mg Foam) • Open – cellular structure permits ingrowths of new-bone tissue and transport of the body fluids • Strength & Modulus can be adjusted through porosity to match natural bone properties
Requirements for Porous Implant • Pore Morphology (Spherical) • Pore Size (200m - 500m) • Porosity • High Purity (99.9%) • Biocompatibility Why Magnesium? • Bioresorbable • Biocompatible • Osteoconductive • Osteoinductive • Properties of bone can be easily attained using varying processing techniques
Processing the Mg by Powder Metallurgy Techniques Powder • Mg powder • 99.9% purity • particle size 180m • Binder: Ammonium Bicarbonate • Spherical Shape • 99.0% purity • Size between 200m – 500m Processing Steps • Blend powders until a homogenous mixture is attained. • Uniaxially press at 100MPa into green compacts • Heat treat at 200ºC for 5hrs, for binder burnout • Sinter at 500ºC for 2hrs
Results From Processing • Optical Micrograph of Porous Mg: • Small isolated micropores distributed in the wall of the interpenetrated macropores. • The micropores are on the order of microns, while the macropores are in the range of 200m – 500m
Results of Processing SEM Micrograph of Mg: • Micropores result from the volume shrinkage during sintering and are to small for bone growth • Macropores are made on the appropriate size level to promote the ingrowths of new-bone tissues and transport of body fluid
Adsorption and Toxicity • Adsorption Rates for Mg • The bone will adsorb around 40% of the Mg in the screw per year. • From this the lifetime of the screw would be between 5 7 years before no traces are left. • Toxicity • Recommended dosage of Mg per day is 350mg • 60% of Mg in the body is found in bones • In recent studies, a diet rich in Mg resulted in increases in bone density in postmenopausal women • Relatively low toxicity issues, but in vivo testing would clarify.