Download

1 / 30
300 likes | 415 Views
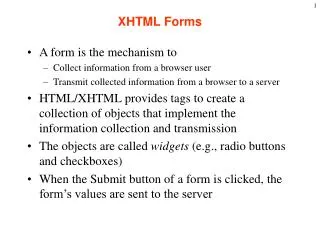
XHTML Forms for Data Collection and Submission. Chapter 5. Overview and Objectives. The use of web forms to collect data input by users The XHTML form element and its action and method attributes These XHTML “ form controls” (also called “widgets”) the input element

E N D
Overview and Objectives • The use of web forms to collect data input by users • The XHTML form element and its action and method attributes • These XHTML “form controls” (also called “widgets”) • the input element • the select and option elements • the textarea element • the submit and reset buttons • the fieldset and legend elements • the label element and its for attribute • Setting up two forms: • a Body Mass Index calculator form • a user feedback form • Getting ready to submit form data (but not actually submitting it) • This chapter is a “standalone” chapter on forms, and we do not incorporate them into our Nature’s Source website until Chapter 8. Chapter 5: XHTML Forms for Data Collection and Submission
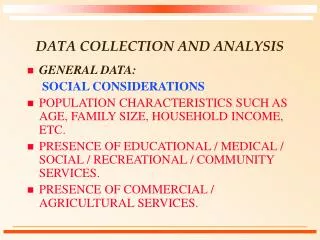
Why Forms? • Forms are just a fact of everyday life: employment applications, income tax forms, forms to tell the doctor the state of our health … • A website will often need to collect information from a visitor, especially if it hopes to do business with that visitor. • Thus the need for forms on our websites parallels our need for them in everyday life. • Online forms appear in various guises, but often look just like the paper forms we use. • Here are the three main aspects to the use of forms for collecting user data: • Designing an appropriate form to collect the desired data (this chapter) • Ensuring the data entered is the data you want (Chapter 6) • Submitting the data to a server for processing (Chapter 8) Chapter 5: XHTML Forms for Data Collection and Submission
The XHTML form Element andIts action and method Attributes • To place a form on a web page we begin by inserting an XHTML form element at the appropriate location in our page markup. • The form element by itself has no visual effect on the page display. • Data-collection elements such as input and textarea are nested inside the form element. • Both the form element itself and the data-collection elements it contains can be styled with CSS. • A form element will also contain a submit button which a user will click to “submit” the form data. • The form tag has an action attribute whose value says what to do when the submit button is activated. • In this chapter we will essentially ignore the action attribute and simply assign the empty string as its value. • The form tag also has a method attribute whose value may be GET or POST, indicating how the data will be transferred to the server. We ignore that attribute as well in this chapter. Chapter 5: XHTML Forms for Data Collection and Submission
A Body Mass Index (BMI) Calculator • Our first form will be used to compute a user’s body mass index. • A person’s body mass index is a quantity computed from that person’s height and weight. • BMI can be used as an indicator of total body fat. • For more information and the formula on which our calculator is based see the website of the National Institute of Health:http://www.nhlbisupport.com/bmi/bmicalc.htm Chapter 5: XHTML Forms for Data Collection and Submission
First Pass at a BMI Calculator:Display of bmi1.html with Its Empty form Element Chapter 5: XHTML Forms for Data Collection and Submission Courtesy of Nature’s Source.
Markup from bmi1.html <!DOCTYPE html PUBLIC "-//W3C//DTD XHTML 1.0 Strict//EN" "http://www.w3.org/TR/xhtml1/DTD/xhtml1-strict.dtd"> <!--bmi1.html--> <html xmlns="http://www.w3.org/1999/xhtml"> <head> <meta http-equiv="Content-Type" content="text/html;charset=utf-8" /> <title>Body Mass Index Calculator</title> </head> <body> <center> <h4>Body Mass Index Calculator</h4> </center> <p>Body Mass Index (BMI) is used as an indicator of total body fat.</p> <form id="bmiForm" action=""> </form> <p>Total body fat is correlated to the risk of ...</p> </body> </html> Chapter 5: XHTML Forms for Data Collection and Submission
Second Pass at a BMI Calculator:Display of bmi2.html Chapter 5: XHTML Forms for Data Collection and Submission Courtesy of Nature’s Source.
The XHTML input Element • The XHTML input element is an empty element only used inside a form element. • Each input element creates, in the form display, a form field (a place where the user can enter data or indicate a choice). • A typical form will have several input elements allowing the user to • Enter a line of text (a different element is used for more text) • Choose one from several mutually exclusive alternatives • Choose one or more from several alternatives that are not mutually exclusive • Indicate whether a single option has been chosen or not • All input elements have these attributes: • Atype attribute whose value determines what kind of input element it will be • A value attribute which is used in different ways, depending on the kind of input element being used • A name attribute which can be used to refer to the element in a script • Additional informational text must be present so that a user will know exactly what a particular input element is expecting. Chapter 5: XHTML Forms for Data Collection and Submission
The input Element with type="text" • This input element allows the user to enter a single line of text. • Example:<input type="text" name="height" size="7" /> • The size attribute specifies the visible width, in characters, of the text box display (default value is 20). • More characters than the visible number may be entered. • For this input element a value attribute could be used to supply a “default” value to appear in the text box until a user starts typing in that box. • See the text boxes labeled Height: and Weight: in the display of bmi2.html. Chapter 5: XHTML Forms for Data Collection and Submission
The input Element with type="radio" • This input element allows the user to choose one of several mutually exclusive alternatives. • Example:<input type="radio" name="heightUnit" value="in" /> • All input elements with type="radio" and with the same value for the name attribute form a group, of which only one may be selected. Select another one, and the previously selected choice will be “de-selected”. • The (required, in this case) value attribute contains the data transmitted from this input element when this form is submitted to a server. • See the “radio buttons” labeled inches and pounds in the display of bmi2.html. Chapter 5: XHTML Forms for Data Collection and Submission
The input Element with type="checkbox" • This input element allows the user to make one or more choices from one or more (non-mutually-exclusive) alternatives. • It can also be used to indicate whether a single option has been chosen or not. • Example: <input type="checkbox" name="details" value="yes" /> • All input elements with type="checkbox"and with the same value for the name attribute form a group, from which any number may be selected. • The (also required) value attribute contains the data transmitted from this input element when this form is submitted to a server. • See the option for getting a detailed BMI analysis in bmi2.html. Chapter 5: XHTML Forms for Data Collection and Submission
Form Markup from bmi2.html:Shows text, radio, and checkboxinput Elements <form id="bmiForm" action=""> <table summary="BMI Calculator-Textbox, Radio Button, Checkbox"> <tr> <td>Height:</td> <td><input type="text" name="height" size="7" /></td> <td>Units:</td> <td><input type="radio" name="heightUnit" value="in" /> inches</td> <td><input type="radio" name="heightUnit" value="cm" /> centimeters</td> </tr> <tr> <td>Weight:</td> <td><input type="text" name="weight" size="7" /></td> <td>Units:</td> <td><input type="radio" name="weightUnit" value="lb" /> pounds</td> <td><input type="radio" name="weightUnit" value="kg" /> kilograms</td> </tr> <tr> <td colspan="4">Please check here if you want a detailed analysis of your BMI: <input type="checkbox" name="details" value="yes" /></td> </tr> </table> </form> Chapter 5: XHTML Forms for Data Collection and Submission
Third Pass at a BMI Calculator:Display of bmi3.html Now using dropdown lists Chapter 5: XHTML Forms for Data Collection and Submission Courtesy of Nature’s Source.
The select and option Elementsfor Dropdown List-boxes • The select and option elements only appear within a form element and combine to produce a dropdown list-box • Example<select name="heightUnit"> <option>inches</option> <option>centimeters</option> </select> • Each option element is nested within a select element. • The first option element is the one that appears in the display of the dropdown list-box. • See the dropdown list boxes showing inches and pounds in the display of bmi3.html. Chapter 5: XHTML Forms for Data Collection and Submission
Form Markup from bmi3.htmlShowing select and option Elements <tr> <td>Height:</td> <td><input type="text" name="height" size="7" /></td> <td>Units:</td> <td><select name="heightUnit"> <option>inches</option> <option>centimeters</option> </select></td> </tr> <tr> <td>Weight:</td> <td><input type="text" name="weight" size="7" /></td> <td>Units:</td> <td><select name="weightUnit"> <option>pounds</option> <option>kilograms</option> </select></td> </tr> Chapter 5: XHTML Forms for Data Collection and Submission
The Missing Element fromOur BMI Calculator • Our BMI calculator contains form fields for the user to enter or choose all the necessary information for the calculation. • But … when and how is that calculation going to be performed? • We are missing a button (another input element) which the user can click to cause the calculation to be performed and the result displayed. • We postpone the discussion of such a button temporarily until we have introduced a second form. Chapter 5: XHTML Forms for Data Collection and Submission
Collecting User Feedback • Our second form will be used to collect feedback from the visitors to our website. • Such forms are found on many websites, and typically contain form fields for the following: • The user’s name, address, gender, telephone number(s),e-mail address(es), and possibly additional personal information • A place for the user to enter comments about the company’s website or to ask questions • Most of these form fields can be handled by the elements we already know about, but for comments and/or extended feedback we need a new element. Chapter 5: XHTML Forms for Data Collection and Submission
First Pass at a Feedback Form:Display of feedback1.html Chapter 5: XHTML Forms for Data Collection and Submission Courtesy of Nature’s Source.
The textarea Element • The XHTML textarea element only appears within a form element, and can be used to collect text when we want the user to enter more than will fit on a single line. • Example:<textarea name="message" rows="6" cols="30"></textarea> • The rows and cols attributes determine the number of text lines and character columns in the display area where the user is to start typing. • If the user enters more text than allowed for by the values of rows and cols, the textarea box will a provide scroll bar as appropriate. • See the textarea box labeled Comments: in the display of feedback1.html. Chapter 5: XHTML Forms for Data Collection and Submission
Partial form markup from feedback1.html <tr valign="top"> <td>Subject:</td> <td><input type="text" name="subject" size="40" /></td> </tr> <tr valign="top"> <td>Comments:</td> <td><textarea name="message" rows="6" cols="30“> </textarea></td> </tr> <tr> <td colspan="2">Please check here if you wish to receive areply: <input type="checkbox" name="reply" value="yes" /> </td> </tr> Chapter 5: XHTML Forms for Data Collection and Submission
Second Pass at a Feedback FormDisplay of feedback2.html Chapter 5: XHTML Forms for Data Collection and Submission Courtesy of Nature’s Source.
The input Elements of Typesubmit and reset • Finally we have two buttons the user can click to make something happen: • A “submit button” to send the form data to the server (remember, though, we are not actually doing that in this chapter):<input type="submit" value="Send Feedback" /> • A “reset button” if the user wishes to clear the form input and start over:<input type="reset" value="Reset Form" /> • In both cases the value attribute determines the text that will appear on the button in the browser display. • See the Send Feedback and Reset buttons in the display of feedback2.html. Chapter 5: XHTML Forms for Data Collection and Submission
Partial form Markup from feedback2.html <tr valign="top"> <td>Comments:</td> <td><textarea name="message" rows="6" cols="30"> </textarea></td> </tr> <tr> <td colspan="2">Please check here if you wish to receive a reply: <input type="checkbox" name="reply" value="yes" /> </td> </tr> <tr> <td><input type="submit" value="Send Feedback" /></td> <td align="right"><input type="reset" value="Reset Form" /></td> </tr> Chapter 5: XHTML Forms for Data Collection and Submission
Fourth Pass at a BMI CalculatorDisplay of bmi4.html (or bmi5.html) Chapter 5: XHTML Forms for Data Collection and Submission Courtesy of Nature’s Source.
Organizing Form Controls (Form Fields)with the fieldset and legend Elements • Often it is helpful to the user if form fields are arranged in logical groupings on the form display. • The fieldset element allows us to group a set of form controls and have the browser place a “box outline” around the grouping. • The legend element allows us to name, or provide a label for, such a grouping, and it must be placed directly inside the fieldset element with which it is associated. • The content of the legend element will appear on the top left part of the box border produced by the fieldset element. • See the result of using the fieldset and legend elements in the display of bmi4.html (or bmi5.html, which has exactly the same display, and so is not shown here). Chapter 5: XHTML Forms for Data Collection and Submission
One Fieldset Markup from bmi4.html <fieldset> <legend>Vital statistics</legend> <table summary="Vital Statistics"> <tr> <td>Height:</td> <td><input type="text" name="height" size="7" /></td> <td>Units:</td> <td><select name="heightUnit"> <option>inches</option> <option>centimeters</option> </select></td> </tr> <tr> <td>Weight:</td> <td><input type="text" name="weight" size="7" /></td> <td>Units:</td> <td><select name="weightUnit"> <option>pounds</option> <option>kilograms</option> </select></td> </tr> <tr> <td colspan="4">Please check here if you want a detailed analysis of your BMI: <input type="checkbox" name="details" value="yes" /></td> </tr> </table> </fieldset> Chapter 5: XHTML Forms for Data Collection and Submission
Behind-the-scenes Logical Groupingsfor Usability with the label Element • The XHTML label element has no visual effect on a form display. • It is used to associate a text label with its corresponding input element. • The association is achieved by making the value of the label element’s for attribute the value of the id attribute of the corresponding input element. • This association is a usability feature, since it allows the (usually text) label itself to be clicked to move the focus to its corresponding input element. That is, the user is not forced to click directly on the input element itself. • This difference cannot be illustrated in a static display. Instead the difference in behavior must be “experienced” by comparing the behavior of bmi4.html (which has no label elements) and bmi5.html (which does, but in every other respect is just like bmi4.html) when each is viewed in a browser and the user clicks on a text label for one of the form fields. • For example, when bmi5.html is displayed, click anywhere on the text of the “Please check here … ” instruction to see what happens. Chapter 5: XHTML Forms for Data Collection and Submission
Partial form Markup from bmi5.htmlIllustrating the label Element <tr> <td><label for="height">Height:</label></td> <td><input id="height" type="text" name="height“ size="7" /></td> <td><label for="heightUnit">Units:</label></td> <td><select id="heightUnit" name="heightUnit"> <option>inches</option> <option>centimeters</option> </select> </td> </tr> Chapter 5: XHTML Forms for Data Collection and Submission
Are We Ready to Submit Our Form Data? • We now have two forms (a BMI calculator form and a feedback form) capable of collecting all the data we need for each purpose. • But … are we ready to submit that data to a server for processing? • Not quite … before we submit that data we want to make sure the data we asked for is the data we got from the user. • And as for the BMI calculation, we will eventually ask the server to do it, but in the meantime we will see how it can actually be done on the client side without sending the information to the server. • These are our topics of discussion in the next chapter. Chapter 5: XHTML Forms for Data Collection and Submission