Download

1 / 52
560 likes | 857 Views
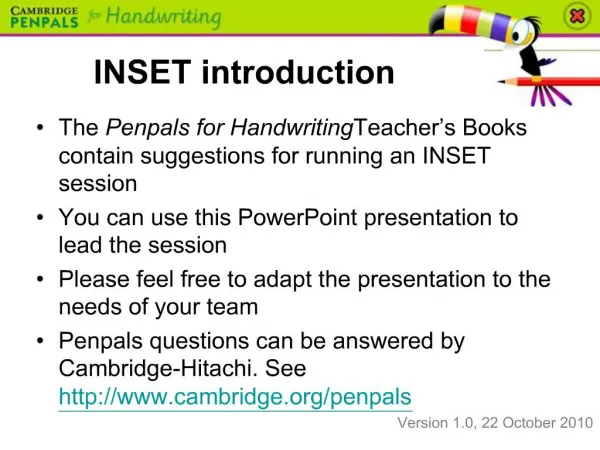
INSET introduction. The Penpals for Handwriting Teacher’s Books contain suggestions for running an INSET session You can use this PowerPoint presentation to lead the session Please feel free to adapt the presentation to the needs of your team

E N D
INSET introduction • The Penpals for Handwriting Teacher’s Books contain suggestions for running an INSET session • You can use this PowerPoint presentation to lead the session • Please feel free to adapt the presentation to the needs of your team • Penpals questions can be answered by Cambridge-Hitachi. See http://www.cambridge.org/penpals Version 1.0, 22 October 2010
Rationale • Handwriting should be actively taught • A flexible, fluent and legible handwriting style empowers children to write with confidence and creativity • Associating handwriting movement with visual letter patterns and aural phonemes will help children learn to spell
A practical approach • Time: A focus on whole-class teaching, with key teaching points clearly identified, allows effective teaching in the time available • Planning: Help with long-, medium- and short-term planning • Practice: Practice Books for independent writing • Revision: Opportunities for record-keeping, review and assessment • Motivation: Written with the support of handwriting experts to stimulate and motivate children. • ICT: CD-ROMs enrich and extend children’s handwriting experiences.
Five developmental phases • Readiness for handwriting; gross and fine motor skills leading to letter formation (Foundation / 3–5 years) • Beginning to join (Key Stage 1 / 5–7 years) • Securing the joins (Key Stage 1 and lower Key Stage 2 / 5–9 years) • Practising speed and fluency (lower Key Stage 2 / 7–9 years) • Presentation skills (upper Key Stage 2 / 10–11 years)
Why other schools use Penpals • A fluent, legible style • Progression from 3-11yrs • 5 clear developmental stages • Sensible links for application • Interactive and multisensory • Easy to use • Delivers results
The components Foundation 1 (ages 3-5) to Years 5/6 (ages 9-11)
Components • Teacher’s Books for each year group • Reception to Y5/6
Components • Practice Books for Independent writing • Handwriting patterns • Phonic and spellingsupport • Consolidation of highfrequency words
Components • Big Books for whole-classor group teaching by a TA • Write-on, wipe-off
Components • CD-ROMs for whole-class teaching • Posture advice • Warm-up clips for gross andfine motor skills • Skywriting • Animated letters and joins
A note on Foundation 1 • Book and CD-ROM cover essential pre-skills to precede any handwriting scheme • Mark-making and Creativity • ‘Talkabouts’ for Circle Time • Play-based learning • Supports children working within Phases 1 and 2 of Letters and Sounds • Penpals Foundation 1 should continue to be used throughout the Foundation Stage as children will continue to benefit from the activities even after they have begun working with the Penpals Foundation 2 resources.
A note on Years 5 and 6 • The components for Years 5/6 work differently: • A crash course in the basics for everyone ahead of SATs • A resource for focusing on specific issues in small groups • Book has presentation projects, assessment and practice sessions • CD-ROM split into Basic and Presentation
Y5/6 basic screens –common errors, and writing quickly and fluently
Y5/6 presentation screens – choosing an appropriate lettering style
Classroom organisation • Arrange tables so that all children can see the interactive whiteboard • Each child needs: • dry-wipe board (preferably with guidelines) and a marker pen, or • pencil and paper • Handwriting is usually done on a horizontal or slightly sloped surface
Timing • ‘Little and often’ is the most effective approach • The whole-class session for each unit (including warm-up): 15 minutes • The independent session:15–20 minutes. • Extra daily ‘practice times’ of 5–10 minutes are ideal. Use these to: • practise the high-frequency words • extend their pattern practice • revisit the letter pattern shown in the Practice Book
Home-school links • A take-home information sheet is provided for parents in each Teacher’s Book
Differentiation • Children working individually with a Teaching Assistant may benefit from additional practice on dry-wipe boards. • Take away activities provide excellent opportunities for differentiation as detailed above. • Cross-references to similar Take aways in earlier books can help you to select less challenging activities for those who need extra practice at a lower level. • Higher-achieving children can be challenged by higher expectations of control and evenness of letters.
Formative assessment • On-going assessment gives you the chance to spot any errors or inconsistencies that are likely to impede a fast, fluent hand in the future. • Be especially aware of left-handers and their pencil hold • The Practice Book page annotations in the Teacher’s Book enable you to draw the children’s attention to key handwriting issues.
Summative assessment • Beginning of year: The upper primary books provide a starting-point assessment PCM • End of year: Use text from the final unit in each book
Links to spelling • Learning to associate the kinaesthetic handwriting movement with the visual letter pattern and the aural phonemes will help children with learning to spell • A spelling/vocabulary link is identified at the start of each unit • Foundation 1 links to phases 1 and 2 of Letters and Sounds • Penpals units can be reorganised to support Jolly Phonics
Font • The font used for Penpals is Sassoon Cambridge Joiner • Intended as a model, but variety is natural! • The Show Alphabet section on the CD-ROM has animations of all letters • Also see the Teacher’s Book introduction for clarification on individual letters
Variations in font size • The following screens shows variations in font size throughout the scheme – see also page 16
Joins and break letters • Use the Show joining letter sets section on the CD-ROM, or an OHT of the inside back cover of this book, to demonstrate the joining letter sets and the break letters.
The two basic join types • Diagonal join (e.g. ): this is the most common join. It starts from the final flick on the baseline (or ‘curl’ in the case of the letter ). • Letters that come before a diagonal join are: • (and in which the flick begins below the baseline).
The two basic join types • Horizontal join (e.g. ) : this join is formed from letters that finish at the top of the letter rather than at the baseline. • Letters that come before a horizontal join are:
Writing on lined paper • Children should be encouraged to write on lined paper • As children progress, the width between the lines should decrease • The font size in the Practice Books is intended to reflect a development in handwriting • A photocopiable sheet with lines of a suitable width is provided in the Teacher’s Books. • Some children may prefer paper with guidelines for the height of ascenders and descenders.
Pencil hold • The most important thing is comfort and a hold that will be efficient under speed • The traditional pencil hold allows children to sustain handwriting for long periods, but there are many alternative pencil holds (particularly for left-handers) • Some children may benefit from triangular pencils or ordinary pencils with plastic pencil grips.
Pencil hold • Use the pencil hold videos in the Posture clips section on the CD-ROMs to illustrate good pencil hold.
Posture • A good posture and pencil hold are vital for good handwriting. • Discourage sitting on one foot, kneeling or wrapping their feet around the legs of the chair! • The images in the Posture clips area on the CD-ROMs illustrate good posture.
Left-handed children • There is no reason why left-handed children’s handwriting should be any worse than that of right-handed children • Left-handed children should not sit to the right of right-handed children as their papers will meet in the middle!
Left-handed children • Left-handed children should be taught to position their paper to the left of centre and then angle the paper for comfort • Use the left-handed pencil hold video and posture photograph inthe Posture clips areaon the CD-ROM toillustrate this.
Sloped surfaces • Children who experience some motor control difficulties often benefit from writing on a slight slope • Ring-binders are the easiest and cheapest way to provide a slope • Commercial wooden or plastic writing slopes are also widely available