Download
1 / 25
250 likes | 371 Views
Installation. Indoor Unit Installation. Typical Installation. Indoor Unit Installation. Installation Location. Indoor Unit Adequate Support!

E N D
Indoor Unit Installation Typical Installation
Indoor Unit Installation Installation Location Indoor Unit AdequateSupport! Buildingstructuremustbeadequatetosupporttheweight oftheunit.Failuretoensureadequatestructuralsupport couldresultinunitfallingfromitslocationwhichcould result in death, serious injury, or equipment or property only damage. Avoidlocatingtheindoorunitwherethereturnand/orsupply airmaybeobstructed. Selectalocationwhereitiseasytodrainthecondensing waterandconnect to the outdoorunit. Keeptheindoorunitfarawayfromheatsources,vaporand flammable gas. Besurethattheinstallationoftheindoorunitconformsto the installationdimensiondiagram. Besuretoleaveenoughspacetoallowaccessforroutine maintenance. Installinalocationwheretheunitismorethan3feetaway from other electric appliances such as television, audio de- vices etc. Select location where air filters can be easily removed.
Indoor Unit Installation Positioning for mounting console unit Step 1 Selectawalllocationsuitablefortheinstallationoftheindoor unit.(Refertotheinstallationmanualforlocationanddimensionspacings.)Locatebuildingsupportmemberssufficientto hold4timestheweightoftheunitbeinginstalled.Markthe location for the supportbracketsandsidescrews.
Indoor Unit Installation Positioning for mounting console unit Step 2 Mount the support brackets. Be sure that the brackets have been fixed firmly enough to withstand 4 times the weight of the unit. If wall anchors are needed for the four side screws, install them at this time.
Indoor Unit Installation Marking hole location Step 1 The piping and wiring can exit the console unit in one of six directions. Left side, right side, back left, back right, left down and right down. Knockouts are provided on the left and right sides of the unit for piping exiting either of these positions.
Indoor Unit Installation Marking hole location Step 2 Mark the hole position referencing the shown diagrams.
Indoor Unit Installation Drilling the hole in the wall to install the piping Step 1 When the piping and wiring exits the console unit at the back of the unit, special attention is required for the angle of the hole drilled. Find the location on the exterior wall where the piping and wiring will exit the building. Drill a 2 ½” diameter hole at a slight downward angle from the inside wall towards the outdoor wall so that the outside hole is a ¼” lower than the hole on the inside.
Indoor Unit Installation Drilling the hole in the wall to install the piping Step 2 Insert a sleeve into the hole to prevent the connection piping and wiring from being damaged while being inserted through the hole.
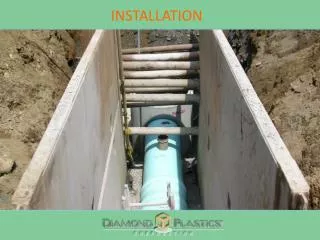
Indoor Unit Installation Drilling the hole in the wall to install the piping Step 3 Pass the piping and wires through the hole using caution to ensure tubing, wiring and insulation is not kinked or damaged. Insulate the piping hole both inside and out after the piping connections have been completed at the indoor and outdoor units. Note: Image for illustration purposes only. The entire drain line tubing must be wrapped to prevent moisture from cool condensate coming in contact with and damaging the ceiling or wall.
Indoor Unit Installation Installing console unit Step 1 Raise the console unit into position, placing the unit on the brackets. Indicator marks molded into the housing allow for easy alignment of the console unit to the brackets.
Indoor Unit Installation Installing console unit Step 2 Slide the front cover locks to the open position and remove the front cover.
Indoor Unit Installation Installing console unit Step 3 Remove the screws holding the case front in place. Release the retainer clips on the lower left and right sides of the case and pull the bottom of the case out from the unit. Lift the case up and release the four top clips located along the top edge of the case front. Remove the case front from the console unit.
Indoor Unit Installation Installing console unit Step 4 Locate the four side holes on the console unit and install the four screws.
Indoor Unit Installation Installing the water drain pipe Step 1 Attach the condensate drain line to the console unit drain line. Insulate the drain line as necessary.
Indoor Unit Installation Installing the water drain pipe Step 2 The condensate drain line should have the proper gradient to ensure proper drainage. Make sure the piping does not have any droops or sags in it that may create a trap in the line.
Indoor Unit Installation Installing the connection pipes Step 1 A flaring kit may be necessary for the installation of the lineset.
Indoor Unit Installation Installing the connection pipes Note:Firstconnecttheconnectionpipetotheindoorunitand then tothe outdoor unit. Pay attention tothe pipebending.Be suretonotdamagetheconnectionpipe.Toavoidleakagebe surenot to over-tighten thejoint nut. Note:Refrigerantlinesshouldbeseparatelyinsulated. Oncethepipinghasbeenconnectedtotheoutdoorunitand aleaktesthasbeenperformed,slidetheinsulationoverthe joints to completely insulatetheconnections. Align the center of the piping flare with the relevant fitting. Screwintheflarenutsbyhandandthentightenthenutswith a spanner and torque wrench. Refer to the chart for proper torque.
Indoor Unit Installation Installing the indoor unit wiring Step 1 Remove the cover plate, revealing the main PC board and terminal block.
Indoor Unit Installation Installing the indoor unit wiring Step 2 Firmly attach the power connection cables to the terminal block in the indoor unit, making certain to observe the proper terminal connections as shown on the unit wiring diagram. Note:Inadditiontotheoutdoorbreaker/fusedisconnect, a breaker or fuse is required for each indoor unit. The installation must be done in accordance with National, State, and/or local codes.
Indoor Unit Installation Installing the indoor unit wiring Step 3 The electric wire must be tightened securely with the wire restraining clip.
Indoor Unit Installation Installing the indoor unit wiring Step 4 Reattach the cover plate to the electric box.
Indoor Unit Installation Reassembling the console unit Step 1 Replace the case front onto the console unit, making sure all clips re-engage.
Indoor Unit Installation Reassembling the console unit Step 2 Reinstall the screws removed during disassembly.
Indoor Unit Installation Reassembling the console unit Step 3 Reinstall the front cover and slide the latches to the lock position.