Download
1 / 26
260 likes | 391 Views
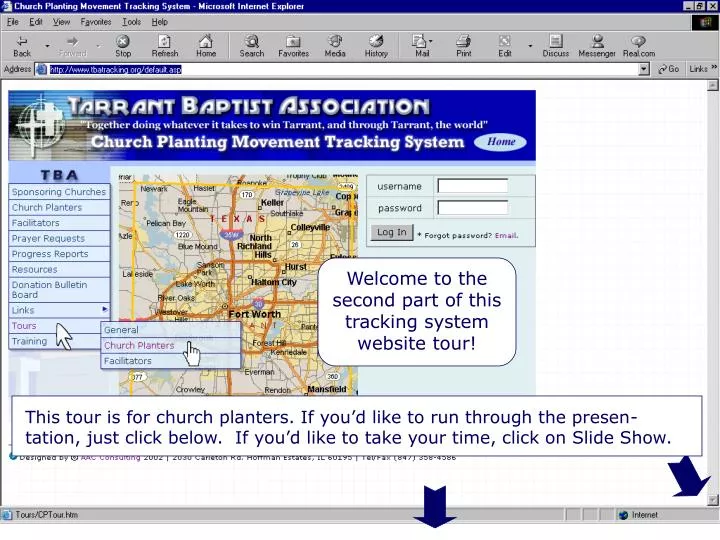
This tour is for church planters. If you’d like to run through the presen-tation, just click below. If you’d like to take your time, click on Slide Show. Welcome to the Second Tour. Welcome to the second part of this tracking system website tour!. What we want to show you how to:.

E N D
This tour is for church planters. If you’d like to run through the presen-tation, just click below. If you’d like to take your time, click on Slide Show. Welcome to the Second Tour Welcome to the second part of this tracking system website tour!
What we want to show you how to: • Fill out a monthly report and update other information in the tracking system. • Register for a training event. • Enter a new resource into the resource system. Click to Proceed
Log In To edit your information in the tracking system, you will need to use the username & password given to you at your assessment or basic training. Then click “Log In”.
When you log in, the tracking system only pulls up the church planters in your association. Move your cursor over “My Info” and click on “My Information”. Locating your information
This page is your own “home page”. It puts on one page most of items that you might need. Now let’s click on the bullet in front of “View my public page”. Locating your public page
You probably remember from the General Tour that there is one page for each church planter that can be accessed by the general public. You should check it regularly to make sure all the info is current. Let’s click the “X” to close this page. Viewing your public page
Now let’s click on the bullet in front of “Edit my information”. Locating how to edit your info
Here’s where all your informa-tion is stored. Later you can work down this page updating your informa-tion as you go. Let’s scroll down to the bottom of this page. Viewing the edit page
Each time after you change any of your information, you will need to click “Submit” to update the tracking system. Submitting updated info
This page contains all your informa-tion, but it is much easier to read in this format. Now let’s go back to your home page by moving your cursor over “My Info” and clicking “My Information”.
Now let’s click the bullet in front of “View/Sub-mit My Monthly Reports”. Locating the monthly reports
If you would ever need to review your monthly reports, just click on the bullet in front of “View/ Submit My Monthly Reports”. This is what you’d see. Viewing previous monthly reports
You can view the report by clicking on your name or edit the monthly report by clicking on the edit button. Since data is being compiled monthly, please only edit the last report. Viewing & editing a monthly report
To submit a monthly report, click on “Submit My Monthly Report.” Submitting a Monthly Report
As you fill out your monthly report for either SBTC or BGCT, it will update any matching fields in the tracking system. If you need any words translated into Spanish, click on “Help (Espanol)” and then place your cursor over those words. Now scroll down. Filling out your monthly report
Before you submit your report, be sure to enter the email addresses of everyone (including yourself) that should receive an automatic email notifying them that you have submitted your monthly report. Then click the “Submit” button. Entering email addresses
This is a sample of the emails that will be automatically generated when you click the submit button. Each person will receive a hyperlink to your report and your user ID & automatically generated password so they can read & print your report. Click to proceed. Automatic emails
Here’s how to register for a training event. Just click on the “Training Registration” bullet. Finding where to register for training events
Selecting a training event Click the button of the event you would like to register for.
Registering for an event Then click “Register”.
Now let me show you how to add a new resource to our resource system. Move your cursor over “Resources” and click on the “Add a New Resource”. Locating where to add a new resource
Let’s add a Basic Training brochure in Spanish. Determine what file folder the resource would best fit under. Click on the drop down arrow and click on the category that the resource would best fall under. Selecting the correct file folder
Type in the resource, any contact information, the title of the hyperlink and the hyperlink address. Scroll down to the bottom of the page. Entering new resource data
This is the tricky part! Click the person/organi-zation who is responsible for providing a resource/ service and then to which associations & denominational networks the resource applies. Then click “Submit”. Determining partners in ministry
Now you can review the resource to make sure all of the information is correct. Make sure that http:// does not appear twice in the hyperlink. Scroll down to see the bottom of the page. View new resource info
This concludes the second part of the tracking system tour. If you resource church planters, please return to the tracking system Home page and continue with the Facilitator Tour. The next tour…