Download
1 / 18
180 likes | 324 Views
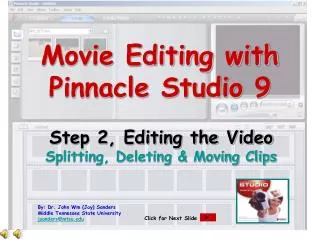
Movie Editing, Storytelling. By: Kameron True. Overview. Kino Video Editor has properly created a free, simplistic, video editor program that enables newcomers to create, capture, and rough edit videos in order to create a story. . Goal.

E N D
Movie Editing, Storytelling By: Kameron True
Overview Kino Video Editor has properly created a free, simplistic, video editor program that enables newcomers to create, capture, and rough edit videos in order to create a story.
Goal • You will be able to create a presentation that correctly facilitates the operations needed to create a story with the video editing program, Kino. All students and faculty of the College of Education will have a general understanding of the program and its uses.
Faculty and students of the College of Education will be able to B. successfully complete all of the objectives C. after my Instructional Presentation D. being 100% able to use Kino video editing program Faculty and students of the College of Education will be able to B. successfully complete all of the objectives C. after my Instructional Presentation D. being 100% able to use Kino video editing program Faculty and students of the College of Education will be able to B. successfully complete all of the objectives C. after my Instructional Presentation D. being 100% able to use Kino video editing program Faculty and students of the College of Education will be able to B. successfully complete all of the objectives C. after my Instructional Presentation D. being 100% able to use Kino video editing program Objectives James Madison Faculty and Students of the College of Education must be able to properly go through the basic processes of capturing, adding transitions, adding effects and saving their video to create a story using Kino.
Before We Start • You may already be familiar with other video editing programs and you may be familiar with working online, this is great because Kino uses both. • It is very important to know that Kino only runs on Linux or any Windows Manager/ Gnome Desktop. It also only works with DV video (digital video). • If you have any other questions as to the requirements for Kino Click Below: http://www.kinodv.org/article/static/3
Capturing Footage Must have access to a camera or tape deck that has IEEE 1394 (fire wire). Simply connect your camera to you computer (make sure it is on) Open Kino Click Capture (Type in where you want to store footage in the “File” field. Default Screen
Controlling the Footage • Video Tape Recorder Buttons will allow you to do the following: play, pause, rewind, fast forward, move to the start of the screen, move to next frame, and move to the end of the movie. HINT: Hover over buttons and they will tell you what they do!
How to: Cut Scenes Click on Split Scenes Button You will see that scenes are broken up on the left Highlight scene that you want to get rid of Click the scissors to cut it out. Or…you can split scenes and add transitions later.
How to Scroll Through Footage You can scroll through audio here. Move through video footage by scrolling the arrow on the timeline. White lines will appear at the start of a scene.
Let’s Have Some Fun With This! KEEP GOING YOU ARE DOING GREAT!
How to: Add Transitions • Once you have decided what you want to cut out or split up, you can add transitions between the scenes. Click on FX button: for all effects wanted!
Transitions Part 2 Click on Video Transition Choose an effect: Make sure it is limited to the scene you want. You can choose if you want the transition to be at the beginning or end of the clip. Add Audio Transition Click Preview to watch the effect or Render Button to put effect into action.
Titler Effect • You can add text by using the Titler Effect
Let’s see if you got it! • Task: Add a Title Page I have already shown you how to add text, so let’s see if you can do it yourself! I want you to add a title to your opening scene. I also, want to you to add a transition into the rest of your video. For those who want to be creative, add in some special effects!
Side Note -From: and to: Controls where everything goes -You can place anything where ever you want down to the second! Remember: Render Puts effect into action!
How to: Save Your Video • Click on Export Button • You have many options to choose from if you click the Other Button.
Save Where You Want! 2. Pop Up 1. Click Folder 4. Click Export 3. Click