Download
1 / 226
2.26k likes | 2.48k Views
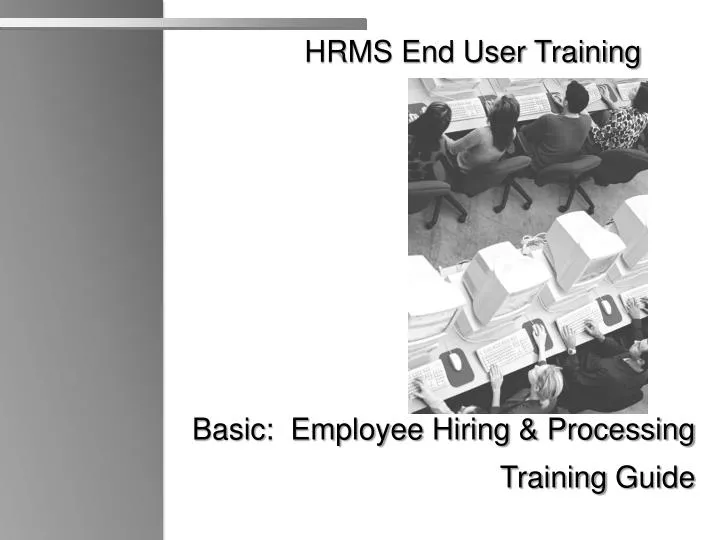
HRMS End User Training. Basic: Employee Hiring & Processing Training Guide. X. Course Objectives. Upon completion of this course, you will be able to: Understand the key components and terms of Personnel Administration.

E N D
HRMS End User Training Basic: Employee Hiring & Processing Training Guide X
Course Objectives Upon completion of this course, you will be able to: • Understand the key components and terms of Personnel Administration. • Hire and rehire an employee using Human Resource Management System (HRMS). • Display and change employee information. • Process an Employee Appointment Change. • Process a Leave of Absence. • Perform an Employee Separation. • Process a Change of Status.
Personnel Administration Overview • Upon completion of this section, you will be able to: • Explain the Personnel Administration components. • Define Personnel Administration roles as they relate to the course. • Identify other HRMS modules that share integration with Personnel Administration components.
An end users position determines what role is assigned and the level of HRMS access available. The following roles exist for Personnel Administration: Personnel Administration Roles
Integration With Other HRMS Components • HRMS is anintegratedsystem, with the ability to shared data with other HRMS components. • It allows real-time transmission from Personnel Administration to: • Organizational Management • Personnel Administration • Payroll • Benefits • Time Management • Information provided during hiring is transferred to payroll in real-time, qualifying a new employee for immediate payroll processing. • Department of Enterprise Services recommends entries in HRMS be completed BEFORE DAY 3 of the Payroll Processing Cycle.
Effective Dating • HRMS allows you to enter an “effective date” when creating infotype records. • You can enter information into HRMS at any time, before or after the employee information changes. • The effective date is based upon a valid start date and a valid end (delimit) date. Note: The end date might default to 12/31/9999. Verify the desired end date prior to saving the action.
Effective Dating Example June 5th – Marsha, the Personnel Administration Processor, receives notification of Kevin’s retirement scheduled for July 31st June 1st – Kevin gives a letter to his immediate supervisor that outlines a retirement date of July 31st June 8th– Marsha enters Kevin’s retirement into HRMS to become effective on July 31st July 31st – Kevin retires with no data entry needed as HRMS activates retirement based on effective data entered on June 8th
Effective Dating – New Hires and Appointment Changes Use CAUTION when using effective dating on New Hires and Appointment Changes. • Although effective dating is beneficial to agencies, be aware that back-dating could adversely affect other components in HRMS. • If the employee did not start on the date that was entered into HRMS, there are procedures in the OLQR that outline specific scenarios. • By back-dating an employee’s personnel action it can cause complications in payroll if it has been processed and even if the employee has no earnings for that pay period.
Infotypes • An infotype is a screen within a transaction in which specific criteria is entered into individual employee files or records. • Infotypes are like documents in an employee’s (electronic) personnel file. • The infotypes are guided by your assigned role and are determined by the action you are performing. • During a personnelaction, infotypes are grouped together to help navigate from screen to screen. • Therefore, there is no need to worry about missing required data fields.
0000 0002 0001 0007 0008 0006 Actions Personal Data Organizational Assignment Planned Working Time Basic Pay Addresses Infotype Examples 21000001 (John Smith)
Personnel Actions IT0001 • Personnelactionsare processes used to record personnel events such as hiring, appointment change or separation. • Each personnel action contains a set or group of infotypes that record all the information necessary for an event to be recorded. • For example, the New Hire action contains linked infotypes that walk you through entry of employee information. • Infotypesyou access display in consecutive order until all required data is entered.
Accessing Personnel Actions • The menu of Personnel Actions(PA40) allows you to choose the action you want to complete. • The action you choose prompts you to complete the required information for that action.
Review Questions • What three roles are part of the Personnel Administration? • ______________________________________________ • ______________________________________________ • Each transaction is assigned a ________________? • ______________________________________________ • ______________________________________________ • This HRMS feature allows information to be entered into the system at any time by using a valid start and end (delimit) date. • ______________________________________________ • ______________________________________________ Personnel Administration Processor, Personnel Administration Inquirer and Personnel Administration Supervisor Transaction Code Effective Dating
Display and Maintain Employee HR Master Data Overview Upon completion of this section, you will be able to: • Describe the differences between the Display actions and the Maintain actions. • Review the Display, Copy, and Change Functions and understand the importance of the information in each infotype.
Accessing Infotypes – Display and Maintain • HRMS allows you to update infotypes while keeping a history to the infotype. • There are two ways to update/maintain infotypes: • Maintain (PA30) • Update specific infotypes one at a time. • Personnel actions (PA40) • Use to process personnel actions such as a New Hire which groups the necessary infotypes needed to process the action. • You can also view employee information: • Display (PA20) • View infotypes one at a time. • Personnel File (PA10) • View the entire employee’s record.
HRMS Activity Maintain Employee Master Data
Audit Tool: Logged Changes in Infotype Data report • Helps identify data changes according to personnel numbers, Infotype and/or date and time. • Run this report daily as an audit resource tool. • Refer to the OLQR User Procedure: Logged changes in infotype data • Access the Logged Changes in Infotype Data by using the transaction code S_AHR_61016380
Review Questions • Match the icon to its function: Change – To change the record with no history. Overview – To view all actions associated with an infotype. Copy – To update the record while keeping a history. • In most circumstances, should you use the Copy or Change action to update employee information?
New Hire Overview Upon completion of this section, you will be able to: • Identify the structure of a personnel action. • Navigate through the Employee Hiring infotypes and understand the importance of the information in each infotype. • Complete a New Hire action in HRMS.
Personnel Number • Personnel Numbersare automatically assigned to an employee and they are never repeated. All previous employees prior to conversion have been assigned a Personnel Number through Data Warehouse or HRMS. • New Employees are assigned new Personnel Numbers. • They have never worked for the State of Washington. • They were previously employed with the State of Washington, but prior to HRMS being implemented. Note: Be sure to request a new hire check with the DES Service Center prior to entering a new hire into the system. This can be done by emailing servicecenter@des.wa.gov
Personnel Number – cont’d • Employees may have two ‘active’ assigned personnel numbers simultaneously. This is known as concurrent appointment. • An employee works in more than one position at the same time in different agencies or personnel areas or works in more than one position in the same personnel area when one appointment is hourly and the other appointment is monthly. HRMS will assign a new personnel number for the employee’s additional concurrent appointment. • During a concurrent appointment the employee is assigned a Primary personnel number for one agency (or position) and a *reference personnel number for the other.
Hire a New Employee • Use the Hire action to enter information for an employee that does not already exist in HRMS. • If the employee already has a personnel number in HRMS, use the Rehire action. • If the employee already has a personnel number prior to HRMS you would use the New Hire action utilizing the personnel number for the employee. • The Hire action moves you through each infotype which requires certain information to hire an employee.
Hire Infotypes • Create the following infotypes during the Hire action including: • Actions (0000) • Personal Data (0002) • Organizational Assignment (0001) • Contract Elements (0016) • Monitoring of Tasks (0019) • Addresses (0006) • Planned Working Time (0007) • Education (0022) • Date Specifications (0041) • Additional Personal Data (0077) • Military Status (0081) • Create Time Specifications / Employment (0552) • Basic Pay (0008)
New Hire Action • To create a Hire Action using the menu path: • Follow Human Resources Personnel Management Administration HR Master Data Personnel Actions • Or enter transaction code PA40 in the Command field
New Hire Personnel Action • During the hire action, the system assigns the new employee a unique number. • Field to complete: • From (Date of Hire) • Example: 1/1/2015 • To access the Hire action, click the box to the left of New Hire. • Click (Execute) to execute the action. Note: A personnel number is not required to complete the Hire action.
Actions (0000) • The Actions infotype records the hire action reason position number for the employee. • Fields to complete: • Reason for Action (use the matchcode) • Position • Click (Enter) to validate and populate the following fields: • Personnel Area • Employee Group • Employee Sub-group • When finished, click (Enter) and then click (Save).
Personal Data (0002) • The Personal Data infotype records data to identify an employee. • Fields to complete: • Last name • First name • Middle name (optional) • SSN • Date of birth • Marital status • Gender • When finished, click (Enter) and then click (Save).
Organizational Assignment (0001) • The Organizational Assignment infotype records the assignment of an employee in the Organizational Structure. • Fields required to complete: • Contract • Permanent (System Default) • Optional fields: • Org. key • Administrator – Time • When finished, click (Enter) and then click (Save).
Delimit Vacancy A feature used to report vacant positions. Information will be updated on the Position Vacancy infotype located in Organizational Management. • This popup window will appear if the position is vacant or if multi-filled. • Click ‘Yes’ to delimit the vacancy. • Click ‘No’ to not delimit the vacancy. Note: If the position is multi-filled select ‘No’.
Contract Elements (0016) • The Contract Elements infotype tracks an employee’s state status (permanent or non-permanent). • Field required to complete: • Contract type • Optional field: • Probationary period • When finished, click (Enter) and then click (Save).
Monitoring of Tasks (0019) • The Monitoring of Tasks infotype tracks the dates on which an employee moves from non-permanent status to permanent status. • Fields to complete: • Reminder Date or • Lead/follow-up time • When finished, click (Enter) and then click (Save).
Addresses (0006) • The Addresses infotype records and stores address data on an employee. • Fields to complete: • Address type • Permanent residence (required) • Street/House no. • Postal code(Zip Code) / City • Office/region (State) • County code • Telephone number • This information is used to: • Calculate tax rates • The Permanent residence type is used to send benefit information to Department of Retirement Systems and Heath Care Authority • When finished, click (Enter) and then click (Save).
Communications (0105) • The communications infotype is used to establish the employee’s email address to be used. • Field to complete: • ID/number • When finished, click (Enter)and then click (Save). Note:If you do not know the employee’s email address at time of hire, click the next record button to move to next infotype.
Planned Working Time (0007) • Fields to complete: • Work schedule rule • Time Mgmt status • Additional time ID • Employment percent • ACA Status Code • Time Type Override* • When finished, click (Enter) and then click (Save). * Note: The Time Type Override box is to only be used by agencies who intend to use TLA
Available Work Schedules: • There are more than 50 work schedules in HRMS. • Typically, the work schedule is based on a 40-hour week, but HRMS accommodates non-traditional schedules. • Rotating work weeks • Altered work days (flex schedules) • Shortened work weeks • 24/7 schedules
Education (0022) • The Education subtype indicates the type of education the employee has achieved. • Fields to complete: • Start • To • Education/training • Institute/location • Certificate • Use the Education infotype to document the details regarding education the employee has received. • When finished, click (Enter) and then click (Save). Note: To skip this infotype, click (Close) to move to the next infotype.
Date Specifications (0041) – cont’d • The Date Specifications infotype documents important employee dates in employment history. • Dates will default to the effective date of the New Hire.
Date Specifications (0041) • HRMS allows up to 12 date types for each record. • To add another Date type such as 09Vac Lv Frozen Up To • Click the (Matchcode) in the next available Date type field to open selection list. • Double-click to select. • Enter date eligible. • When finished, click (Enter) and then click (Save).
Date Specifications – Adjusting Service Dates • You can adjust the service dates for employees who have worked in other covered jurisdictions (if appropriate), higher education institutions or have served in the military. • Although these positions are not former appointments within State of Washington, the work period is recognized by the State for recording purposes. • Adjusting service dates is important since layoffs are or will be governed by a combination of seniority and performance (as defined by each agency).