Download

1 / 65
1.28k likes | 2.52k Views
Basics of Sterilization. David R. Woodard, MSc, CIC. Dr. Earle Spaulding “ You can clean without disinfecting, but you cannot disinfect without cleaning ”. Decontamination Area. The location designated for the collection, retention, & cleaning of soiled instruments

E N D
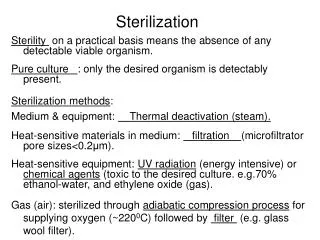
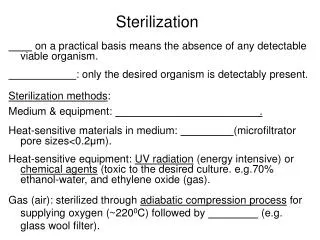
Basics of Sterilization David R. Woodard, MSc, CIC
Dr. Earle Spaulding “You can clean without disinfecting, but you cannot disinfect without cleaning”
Decontamination Area • The location designated for the collection, retention, & cleaning of soiled instruments • Physically separated from all other areas to decrease risk of cross infection • Air from decontam area is exhausted to the outside and not recirculated
Types of Cleaning • Decontamination • Process that removes as many microorganisms as possible by physical, mechanical or chemical means • Also known as cleaning • Utilizes water, detergent and enzyme soln • Enzyme separates blood, bone and tissue from instruments
Types of Cleaning • Disinfection • Immediate state between physical cleaning & sterilization • Uses thermal processes or chemical germicides
Manual Cleaning of Instruments • Cleaned under water with nonabrasive neutral PH detergent • Low sudsing and & does not leave residue • Special attention given to hard to clean areas • Items with lumens are cleaned with brushes and flushed with water
Inspection of Instruments • Cleanliness, & absence of corrosive substances • Free motion of hinged instruments-absence of stiffness • Proper alignment of jaws & teeth • Proper tension with closed ratchets • Sharpness of blades, trocars, absence of burrs, gouges • Screws and pins are clean
Inspection Con’t • General integrity-absence of cracks, dents, chipping, worn areas • Intact insulation sheathing, absence of tears • Items composed of more than one part are complete & parts fit together securely • Powered surgical instruments appropriately lubricated & tested for proper functioning
Preparation of Instruments • Remove gross soil at point of use • Jaws, blades, serrations, box locks commonly retain high levels of bioburden • Remove blood/tissue with water & sponge • ↓number of organisms • Reduces nutrient material that promotes bacterial growth • Minimizes potential for environmental contamination • Removes substances that damage the instruments
Organization of Instruments • Maximize surface area of instruments • Place instruments in a mesh bottom tray to allow for full exposure of cleaning mechanism • Open jointed instruments at box locks • Disassemble instruments composed of more than one part • Separate delicate scissors & microsurgical instruments from heavier instruments to avoid damage
Assembly of Items for Sterilization • All hinged instruments must be opened & secured with stringers in a wire mesh basket • The weight of an instrument set should be evenly distributed to avoid collection of moisture during sterilization • A towel may be positioned in the tray to facilitate revaporization of condensate • Delicate instruments require tip guards/foam • Count sheet in every tray
Packaging Materials • Items must be packages in a manner that maintains their sterility • Appropriate packaging material • Allows effective sterilant penetration • Must contain the sterility of the processed items • Must allow aseptic presentation of contents
Paper-Plastic Package System • Allows for proper sealing to secure contents • Remove as much air as possible to facilitate effective sterilization • Double peel packages should be sequentially sized & sealed to allow fro proper fit of inner pouch • Paper sides of both packages are positioned together to allow adequate penetration of the sterilant
Rigid Sterilization Containers • Reduce cost and management of waste • Perforations in the lid and bottom are covered with disposable bacterial filters • Filters allow sterilant to penetrate • Tamperproof locks & ID labels • Need to follow recommended weight, density, sterilization cycles & times & loading practices
Storage of Packaging Materials • Room temperature • Humidity 35% to 70% • High humidity • Packaging may become over hydrated which can affect integrity of adhesives & seals of peel packages • Low humidity • Dehydration • Brittle and easily tear
High Level Disinfection • Uncontrolled process • Efficacy is directly affected by the cleanliness of the device, preparation of the device, the level of the active ingredient, temperature of solution and the exposure time • Testing the solution according to directions
Chemical Disinfection(Cidex OPA)High Level Disinfection • Performed by submersing an item in a covered basin of germicidal solution for a designated length of time to achieve the desired level of microbial kill • May eliminate many or all pathogenic microorganisms • Will not kill spores
Disinfecting Issues • Product must be: • Tested once each day of use or each time used when not used daily. • Changed as manufacturer requires • Test strips tested for accuracy (high/low) at time of introduction to use • Test strips expire! • Temperature sensitive
Disinfection • Improper cleaning and organic debris are among many factors that have been known to nullify or limit the efficacy of this process.
Washer Sterilizers • Wash, rinse, & use gravity steam sterilization • High temps & steam leads to total destruction but they should not be considered ready or safe for patient use • Must clean & remove bioburden • Tissue or debris not removed during wash cycle may be baked on during sterilization cycle
Advantages of Washer Sterilizer • ↑ penetration capability • Exposure of higher temps to all surface areas • Greatest incidence of microbial lethality • Automatic time-released lubrication cycle
Sterilization • The process of killing all forms of microbial life
Sterilization Indicators • Class I – External, time, temp, pressure indicator, says item went through autoclave (tape, peel packs) • Class II – Bowie Dick, checks for air removal • Class III – Internal, time & temp, rarely used today • Class IV – Internal, reacts to two or more parameters, rarely used today • Class V – Integrators, melted chemical pellet, reacts to all parameters, all steam cycles • Class VI – Emulating indicators, cycle specific • Biological – gold standard, shows kill of organisms
WELCOME TO DECONTAM PASS THRU WINDOW AUTO WASHER WORK TABLE
WELCOME TO STERILE PROCESSING WINDOW WASHER
READY FOR STERILIZATION AUTOCLAVE WORK TABLES
WORK AREA INCUBATOR OBSOLETE EQUIP / INST COUNT SHEETS
Steam SterilizationMoist Heat • Most economical & efficient • Rapid processing time allows frequent availability • Items must be able to tolerate high temps & moisture • Works with time, temperature & moisture
Steam SterilizationTime, Temperature, Moisture • Steam circulates within the jacket space surrounding chamber • Steam enters the chamber & displaces all the air • Air and steam do not mix • As pressure increases, saturated steam contacts all surfaces , penetrates packages, & forces air out through a drain at the bottom of sterilizer • Sterilization is initiated once all air is removed • High temp of saturated steam causes microbial destruction • Proper loading is crucial to allow the steam to freely circulate
Steam Sterilization Con’t • Temperature affects the time of exposure in that the higher the temperature, the less exposure time is required. • As pressure ↑ in a closed chamber, so does the temperature • If these parameters are not represented in a cycle, sterilization will not occur
Cycle Phases • Conditioning • Air removal • Exposure • Load is heated to sterilization temp • Exhaust • Bottom drain opens and steam is exhaused • Drying • Dry heat revaporizes existing moisture & removes from the load
Proper Loading & Unloading • Proper Loading • Prevents formation of air pockets & obstructions to the circulation of steam • Proper Unloading • Hot packages are allowed to cool before being handled • Moisture will form upon contact and cause contamination • Called strike through • Do not place hot items on cool surfaces
Sterilization Process MonitorsChemical Monitors (Indicators) • Monitor one or more process parameters of a sterilization cycle • Detects failures in packaging, loading or sterilizer function • Consist of a sensitive chemical or ink dye that develops a visual change after the exposure to certain physical process conditions (temp & humidity) • Placed on the outside of every package • Need to be examined after sterilization & before use
Chemical Monitors Con’t • Internal monitors placed in the area of greatest challenge within the package • Visible once package is opened • Both internal l& external indicators reflect exposure of an item to one or more sterilization parameters • Do not guarantee sterility • If questionable, item is not considered sterile
Biologic Monitors • Standardized preparation of known microorganisms highly resistant to a specific mode of sterilization. • Their purpose is to reveal evidence of the efficacy of a sterilization cycle by utilizing a high number or resistant spores to challenge the function of the sterilizer. • Most reliable monitors
Biologic Monitors Con’t • After cycle is complete put in incubator to observe microbial growth • Negative biologic monitors contain no growth & indicates that conditions necessary for sterilization & microbial kill were met • If growth detected: • Notify supervisor immediately • Further test & evaluate to determine viability of organisms & efficacy of the cycle
Biologic Monitors Con’t • Bacillus stearothermophilus • Steam sterilization • Bacillus subtilis • Gas sterilization • Impregnated on paper strips or capsules and placed within the chamber • Special test packs or • Wrapped in items
Biologic Monitors Con’t • A control biologic monitor, which has the same lot number, as the test and has not bee exposed to a cycle is also incubated and examined for growth
Routine Biologic Monitoring • Frequency of Use: • During installation of sterilizer or after major repairs • Daily in steam autoclaves • Gas-with each load • Any load with implants
Routine Biologic Monitoring • Placement: • Steam • In loaded chamber over drain or coolest part of sterilizer • Gas • In the middle of the loaded chamber • Incubation: • Usually 48 hours • 1 hr incubation monitors available for gravity displacement steam sterilizers
Bowie Dick Test • Daily air removal test • Insures proper function of the vaccuum and detects any air leaks • Monitor is placed on the bottom rack over the drain before the first load • Satisfactory test occurs when there is a uniform color change
Biological Indicators Following the autoclave cycle, the BI is placed in an incubator; also a control Length varies with the product; rapid readout 1-3 hours, or 24 hours Positive test = sterilization process has failed due to improperly processed load, failure to meet temperature or exposure parameters, mechanical problems, etc. Purple = bugs killed, PASS Yellow = pus FAIL
Ethylene Oxide Sterilization • Used to sterilize heat-labile and/or moisture-sensitive items • Toxic & flammable • Lengthly processing /aeration time • High cost • Environmental concerns
ETO SterilizationGas • Colorless, noncorrosive, highly penetrative • For items that are sensitive to high concentrations of moisture and/or heat • Appropriate conditions of time, (105-300 min) temp, (low) EO concentration, relative humidity (45%-74%) • Appropriate aeration is required to remove residual EO
EO Aeration • Continuous currents warm filtered air • 12 hrs = 120 degrees • 8 hrs = 140 degrees
Hydrogen Peroxide Gas Plasma SterilizationSterrad • Rapidly destroys microorganisms utilizing low temperatures without toxic residue • Used for heat and moisture sensitive items • Uses radio frequency energy to vaporize hydrogen peroxide • Takes approximately one hour • For narrow lumens that are longer than 12” or narrower than ¼ “ , a special adaptor is needed
Chemical SterilizationThe Steris • Used on items that are heat sensitive • Delicate instruments, scopes, cameras • Uses a lower temperature & shorter cycles • Peracetic Acid