Download
1 / 24
550 likes | 1.15k Views
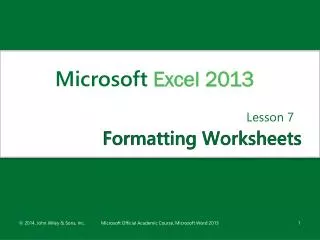
Excel Lesson 2 Formatting and Editing Worksheets. Microsoft Office 2010 Fundamentals. Story / Walls. Objectives. Create a new workbook. Format cells. Apply themes and styles and use conditional formatting. Adjust column widths and row heights. Insert and delete rows and columns.

E N D
Excel Lesson 2Formatting and Editing Worksheets Microsoft Office 2010 Fundamentals Story / Walls
Objectives • Create a new workbook. • Format cells. • Apply themes and styles and use conditional formatting. • Adjust column widths and row heights. • Insert and delete rows and columns. • Find and replace data. • Copy and move worksheet data. • Check spelling. 2 2
cell style Clipboard conditional formatting copy cut drag-and-drop method fill font font styles paste point size theme Vocabulary 3 3
Introduction • In this lesson, you will learn how to use Excel’s editing and formatting features to enhance the appearance of a worksheet. • You will also learn how to create a new workbook; how to format a workbook; and how to organize data to get the information you need. 4 4
Create a new workbook by clicking the File tab to display Backstage view, then clicking New. Click the Blank workbook icon in the center pane and then click the Create button. Creating a New Workbook 5 5
Formatting Cells • Click the dialog box launcher in the Font, Alignment, or Number groups on the Home tab to display the Format Cells dialog box. 6 6
Setting Font Formats: The Font group on the Home tab on the Ribbon includes options for selecting fonts, font size, underline, and font color. Formatting Cells (continued) 7 7
Using the Format Painter: You can use the Format Painter to copy multiple formatting characteristics at once to other cells. Adding and Removing Cell Borders: Borders can be applied to any side of a cell using predefined styles or by creating custom borders. Changing Fill Color: To change a cell’s background color, use the Fill Color button in the Font group on the Home tab. Formatting Cells (continued) 8 8
Changing Cell Alignment: Use the buttons in the Alignment group on the Home tab. More options are located on the Alignment tab of the Format Cells dialog box. Clearing Cell Formats: Remove all the formatting from a cell or range by clicking the Clear button on the Home tab in the Editing group and then clicking Clear Formats. Formatting Cells (continued) 9 9
Applying Number Formats: To change a number format, use the buttons found on the Home tab in the Number group. Formatting Cells (continued) 10 10
Applying Themes: A theme is a set of predesigned formatting elements—including colors, fonts, and effects. Use the commands in the Themes group on the Page Layout tab. Applying Themes and Styles 11 11
Applying Themes and Styles (continued) • Working with Table Styles: • Click the Format as Table button in the Styles group on the Home tab to display a gallery of table styles. 12 12
Applying Cell Styles: A defined combination of formatting characteristics—such as number, alignment, font, border, and fill—is called a cell style. Click the Cell Styles button in the Styles group on the Home tab to display a gallery of cell styles. Applying Themes and Styles (continued) 13 13
Click the Conditional Formatting button on the Home tab in the Styles group. Using Conditional Formatting 14 14
Working with Rows and Columns • The commands for inserting, deleting, and resizing rows and columns are located in the Cells group on the Home tab. 15 15
Adjusting Column Width: Use the mouse to drag the right border of the column heading to the width you want. Or specify an exact width in the Column Width dialog box by clicking the Format button in the cells group on the Home tab. Working with Rows and Columns (continued) 16 16
Adjusting Row Height: Excel changes the row height automatically to accommodate the data and font size. When necessary, you can click the row heading border and drag up or down to a new height. Working with Rows and Columns (continued) 17 17
Inserting a Row or Column: Click the Insert button arrow in the Cells group on the Home tab to display a menu with options for inserting a row or a column. Deleting a Row or Column: Click the Delete button arrow in the Cells group on the Home tab to display a menu with options for deleting rows or columns. Working with Rows and Columns (continued) 18 18
Finding and Replacing Data • Click the Find & Select button in the Editing group on the Home tab to access the Find and Replace commands. 19 19
Copying and Moving Worksheet Data • To move or copy data, you can use the Clipboard or the drag-and-drop method. • Cutting, Copying, and Pasting to the Clipboard: • The Cut, Copy, and Paste buttons are located in the Clipboard group on the Home tab. 20 20
Copying and Moving Worksheet Data (continued) • Using the Drag-and-Drop Method: • Use the mouse to click a selected cell or range, drag it to a new location, and drop it. 21 21
Checking Spelling • Click the Spelling button in the Proofing group on the Review tab to open the Spelling dialog box. 22 22
Summary In this lesson, you learned: • How to create new workbooks. • Various ways to format cells. • How to apply themes and styles. • Conditional formatting can help highlight and interpret data. 23 23
Summary (continued) • The processes for adjusting column widths and row heights. • Methods of inserting and deleting rows and columns. • How to find, replace, copy, and move worksheet data. • It is a good idea to check spelling. 24 24