Download
1 / 37
480 likes | 1.79k Views
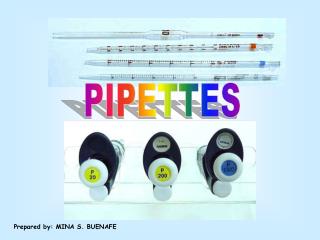
PIPETTES. Prepared by: MINA S. BUENAFE. WHAT ARE PIPETTES. The PIPETTE is a precision instrument that is used to transfer known volumes of liquid accurately. Pipettes may be glass or plastic tubes, usually open at both ends. They are usually used for volumes between 0.5 and 100mL

E N D
PIPETTES Prepared by: MINA S. BUENAFE
WHAT ARE PIPETTES The PIPETTE is a precision instrument that is used to transfer known volumes of liquid accurately. Pipettes may be glass or plastic tubes, usually open at both ends. They are usually used for volumes between 0.5 and 100mL Automatic microliter pipettes are usually used for volumes between 1µL and 1mL
PURPOSE OF THE MODULE • The purpose of this module is to re-visit basic laboratory techniques on the proper use and handling of volumetric, measuring, and automatic microliter pipettes. • WHY? • Pipettes will only perform as well as the operator’s technique allows. • Techniques among the users may vary with the users’ background, preferences, and training. • The difference in technique and execution can affect accuracy and precision of the experiment or the test.
TYPES OF PIPETTES • Volumetric Pipettes • Measuring Pipettes • - Mohr • - Serological • Automatic (Microliter) Pipettors
PIPETTE AIDS Types of Suction Device: Rubber Aspirator (Bulb) ‘High-tech’ Pipette Bulb (EppendorfTM or NalgeneTM) Other Pipette Bulbs (e.g., VadosaTM Pipette Filler)
VOLUMETRIC PIPETTES • Used to deliver a single specific volume of liquid, usually between 0.5 and 100mL. • Shaped like rolling pins with a large belly, one blunt end, the neck, and one tapering end, the tip. • Used for accurate measurements, since it is designed to deliver only one volume and is calibrated at that volume. • Should be used when accuracy and reproducibility are crucial, because these can achieve accuracy to four significant figures. (e.g. 100.0mL)
VOLUMETRIC PIPETTES • Specifications: • Indicate how much liquid will be transferred if the liquid is drawn up to the calibration line on the neck • Indicate the temperature at which the calibration was made • Indicate whether it is a TD (to deliver) or TC (to contain) pipette
VOLUMETRIC PIPETTES Helpful Hints: Using a Volumetric Pipette - Examine each pipette you take from the drawer because occasionally you will find a stowaway who got in and couldn't get out. - Examine the tips for breakage. Many breaks are trivial, i.e., they show minor chipping around the edge of the tips. Here's one in which the entire wall has fractured at one point. This pipette is unusable because the liquid path has been compromised.
VOLUMETRIC PIPETTES Helpful Hints: Using a Volumetric Pipette • - Hold the pipette by the upper third of the tube and keep the tip from touching anything. - Squeeze the aspirator before pressing it against the blunt end of the pipette. Make sure you have an air-tight seal between the bulb and the pipette. • Place the tip of the pipette into the solution to be drawn up and release the bulb slowly. Do not allow the tip of the pipette to break the surface of the liquid while drawing in the solution. (The sudden decrease in viscosity at the tip will cause a large amount of liquid to contaminate the inside of the rubber bulb because of the entry of air pushing the liquid up beyond the mouth of the pipette.) • Draw up the solution until the meniscus is several centimeters above the calibration line, then quickly put your finger over the open hole of the pipette.
VOLUMETRIC PIPETTES Helpful Hints: Using a Volumetric Pipette - Making sure that the line of sight is perpendicular to the calibration mark, allow a tiny amount of air in so that the meniscus drops to the mark. When the bottom of the meniscus coincides with the calibration mark, the pipette contains a precisely measured volume. • Remove the pipette from the reagent solution and allow the liquid to drain into the receiving vessel. • Volumetric pipettes should NOT be "blown out" to eject all liquid at the tip these pipettes are calibrated in a manner that takes into account the solution which remains at the tip due to surface tension.
MEASURING PIPETTES • They are straight glass or plastic tubes with one tapering end. • Calibrated into small divisions so that various amounts of liquid can be measured with the same pipette. • Usually used to measure any amount between 0.1mL and 25.0mL. • They are not as accurate due to the fact that any imperfection in their internal diameter will have a greater effect on the volume delivered.
MEASURING PIPETTES Types of Measuring Pipettes: • Mohr Pipettes • The graduations on these pipettes always end before the tip. • - Serological Pipettes • The graduations on thesepipettescontinue to the tip.
MEASURING PIPETTES Specifications: • Indicate the maximum volume of liquid that can be transferred. • Indicate the size of the divisions on the pipette. • Indicate the temperature at which calibrations were made. • Indicate whether the pipette is a “to deliver” (TD) or “to contain” (TC) pipette.
MEASURING PIPETTES Specifications: 5mL TD in 1/10mL (0.1mL) at 20oC Specifications on a pipette as shown above indicate that the pipette is calibrated in 1/10mL divisions and will deliver up to 5.0mL within published (printed) tolerance levels at 20oC.
MEASURING PIPETTES Serological Pipettes: If a serological pipette has a frosted band or two thin rings around the neck, then it is a blow-out pipette. (The frosted band should not be confused with thicker colored rings or colored dots, which are a manufacturer’s code for the maximum volume of the pipette. Remember, only blow-out a serological pipette if it has a frosted band or two thin rings.) This means that after all the liquid has been allowed to drain out by gravity, the last drop remaining in the tip is also forced out.
AUTOMATIC MICROLITER PIPETTES Automatic pipettes are used in the biological, biochemical, and microbiological laboratories to accurately transfer small liquid volumes. Glass pipettes which are used in chemical laboratories are not highly accurate for volumes less than 1mL, but the automatic pipettes are both accurate and precise. They operate by piston-driven air displacement. A vacuum is generated by the vertical travel of a metal or ceramic piston within an airtight sleeve. As the piston moves upward, driven by the depression of the plunger, a vacuum is created in the space left vacant by the piston. Air from the tip rises to fill the space left vacant, and the tip air is then replaced by the liquid, which is drawn up into the tip and thus available for transport and dispensing elsewhere.
AUTOMATIC MICROLITER PIPETTES • Plunger button is used to aspirate and deliver the liquid. • Tip ejector button is used to discard the tip without having to touch it. • Volume Adjustment Knob includes a stainless steel micrometer used to adjust the piston displacement to dial the exact volume of liquid. • Volume Indicator displays the the µL volume selected in a side window. The display consists of three numbered dials and is read from top to bottom. • Plastic Shaft is basically the body of the pipette to which the tips are snugly attached. • Tip Ejector Arm pushes the tip off the pipette • Disposable Tip is where the liquid sample is collected for aspirating and dispensing.
AUTOMATIC MICROLITER PIPETTES Helpful Hints: Using an Automatic Pipette (Normal Mode) • Set the desired volume with the knob at the top of the pipette. Turn 1/3 revolution above the desired setting and then slowly down to the desired setting for optimal accuracy. • Place a fresh tip tightly onto the barrel. (Tips are contained in a package or dispenser so that you do not handle or contaminate the points with your fingers.) In a 20µL Pipettor, this reads 6.86µL In a 1000µL Pipettor, this reads 262µL Attaching tips to the pipettor Tips come in different size. Choose the right tip for the pipettor being used.
AUTOMATIC MICROLITER PIPETTES Helpful Hints: Using an Automatic Pipette (Normal Mode) • Pre-wet the tip by taking up and discarding three or four squirts of the solution before the transfer. This action reduces the surface tension on the inside walls of the tip and also provides the proper level of inter-tip humidity, which reduces evaporation of the sample liquid. • Depress the plunger to the first stop. It is that part of the stroke that extends the piston to the calibrated volume displayed on the volume indicator. • Hold the pipette vertically and dip it 2 – 5mm into the sample liquid. • Slowly and smoothly release the plunger to aspirate the liquid, pausing about a second after aspiration. Never let the plunger snap up!
AUTOMATIC MICROLITER PIPETTES Helpful Hints: Using an Automatic Pipette (Normal Mode) • Withdraw the tip/pipette from the solution straight out. No liquid should remain on the outside of the tip. Wipe away any droplets on the outside of the tip with a lint-free tissue, e.g., Kimwipes®. Wipe only the droplets from the side of the tip. Never touch the tip orifice. The right way to wipe the tip The wrong way to wipe the tip • To dispense liquid, touch the micropipette tip to the wall of the receiver and gently depress to the first stop. Allow the liquid to drain along the inside walls of the tip, then depress the plunger beyond the first stop to squirt the last drop of liquid out of the tip.
AUTOMATIC MICROLITER PIPETTES Helpful Hints: Using an Automatic Pipette (Normal Mode) Dispensing the Sample: Fig 1 Fig 2 Fig 3 Figure 1: Start Dispensing Figure 2: 1st Stop: Dispense (pause for a second or so) Figure 3: 2nd Stop: Expel the residual liquid (blow-out)
AUTOMATIC MICROLITER PIPETTES Helpful Hints: Using an Automatic Pipette (Normal Mode) • With the plunger fully depressed, withdraw the pipette from the receiving vessel carefully, sliding the tip along the wall of the vessel. Holding the tip against the side of vessel is especially important when transferring small volumes of liquid. • Gently allow the plunger to return to the ‘UP’ position. Do not allow it to spring back! • Discard the tip by depressing the tip ejector button. A fresh tip should be used for each sample to prevent sample carryover. • Never lay the pipette on its side nor invert the pipette if liquid is in the tip.
PROPER PIPETTING TECHNIQUES Pre-wet the pipette tip Aspirate and expel the sample at least three times before aspirating a sample for delivery. Work at temperature equilibrium Allow the liquids to equilibrate to ambient temperature. Examine the tip before dispensing Very carefully, wipe the tip only if there is liquid on the outside. Use standard mode pipetting Choose standard mode rather than the reverse-mode pipetting for all samples that are not viscous.
PROPER PIPETTING TECHNIQUES Pause consistently after aspiration Pause with the tip in the liquid for about a second after aspirating the sample. Pull the pipette straight out Pull the pipette straight out of the container after aspirating the sample. Do not touch the tip to the sides of the container. Minimize handling of the pipette and tip Set the pipette down between sample deliveries and avoid handling the tips. Body heat transferred to the equipment/ instrument during the handling can cause a disruption in the temperature equilibrium.
PROPER PIPETTING TECHNIQUES Immerse the tip to the proper depth During aspiration, make sure that the pipette tip is immerses 2 – 5mm below the meniscus and well clear of the bottom and walls of the container. Use the correct pipette tip Always use the tip specifically designed for use with the type of pipette being used. Make sure the tip is securely attached. Use consistent plunger pressure and speed Depress and release the plunger smoothly and with consistent pressure and speed when dispensing samples.
AUTOMATIC MICROLITER PIPETTES - The latest automatic pipette out in the market is one that takes into account ergonomics and routine use of the apparatus. - This type of pipette is ideal for process acceleration and saving time on long series pipetting. The design reduces hand fatigue associated with repetitive work. - It allows for continuous volume adjustment from 1 µL to 50 mL (depending on the tip) without stopping for a refill
AUTOMATIC MICROLITER PIPETTES Parts of a Repetitive Pipette • Volume Selection Dial • Position Display • Battery Compartment • Digital Display • Pipetting Lever • Filling Lever • Ejection Key • Serial Number
AUTOMATIC MICROLITER PIPETTES Parts of a Repetitive Pipette Tip(Repeater® Plus Combitip®) • 1. Volume to be dispensed at position 1 on the Volume Selection Dial • The smallest volume to be dispensed (position 0.5 on the Volume Selection Dial) • The step sequence of volume to be dispensed if dial setting is increased from 0.5 • The largest volume to be dispensed (postion 10 on the Volume Selection Dial) • Graduation scale • Maximum filling capacity • US Patent Numbers
AUTOMATIC MICROLITER PIPETTES Helpful Hints: Using a Repetitive Pipette (Repeater®) • Push the filling lever down completely and hold down while inserting the tip. Do not press the ejection key • Push the tip into the pipette from below (remember to use gloves!). The tip will click into place. • When inserting the tip directly from the rack, push the filling lever down completelyand hold down. • The volume which would be dispensed in accordance with the size inserted and the position of the Volume Selection Dial appears in the display. • Select the volume by turning the dial. The volume selected appears in the display.
AUTOMATIC MICROLITER PIPETTES Helpful Hints: Using a Repetitive Pipette (Repeater®) • Filling and Dispensing: • Immerse the tip into the liquid. Slide the filling lever slowly upwards to the stop. The display flashes (pipette is not yet ready for operation.) • Discard the first dispensing step. It is not a measured volume and just pre-wets the system • Wipe the tip with lint-free tissue (e.g. KimWipesTM) and hold it against the inside of the vessel. Aspirate the liquid slowly and evenly. • Press the pipetting lever once and discard the liquid. The display stops flashing and shows the pipetting volume. • Hold the pipette tip inside the vessel and execute the stroke of the pipetting lever. If a refill is necessary, always discard the first step.
AUTOMATIC MICROLITER PIPETTES Helpful Hints: Using a Repetitive Pipette (Repeater®) • When ejecting, empty the tip by sliding the filling lever is at its lowest position. Empty the liquid into a receiving or waste vessel. • Press both Ejection Keys simultaneously. The tips are automatically released from the pipettor. If the tips are equipped with reusable adapters, make sure the adapters are unscrewed and stored in a dry place. The display should no longer be lit at this point. • Clean the pipette with a soft cloth pre-wet with soap solution or disinfect with 60% Isopropanol. Do not allow any liquid to enter the apparatus.
IMPACT OF PIPETTING TECHNIQUES Accuracy & Precision: Accuracy means the closeness with which the dispensed volume approximates the volume set on the pipette. Inaccuracy is the deviation of a measurement from a standard value or true quantity. In a group of values, inaccuracy would be the deviation of the mean, ( ) of the group of values from a standard value. Inaccuracy is measured in terms of absolute error (AE). Precision is the "scatter" or reproducibility of individual measurements of the same volume. Imprecision is concerned with the closeness of two or more measurements to each other, rather than to a standard value. It is measured in terms of standard deviation (s) or a coefficient of variation/relative standard deviation (CV/RSD).
IMPACT OF PIPETTING TECHNIQUES For the Mathematically-Inclined: Inaccuracy: where µ ≡ standard value ≡ mean of enough experimental runs Imprecision: where ≡ mean or average value ≡ any single value N ≡ total number of observed values
IMPACT OF PIPETTING TECHNIQUES Types of Error Affecting Accuracy and Precision: • Random (or Indeterminate) Error: affects precision • - not predictable and can be caused by a variety of factors e.g., the number and/or complexity of the steps in the method, the skill of the analysts, and the quality of the material and apparatus • Gross Error: affects both precision and accuracy • - usually large, easily detectable , and preventable if the method is carefully followed. Examples of gross errors include misreading, careless observation of methods, and character transpositions. • Absolute (or Determinate) Error: affects accuracy • - this type is categorized further into one of the following: personal error, method error, and/or instrumental error.
IMPACT OF PIPETTING TECHNIQUES Thank you for your attention!