Download
1 / 167
1.7k likes | 1.9k Views
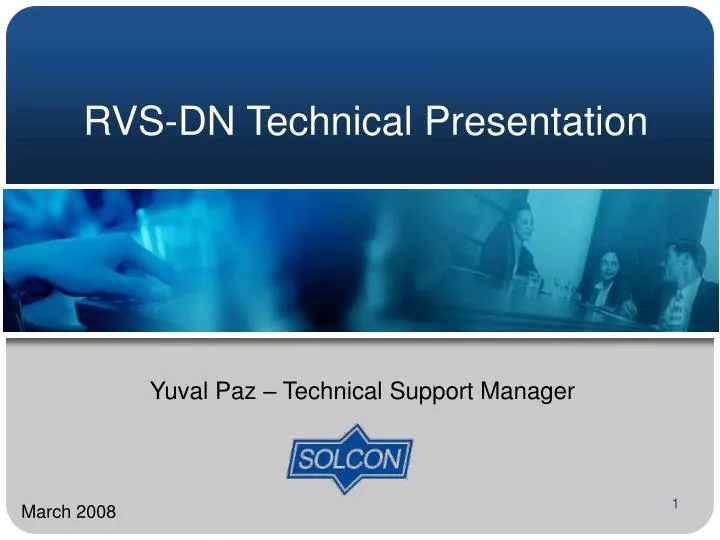
RVS-DN Technical Presentation. Yuval Paz – Technical Support Manager. March 2008. Presentation Content. 1. Presentation. 2. Power Wiring. 3. Control wiring. 4. Programming. 4. Protection. Main Features. Heavy Duty Design : 400% In, 30 sec. at 50°C, 4 starts an hour

E N D
RVS-DN Technical Presentation Yuval Paz – Technical Support Manager March 2008
Presentation Content 1. Presentation 2. Power Wiring 3. Control wiring 4. Programming 4. Protection
Main Features • Heavy Duty Design: 400% In, 30 sec. at 50°C, 4 starts an hour • Comprehensive Range: 8-3000A, 220-1000V • Third Generation Digital Field proven experience • Fully featured: Control, Comprehensive motor Protection & Supervision • User Friendly: Default settings, LCD display, Selectable languages
UL Approved : 8-820A, 1100A and above are designed to meet UL requirements USA cUL Approved : 8-820A 1100A and above are designed to meet cUL requirements Canada CE Approved (EMC & Safety) : 8-1400A 1800A and above are designed to meet CE requirements European Marine & Offshore Lloyd’s Approved (ENV 1 & ENV 2) : 8-1400A 1800A and above are designed to meet Lloyd’s specifications for ENV1 & 2 requirements Marine & Offshore Germaniche Lloyd’s Approved: 8-1400A 1800A and above are designed to meet Germaniche Lloyd’s specifications RVS-DN Approvals
China China Compulsory Certificate Russia GOST certificate of conformity Marine & Offshore Det Norske Veritas Marine & Offshore Registro Italiano Navalo RVS-DN Approvals
Line To by-pass (option) LCD (selectable languages) LEDs (status display) Control terminals (Plug-in) IP 20 Finger protected for safe operation To Motor Selector Guide – Frame A • Model • RVS-DN 8 • RVS-DN 17 • RVS-DN 31 • RVS-DN 44 • RVS-DN 58 • RVS-DN 72
Selector Guide – Frame B (Bus bar cover removed) • Model • RVS-DN 85 • RVS-DN 105 • RVS-DN 145 • RVS-DN 170 Line Power Section Control Module (Identical for sizes B-G) To Motor Preparation for bypass contactor is standard in this model To Bypass contactor (not shown in the picture)
To Bypass contactor Line C/Ts Power Section Control Module To Motor Selector Guide – Frame C • Model • RVS-DN 210 • RVS-DN 310 • RVS-DN 390
To Bypass contactor Line C/Ts Power Section Control Module To Motor Selector Guide – Frame D • Model • RVS-DN 460 • RVS-DN 580 • RVS-DN 820
Line Load (Bus-bar cover removed) C/Ts Power section Control module RVS-DN 950A and up must be operated with an external bypass Selector Guide – Frames C,D UL/Marine • Model • RVS-DN 210 • RVS-DN 310 • RVS-DN 390 • RVS-DN 460 • RVS-DN 580 • RVS-DN 820 • RVS-DN 950 In RVS-DN 950A C/Ts are mounted outside the soft starter
Line Power Section C/Ts Normally mounted Outside the Soft starter Control Module To Motor This model must be operated with an external bypass Selector Guide – Frame E • Model • RVS-DN 1100 • RVS-DN 1400 • RVS-DN 1800
This model must be operated with an external bypass Selector Guide – Frame F • Model • RVS-DN 2150 Line Power Section C/T Control Module To Motor
This model must be operated with an external bypass Selector Guide – Frame G • Model • RVS-DN 2400 • RVS-DN 2700 • RVS-DN 3000 Power Section Line External C/T are available Control Module To Motor
1000V models must be operated with an external bypass Selector Guide – 1000V Models • Model • RVS-DN 105A • RVS-DN 170A • RVS-DN 210A • RVS-DN 310A • RVS-DN 390A • RVS-DN 460A 1000V models
Selector Guide – 1000V Models • Model • RVS-DN 105A • RVS-DN 170A • RVS-DN 210A • RVS-DN 310A • RVS-DN 390A • RVS-DN 460A 1000V models
Selector Guide – How to Select? • System voltage • Motor current and connection • Starting conditions • Options and control voltage
Selector Guide – How to Select? • System voltage • 400 230 - 400 VAC, 50/60Hz, +10% -15% • 480 480 VAC, 50/60Hz, +10% -15% • 600 600 VAC, 50/60Hz, +10% -15% • 690 690 VAC, 50/60Hz, +10% -15% • 1000 1000 VAC, 50/60Hz, +10% -15%Models: 105A, 170A, 210A, 310A, 390A, 460A.
Selector Guide – How to Select? • Motor current and connection • Starter current ≥ motor FLA! ! !
Selector Guide – How to Select? • Motor current and connection • In line/Inside delta • When soft starter is connected “inside delta” lower current is running through the soft starter. Soft starter MUST Be connected exactly as shown in the manual
Selector Guide – How to Select? • Motor current and connection • In line/Inside delta • Advantages: • Smaller dimensions • Less expensive Soft Starter • Disadvantages: • Six wire to the motor – more complicated wiring. • No pulse start • No curve selection (Curve 0! Only) • No energy save • No slow speed • No phase sequence “off” mode. • Although current inside delta is reduced by 1.73 (√3), Soft starter current is reduced by 1.5.For example: for a 870A motor, you can choose a 580A soft starter when connected “inside delta”
Selector Guide – How to Select? • Starting conditions • The RVS-DN is able to start at 4xIn, 30 seconds at 50°C
Selector Guide – How to Select? • Options: • Communication - RS-485 (Modbus) • Communication – Profibus • Insulation tester • Analog card – Thermistor in and Analog out • Harsh environment treatment. • Preparation for Bypass contactor • Line and load bus bars at bottom • Remote panel mounting replacing the original panel. • Russian characters LCD display • Marine approval • UL & cUL approval • Tachometer card for special drive systems
Bypass Contactor • Models 8-820A can operate continuously without a bypass contactor • All models from RVS-DN 950A and up and RVS-DN 1000V must be implemented with a bypass contactor • Bypass preparation is standard in models RVS-DN 85-170A.
Bypass Contactor • Current flow during start
Bypass Contactor • Current flow with bypass contactor Soft starter must be ordered with preparation for bypass contactor
Line C / T Bypass Contactor To motor M Bypass Contactor • Bypass contactor connection
RVS-DN End of Acceleration Relay M 1 2 3 4...9 13 14 15 16 17 18 19 20 21 N L Bypass Contactor • How to control the bypass contactor?
Control Module (B-G models) Optional boards: Control Plug • Insulation Test board • Analogue board • Tacho encoder board • (only one option can be installed) Control Transformer Dip Switches Power Supply Board Microprocessor & EPROM Fan control jumper Optional comm. boards: • RS 485 (MODBUS) • Profibus • Others upon request Control Supply I / O terminals
Control Module (B-G models) Auxiliary Relays : C/O, 8A/250VAC * Immediate - with On and Off delays * Fault - prog. Fault / Fail- safe * End of Acceleration - with On delay 8 dip switches
OFF 1 2 3 4 5 6 7 8 Dip Switches in Control Module No. Function OFF (default) ON 1 Display Minimum Maximum 2 Tacho feedback Disabled Enabled 3 Mains / Generator Mains Generator 4 Always OFF 5+6 Language selector English, French, German, Spanish, Russian* 7 Extended range Disabled Enabled 8 Software lock Open Locked * Russian display must be specified when ordering.
Dip Switches in Control Module • Dip switch #7 functions
Presentation Content 1. Presentation 2. Power Wiring 3. Control wiring 4. Programming 4. Protection
L1 L2 L3 Fuses or Circuit breaker Line Contactor (when required) Soft Starter M Mains Wiring • In line wiring
M Mains Wiring • In line wiring with bypass contactor L3 L2 L1 By-pass Contactor “Preparation for By-pass” eliminates the need for additional O / L
L1 L3 L2 Fuses or circuit breaker Soft starter M Capacitor (when used) must be at Line side. A capacitor contactor is not mandatory. Motor Mains Wiring • In line wiring with pf capacitors
Presentation Content 1. Presentation 2. Power Wiring 3. Control wiring 4. Programming 4. Protection
Control Wiring • Control wiring = Wiring terminals in the bottom of the control module (B-G models)
Aux Contact “Fault” Aux Contact “Immediate” Aux Contact “End of Acc.” E.Save / Slow Sp / Reset D. Adjust / Rev. / Reset Tacho feedback External Fault Soft Stop Common Start Neutral Stop 1 2 3 4 5 6 7 8 9 10 11 12 13 14 15 16 17 18 19 20 21 ! Control Wiring
Control Wiring • Terminal 21 3P+N+GR - Connect terminal 21 to neutral 3P+N - Connect terminal 21 to neutral 3P+GR - Connect terminal 21 to ground 3P - Leave terminal 21 unconnected 3P - Leave terminal 21 unconnected 3P+GR - Leave terminal 21 unconnected
Neutral 1 2 3 4 5 6 7 8 9 10 11 12 13 14 15 16 17 18 19 20 21 N N Control Wiring - Terminal 21 (1) For Mains system with Ground and / or Neutral - connect Terminal 21 to N or Gr. (2) For Mains system without Ground and Neutral - leave Terminal 21 open N or Gr. (1)
D. Adjust / Reverse / Reset E.Save / Slow / Reset Soft Stop Common Start Stop Neutral 1 2 3 4 5 6 7 8 9 10 11 12 13 14 15 16 17 18 19 20 21 N L Same voltage for Control Supply (1-3) and Control Commands (4-9) Control Wiring
Control Wiring D. Adjust / Reverse / Reset E.Save / Slow / Reset Soft Stop Common Start Stop Neutral 1 2 3 4 5 6 7 8 9 10 11 12 13 14 15 16 17 18 19 20 21 Different voltages for Control Commands (4-9) can be AC or DC (must be specified) N L Control Command voltage
D. Adjust / Rev. / Reset E.Save / Slow / Reset Soft Stop Common Stop Start 1 2 3 4 5 6 7 8 9 Motor will soft start when C closes and stop immediately when C opens N L Control Wiring - Start / Stop C
Control Wiring - Start / Stop D. Adjust / Rev. / Reset E.Save / Slow / Reset Soft Stop Common Stop Start 1 2 3 4 5 6 7 8 9 C Motor will soft start when C closes and soft stop when C opens N L
E.Save / Slow / Reset D. Adjust / Rev. / Reset Soft Stop Common Stop Start 1 2 3 4 5 6 7 8 9 C2 C1 C N L Control Wiring - Start / Stop Push-button operation - Motor will soft start when C closes, soft stop when C1 opens and stop immediately when C2 opens
D. Adjust / Rev. / Reset E.Save / Slow / Reset Soft Stop Common Stop Start 1 2 3 4 5 6 7 8 9 C N L Control Wiring - Start / Stop
Control Wiring - Energy Save D. Adjust / Rev. / Reset E.Save / Slow / Reset Soft Stop Common Stop Start 1 2 3 4 5 6 7 8 9 C Energy Save will operate when Terminal 7 is designated as Energy Save and C closes. For automatic operation use a jumper. N L
D. Adjust / Rev. / Reset E.Save / Slow / Reset Soft Stop Common Stop Start 1 2 3 4 5 6 7 8 9 C Slow Speed will operate when Terminal 7 is designated as Slow Speed and C closes before motor starting. N L Control Wiring - Slow Speed
Control Wiring - Remote Reset D. Adjust / Rev. / Reset E.Save / Slow / Reset Soft Stop Common Stop Start 1 2 3 4 5 6 7 8 9 C1 C2 * Remote (hardwire) Resetting will operate when Terminal 7 or 8 are designated as Reset and C1 or C2 close N L