Download
1 / 35
350 likes | 481 Views
NS1000. KX-NS1000. Unified Messaging. Contents. Chapter 1 Introduction to Unified Messaging 1.1. Introduction 1.2. UM Overview Chapter 2 UM Mailbox - Basic Setup 2.1. Basic Setup 2.2. SMTP Server Setting 2.3. UM Port Settings 2.4. UM/Trunk Service Group Settings

E N D
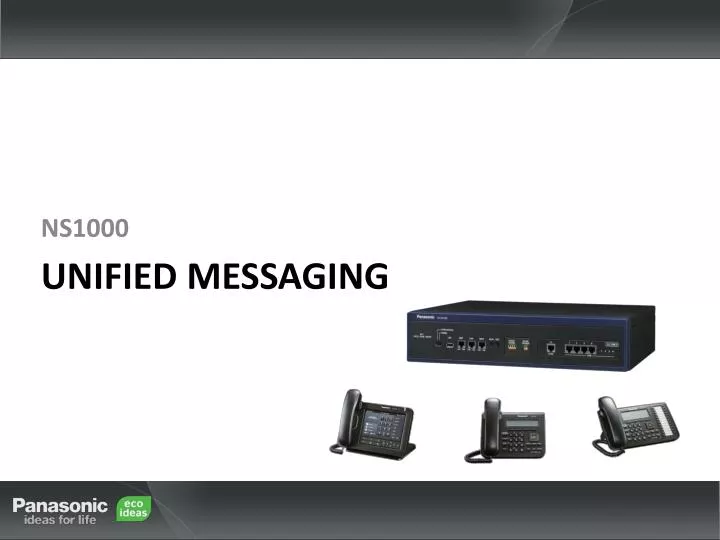
NS1000 KX-NS1000 Unified Messaging
Contents • Chapter 1 Introduction to Unified Messaging • 1.1. Introduction • 1.2. UM Overview • Chapter 2 UM Mailbox - Basic Setup • 2.1. Basic Setup • 2.2. SMTP Server Setting • 2.3. UM Port Settings • 2.4. UM/Trunk Service Group Settings • Chapter 3 Introduction to Unified Messaging • 3.1. Two-Way Recording (User) • Appendix
Chapter 1 Introduction to Unified Messaging
1.1 Introduction Fax to email as a .TIFF attachment for incoming faxes*. • The inbuilt Voice Mail (VM) features form an integral part of the NS1000 Unified Messaging system and handles incoming calls, messages, and Mailbox Management. • - Default Configuration : 1024 mailboxes, 2ch voice mail port, 2h recording time. Print to Fax directly from your PC applications* • Built-in • Voice Mail • Auto Attendant and IVR function/features • Activation Keys • 2 channel / 4 channel • IMAP4 / email • 2 way recording • 2 way recording control Unified Voice, FAX, Email Email Server (IMAP/POP3) Playback messages via Toolbar Outlook Plug-in *Using Optional FAX Interface
1.2 UM Overview • Ext/Mailbox Owner features. • An extension user can record a personal greeting message to greet a caller and ask him to leave a voice message. NS1000 User can record their own personal greeting message
1.2 UM Overview (2) • Subscriber features • The caller can leave a voice message for the desired extension user. • The user can receive the message via email, or can access the message via their extension. NS1000 1. Incoming Call PSTN 2. Forward to UM 3. A greeting message is sent. • Can leave a message or Send FAX message 5. Lights the Message Waiting Lamp 6. Sends Email Notification (If Set)
1.2 UM Overview (3) • Caller features (Services) • Callers can access UM ‘Services’ such as; Automated Attendant, Interview Mailbox, Custom Services and Mailbox Services • Example – Automated Attendant (AA) NS1000 1. Incoming Call PSTN 2. A-A Service 3. A greeting message is sent. • Call EXT by dialing EXT No. 5. EXT Rings
1.2 UM Overview (4) • Easy operation via Telephone NS1000 UM Access the mailbox from atelephone. - An user can listen the voice message. - Also, can transfer the FAX message to the FAX machine and print out the FAX. The Message Waiting Lamp on the telephone notifies that a new message (Voice / FAX) is left in the mailbox FAX
1.2 UM Overview (5) • Integration with mailers (Using IMAP4) NS1000 UM Access to the mailbox from mailer on PC. - An user can check left voice & FAX message visually. FAX
Chapter 2 UM Mailbox - Basic Setup
2.01 Setting the UM Class Of Service for Email To enable a Mailbox to send an email, the E-Mail Option must be set to ‘YES’ in the UM Class of Service. UM Configuration -> 2. Class Of Service -> General, set Email OPTION to ‘YES’ Click ‘OK’
2.02 Setting the UM Class Of Service for FAX To enable a Mailbox to receive a FAX, the FAX Option must be set to ‘YES’ in the UM Class of Service. UM Configuration -> 2. Class Of Service -> General, set FAX OPTION to ‘YES’ Click ‘OK’
2.03 Setting the UM Class Of Service for PC DESKTOP To enable a Mailbox to use Desktop Services (Fax Driver, CA etc), the DESKTOP Messaging Option must be set to ‘YES’ in the UM Class of Service. UM Configuration -> 2. Class Of Service -> General, set DESKTOP Messaging OPTION to ‘YES’ For Demo Purposes, Tutorial can be set to ‘None’ Click ‘OK’
2.1Basic Setup (1) • Basic set up parameters • Setup –Users -1.User Profiles –Unified Message • Set UM Group No. ( pull down and select ) • Create mailbox *It has to set non-existing Mail box No. NB: For further detail, please refer to the ‘Users’ Presentation
2.1Basic Setup (2) • Basic set up parameters (Record Prompts / Greetings) • Setup –Users -1.User Profiles –Unified Message –Prompt Registration • Prompt can be recorded. NB: For further detail, please refer to the ‘Users’ Presentation
2.1Basic Setup (3) • Basic set up parameters (Basic parameters) • Setup –Users -1.User Profiles –Unified Message –Mailbox Setting Detail mail box set up can be done. NB: For further detail, please refer to the ‘Users’ Presentation
2.1Basic Setup (4) • Basic set up parameters (Email Notification) • Setup –Users -1.User Profiles –Unified Message –Mailbox Setting – Notification Parameters 1. Click to edit email preferences. NB: For further detail, please refer to the ‘Users’ Presentation
2.1Basic Setting (5) • Basic set up parameters (Email Notification) • Setup –Users -1.User Profiles –Unified Message –Mailbox Setting – Notification Parameters 3. Configure Callback and attachment preferences. 2. Configure email preferences. 4. Configure email Sending Schedule (If required) Up to 3 email addresses can be set. Use a ‘,’ (comma) to separate the addresses
2.1Basic Setting (6) • Basic set up parameters (Enable / Disable Email Notification) • Setup –Users -1.User Profiles –E-mail Notification Enable or Disable Email Notification. NB: Activation Key is required to enable this feature (Refer to ‘Activation Key’ Presentation)
2.2SMTP Server Settings • SMTP settings (Email Client) • So that Email notification can take place, the SMTP Server details must be entered. ‘Settings’ -> Network Service -> 2. Server Feature -> 6. SMTP Enter the SMTP Client/Server information here. Enter the details required by your Email Server. The NS1000 only sends email to the Server as a ‘Client’.
2.3UM Port settings (1) • UM Port settings (Port Number) • The number of available UM port must be set. The more UM ports available, the more users can simultaneously access the UM System. ‘Settings’ -> PBX Configuration -> 1. Slot -> UM Port Property UM Ports can be defined here. NB: A/Ks required for additional UM Ports (2 default) NB: For Master, each UM port is equivalent to 10 Extension ports (24 UM Ports = 240 Ext Ports) – (Inbuilt ports not included).
2.3UM Port settings (2) • UM Port settings (Floating UM Number) • The UM System is allocated a Floating UM Group Number (Default: 500). BY accessing this number, a User can access or set C-FWD to their Mailbox etc ‘Settings’ -> PBX Configuration -> 3. Group -> 7. UM Group -> 2. Unit Settings UM Group Number defined here
2.4Service Group settings (1) • UM settings (Service Group) • By Setting the Appropriate UM Service Group / VM Trunk Group No. relationship. Specific DDI’s can be routed to specific UM Services. ‘Settings’ -> PBX Configuration -> 10. CO -> 3. DDI Table (or 2. DIL Table) UM Service Groups can be assigned to Trunk Groups. NB: This setting is also available for DIL Ports
2.4Service Group settings (2) • UM settings (Service Group) • By Setting the Appropriate UM Service , a caller can be guided to a Custom Service, Automated Attendant, Interview Mailbox, Fax Service or be transferred directly to a Mailbox. ‘Settings’ -> UM Configuration -> 1. Service Group UM Service type for each Service Group can be set here.
Chapter 3 Two-Way Recording (User)
3.1Two-Way Recording (2-Way Record) • Two-Way Recording (Key Setting) – (Not supported by UT Series) • A user can record conversations directly to their individual Mailboxes by pressing a ‘Two-Way Record’ Key on their IP-PT. (A Two-Way Transfer Key will record the call in a different Mailbox.) • A Warning tone will be sent when the Two-Way Recording button is pressed. ‘Settings’ -> PBX Configuration -> 4. Extension -> 1. Wired Extension -> 4. Flexible Button. Recording time is specified by the users COS setting. Two-Way Record Button and UM Group Number is set here. NB: Two-Way Recording A/K is required for this feature (KX-NSU301, 310, 399 etc.)
Chapter 4 Appendix
Appendix • The default configuration provides 1024 mailboxes, 2ch VM ports with 2h storage without additional Activation Key or hardware. • Specifications (1/2)
Appendix • Specifications (2/2)
Appendix • UM related Activation Keys • There are 6 types of Unified Message related Activation Key as follow. • 1) UM System Function 1(Recording Time Expansion) Note: Table shows Max. recording time for each CF When install these CF, user need not to install Activation Key 2) UM System Function 2 (2Way Record Control) 3) UM System Function 3 (Message Back up)
Appendix • Unified Messages related AK (2) • 4) UM Ports 5) UM Email Client/Notification 6) 2way Recording/Transfer users
Appendix • System Block Diagram KX-NS1000 PBX Data Bus UM Channels 2 channels are available by default. Optional activation key will expand the number of UM port (UM channel). (KX-NSU102, 104) * Max. 24ch SM-S : 200hours SM-M : 450hours SM-L : 1,000hours Recording Area on the Optional SM card (Daughter card) Main board Block VM port 1 slot for optional SM card Recording Area on the main board 2 hours are available by default. Optional activation key will expand to 15 hours. (KX-NSU001)
Appendix • VM Group Number • UM ports make up a group, called a UM group. • This group has a floating extension number which is used to access the VM. Floating Extension Number - Only one number is used for VM access, even though 24 built-in VM ports are used. - Default : 500 (Master system) 501 - (Slave system) Floating Extension Number : 500 Port 2 Ext.5102 Port 24 Ext.5124 Port 1 Ext.5101 UM Block Voice Mail Group or UM group ・Using this Floating Extension Number as VM destination.
Appendix • Extension Number of UM port (Initial set up) • An extension number is automatically assigned to each UM channel. KX-NS1000 PBX Data Bus An extension number is assigned to each channel. Default : 5101 - 5124 (Master system) 5125 - (Slave system) UM Channels Main board UM (Voice mail, AA, Fax, etc.) Block UM port ・Extension numbers are assigned automatically regardless of additional Activation Key or SM card.
Notes • Notes: • Data conversion from TVA/TVM is not supported. • VM menu (LCD) is not supported. • No VMA with CA. (Outlook Plug-in)